


Data Check is a fabulous, new (ish!) feature in Microsoft Dynamics 365 Business Central that you either might have missed or, even if you are using it, not all your colleagues will be.
Data Check is basically an early warning system showing problems that will crop up when someone attempts to post the document or journal.
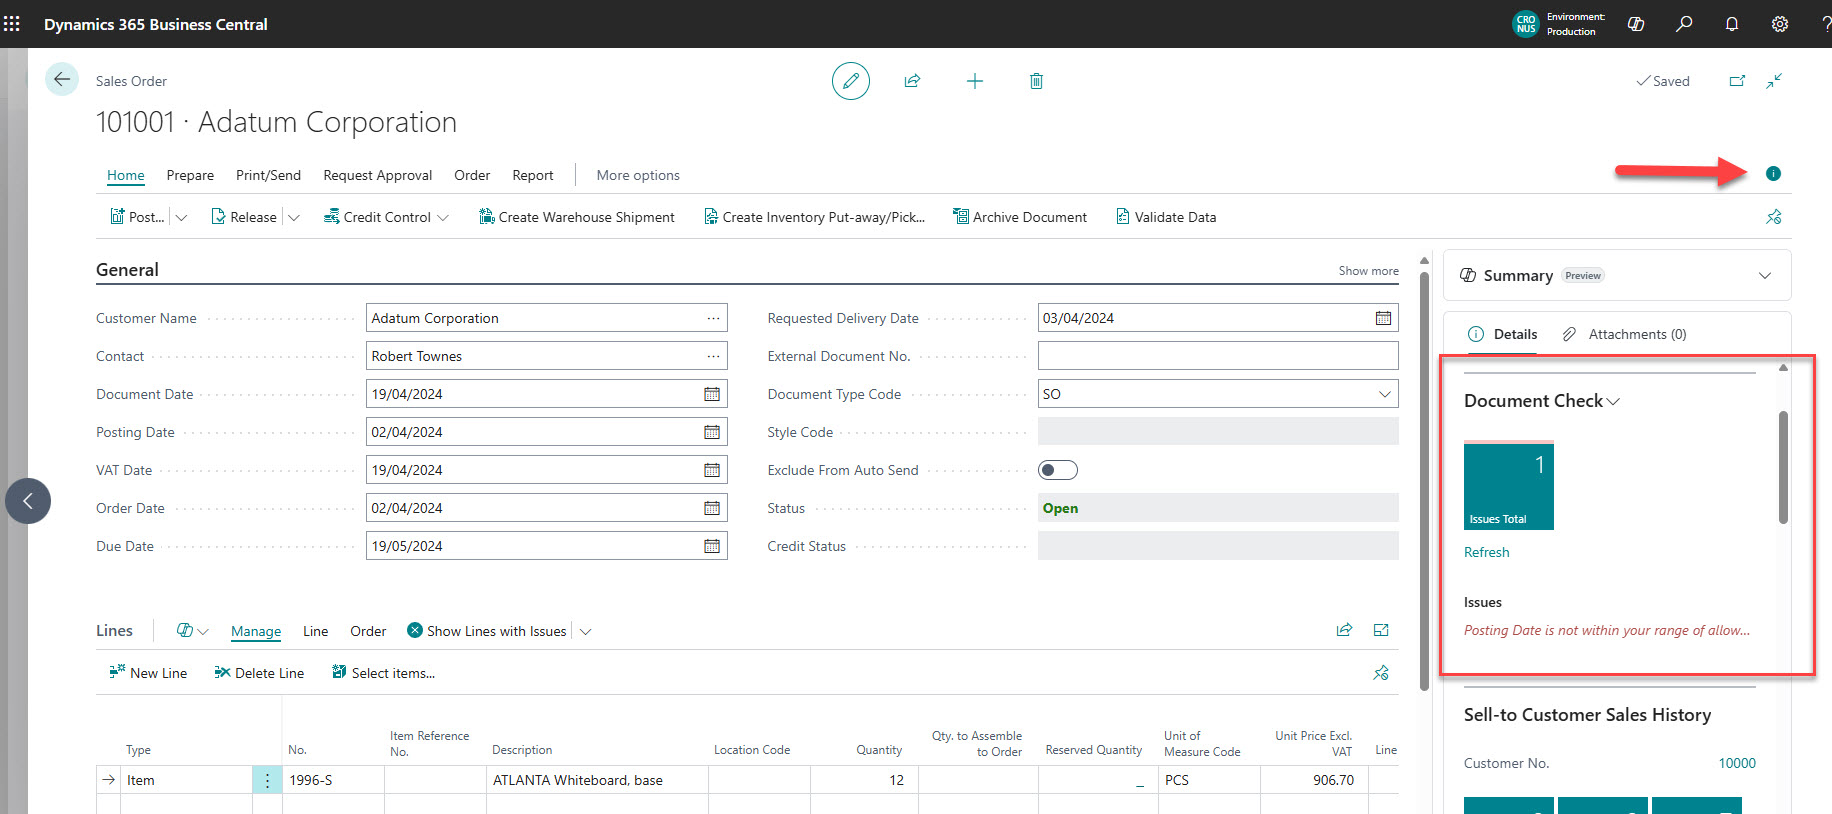
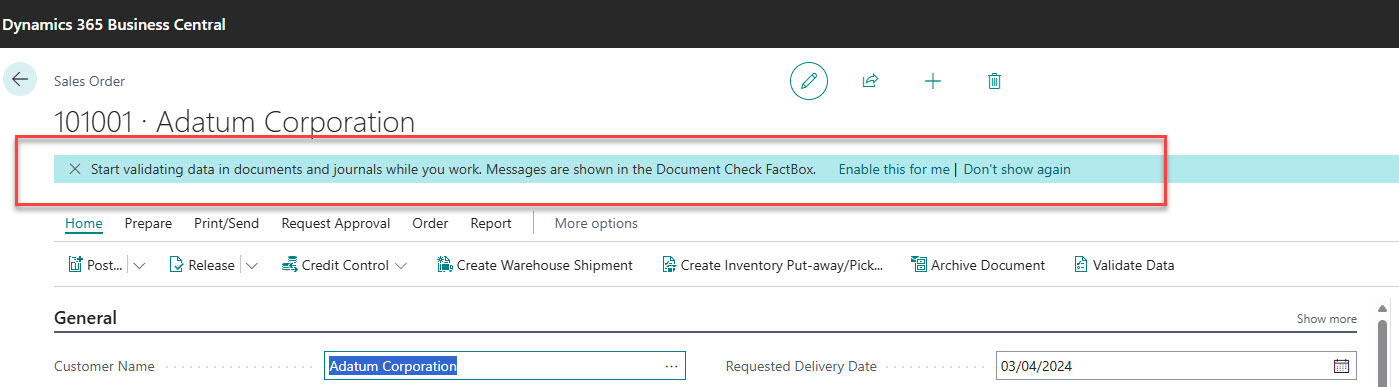
It has always been possible for the user that is going to post to use the Preview Posting function to see if any errors will occur – but this new feature provides higher visibility as it’s in a dedicated Document Check FactBox on the right and specifically draws the users attention to any issues.
This is really helpful as, often, the user creating the document won’t be the one that finally posts it, so we’re able to spot problems like missing posting setup, incorrect dimensions, dates issues, etc. before it gets passed down the line.
On Documents users get a Document Check FactBox, as long as they have this visible. This little i in a circle controls this and some users may have clicked it off and forgotten about it.
On Journals there is an equivalent Journal Check FactBox, again if the FactBox pane is visible.
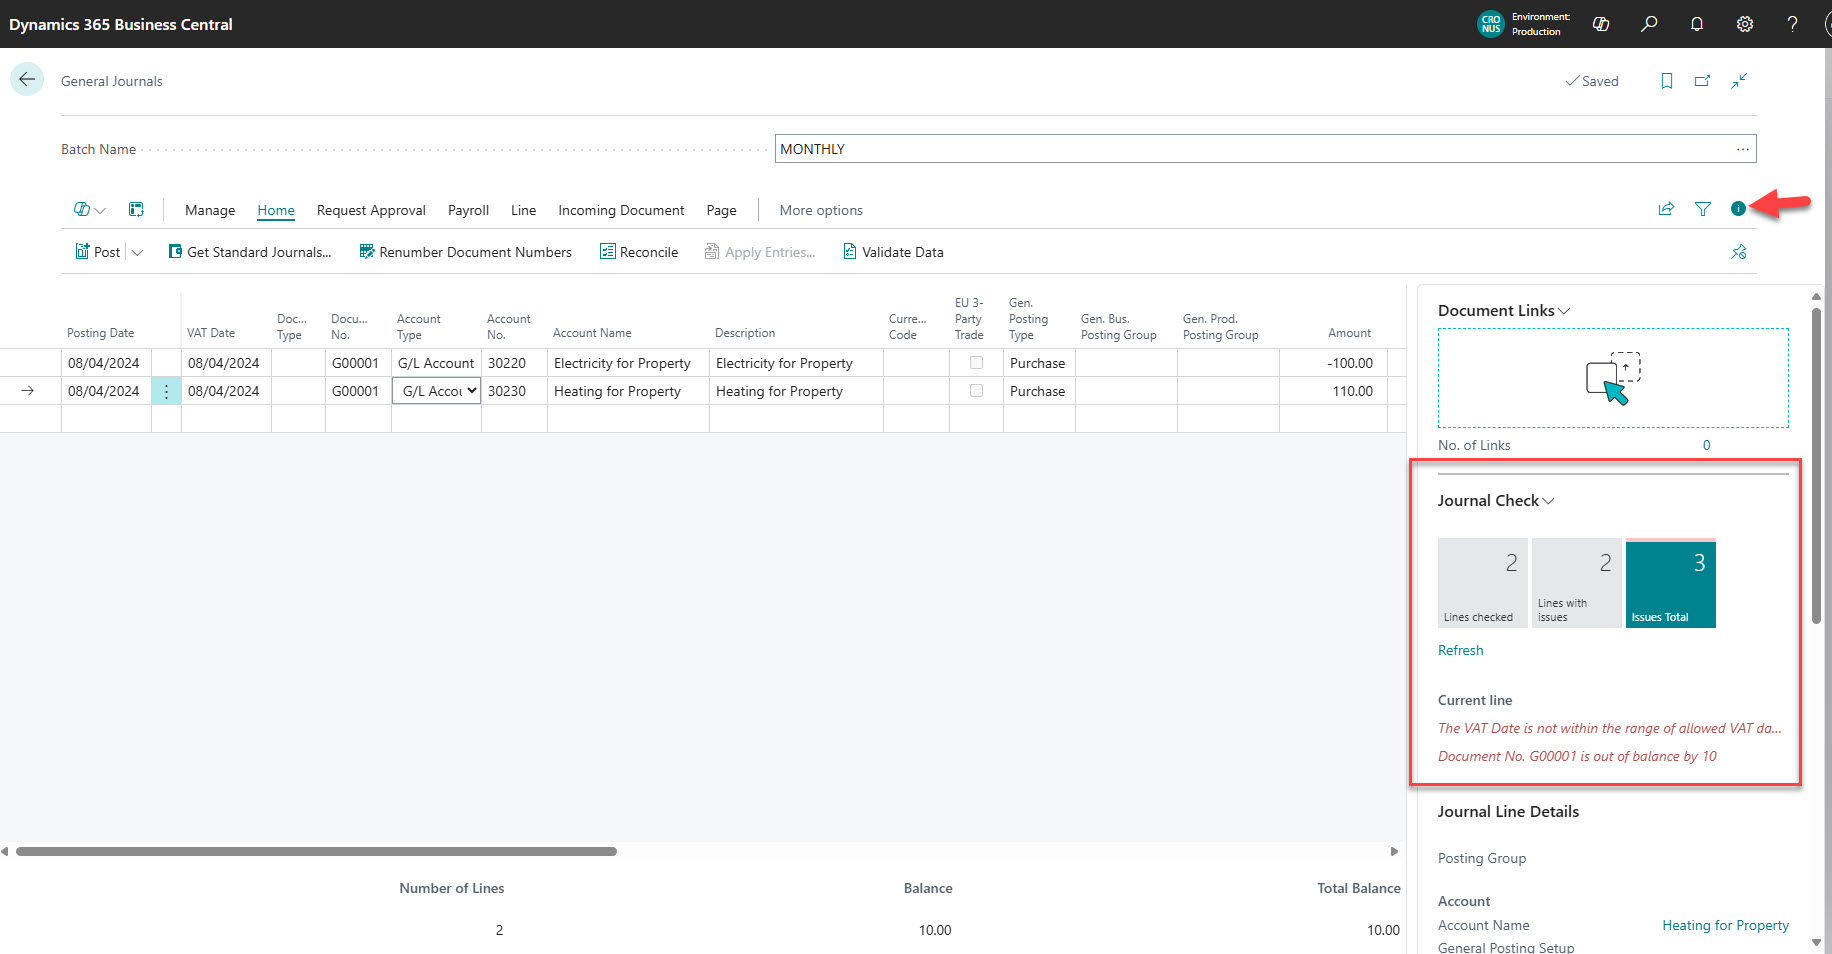
In both cases, the check will refresh itself manually when the user moves between lines, but it can also be asked to refresh manually by clicking Refresh.
So, how do you activate this? Simple: it’s done from the General Ledger Setup page. Now this is essentially the financial nerve centre of Business Central, so please don’t go changing any random settings as it will impact how your company works! However, to turn this on is safe, so we can simply click the Enable Data Check slider to the right.
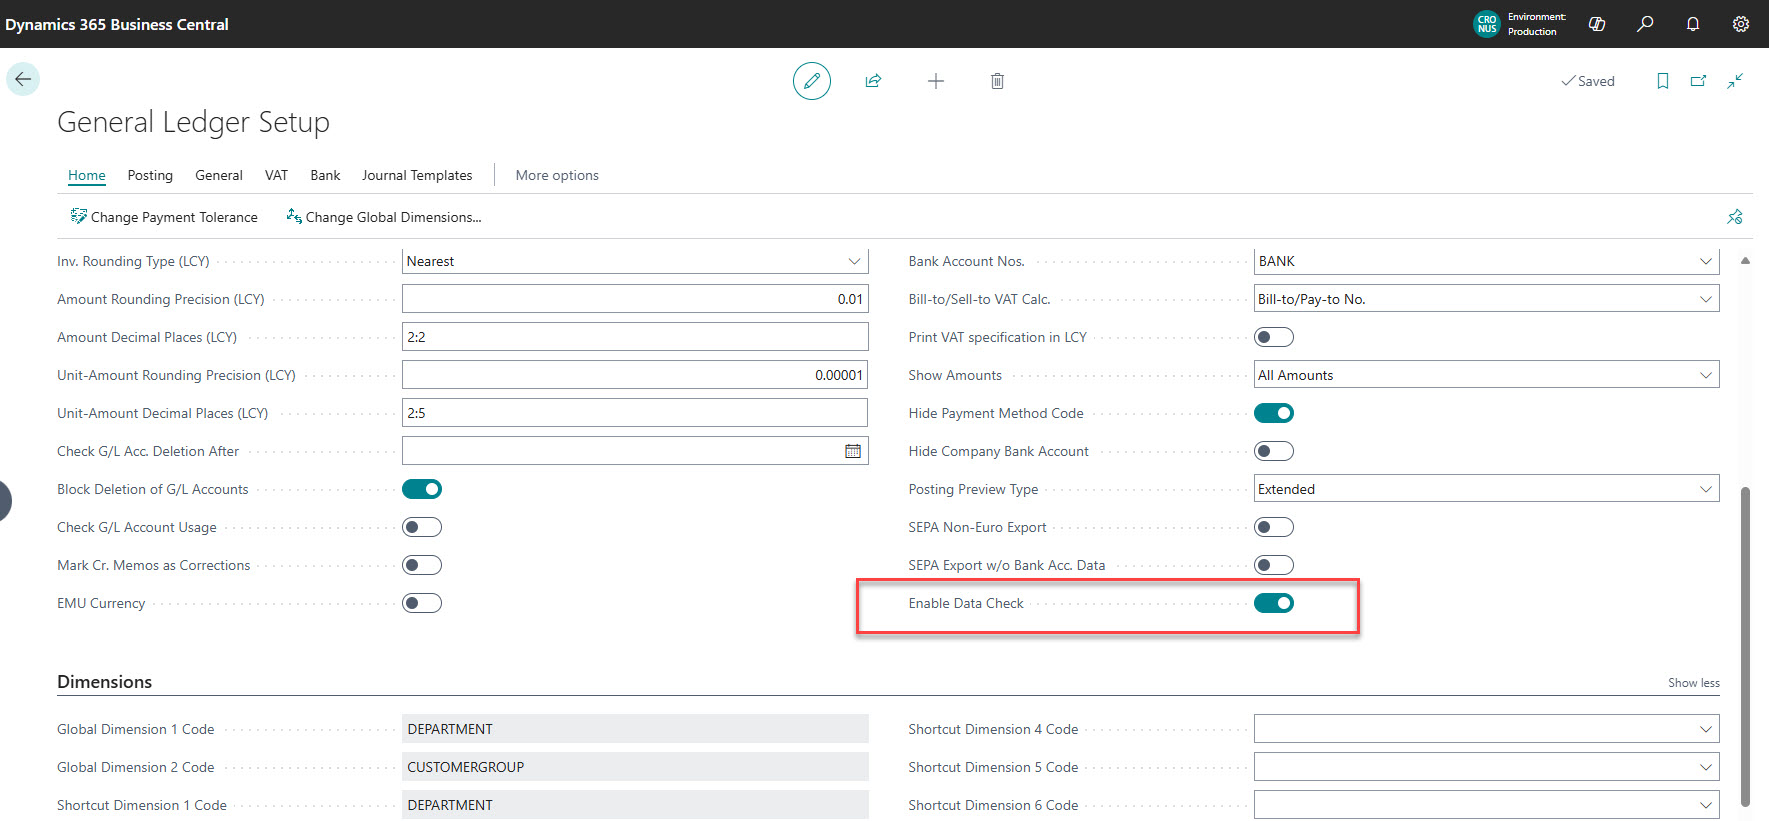
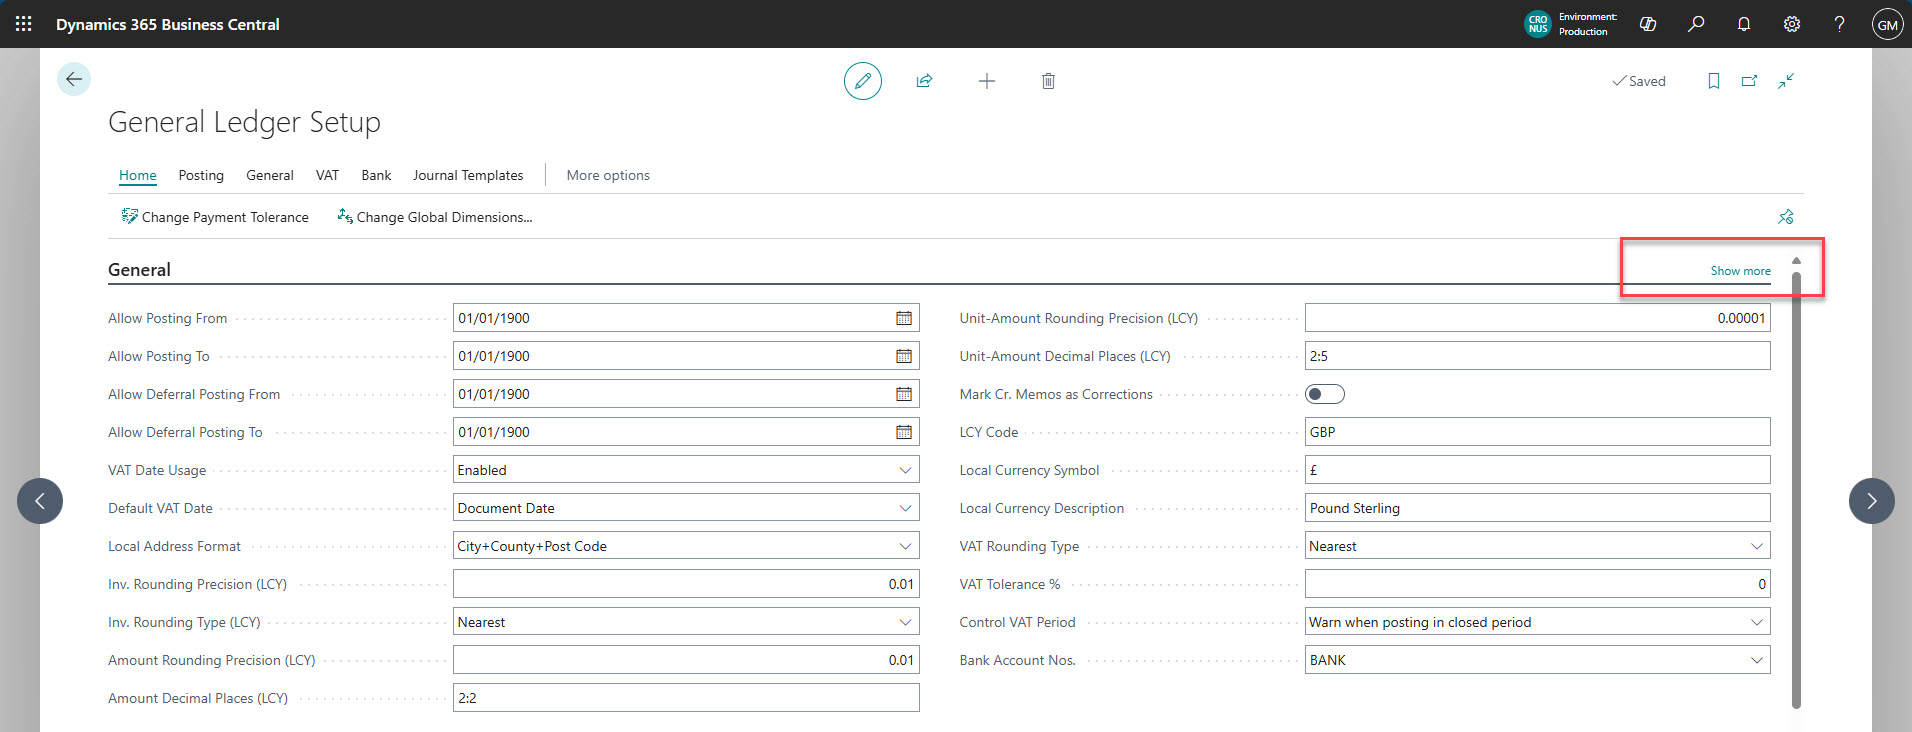
If you don’t see the option then make sure you click the Show More on the top right-hand side of the General tab, then you will see all the fields.
That’s all pretty straight forward, right? So what is the twist I mentioned?
Well, the message below is the second part of the setup. Microsoft have made this a global setting we have to turn on – one that’s classed as user personalisation. Each user has to answer the below question by choosing “Enable this for me” or they will not benefit from the feature.
But what if they don’t activate it? How can I tell? Good questions. Basically, you can’t! No, I’m just teasing – you can if you do some clever filtering. Here’s how…
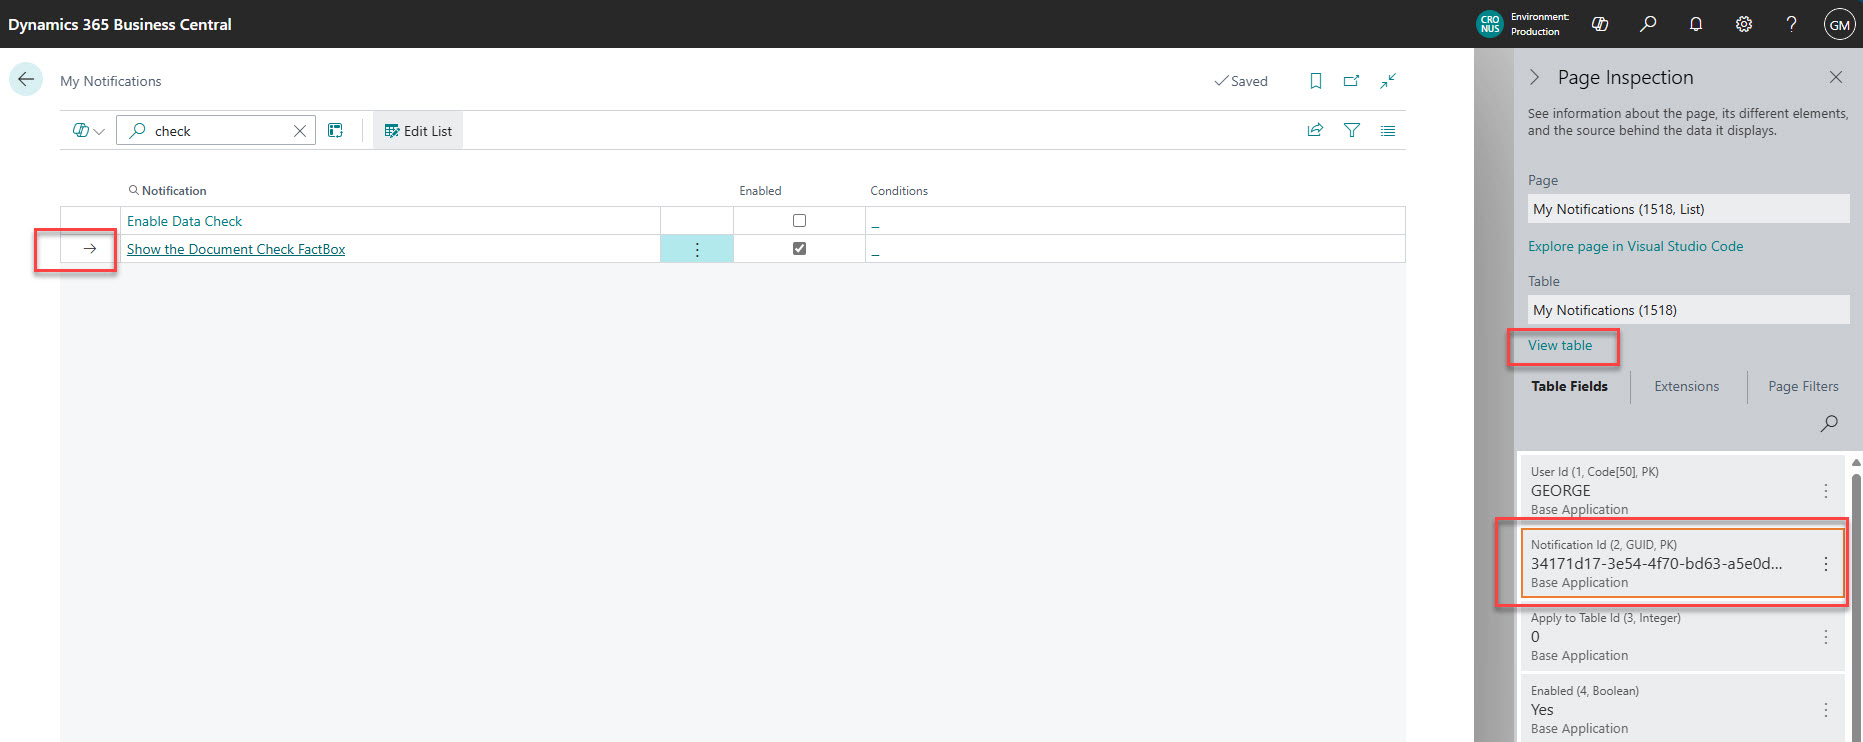
Step one, go to the My Notifications page from Settings by choosing Change when I receive Notifications or go to Notifications via Search (it’s the same page). This shows the notifications status for you only. If we use the Search box top left and look for the text “check” it will find the two relevant notifications. The top one is the message we just saw. This turns on the second part, which is the bit we need.
So, we need to see which users do not have the second line here ticked. To do that we need to know what that field is. Brace yourself, this is getting geeky!
Step two, using Page Inspection (Ctrl+Alt+F1 or via Help – Inspect Pages and Data) find out what the Notification ID is for this specific notification.
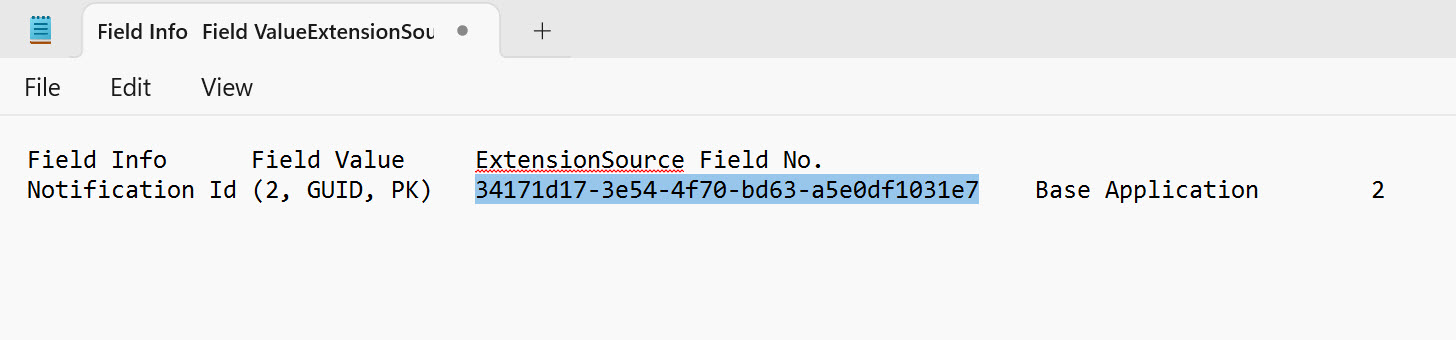
It's 34171d17-3e54-4f70-bd63-a5e0df1031e7 – nice and memorable, huh? As we’ve printed it here you now know but if you want to check, then copy the cell into something like Notepad to make it easier to read.
Now that you have that crucial piece of information, back in the My Notifications page, click View Table. You will then see far more than you need, so we need a filter. In the Filter List by section, add a filter to Notification Id and use the lovely value that we found as the filter value. Probably best to copy and paste it unless you have an amazing visual memory!
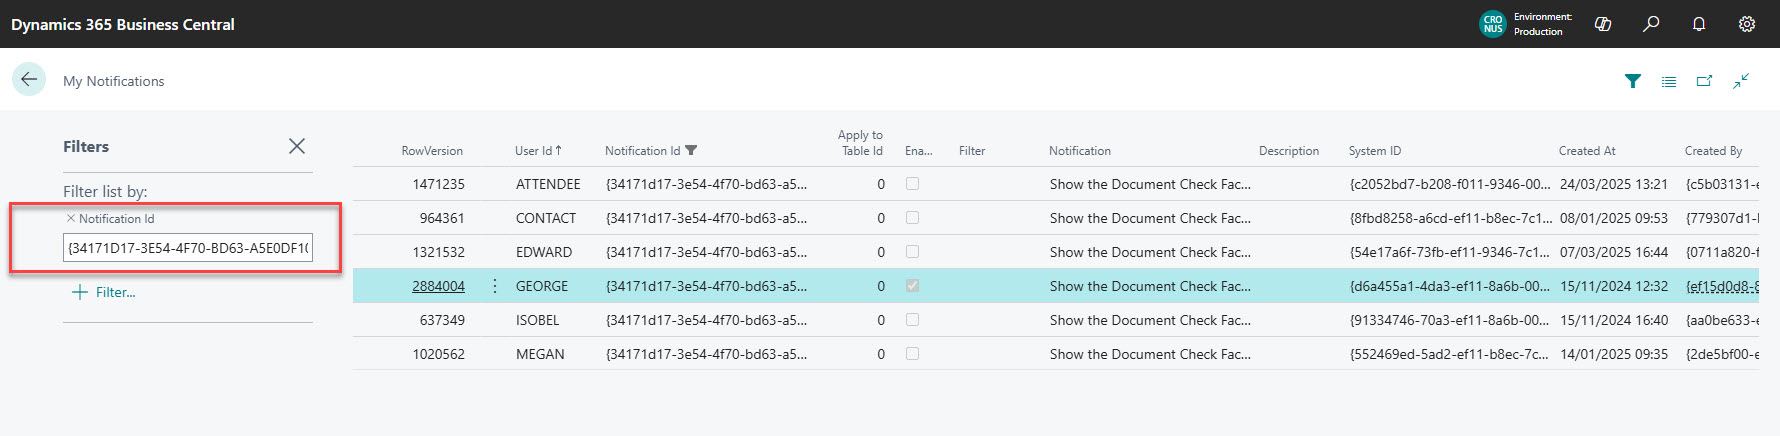
The end result is a list of all the users and the state of this particular notification, so we now know who to speak to and help them turn this on by the lack of ticks in the Enabled column.
So, it’s a win for your business, with less problems at the point of posting. Plus, you’ve hopefully gained greater insight into the ways you can work with Business Central from our sneaky little trick.
If you want to talk more to people who like helping customers get the best out of Business Central and know our way around a feature or two, then please get in touch today.