


Permission errors in Microsoft Dynamics 365 Business Central can be a pain. Sometimes when you fix one error, you’re greeted with another, meaning you then have to fix all associated permissions.
If you’re working with mostly standard system permissions, reviewing all the sets to find the most appropriate to fix permission errors can be time consuming. In this blog, we’ll outline a small process you can follow to quickly determine which set(s) could be used to solve your permission errors, if this suits your process.
Firstly, you’ll need to make note of the permissions error you get, notably the TableData ID and if it’s a Read, Insert, Modify or Delete permission. Here’s where to look:
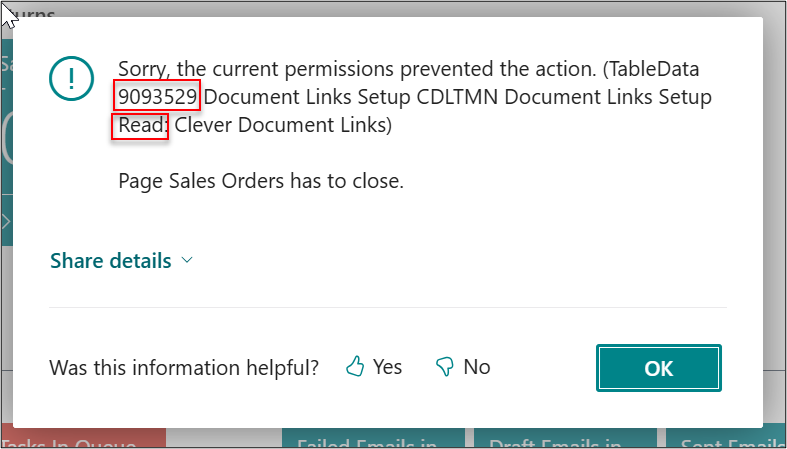
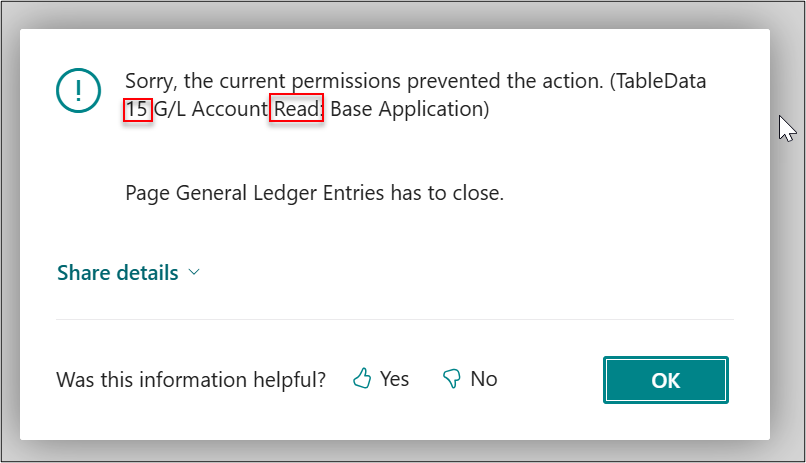
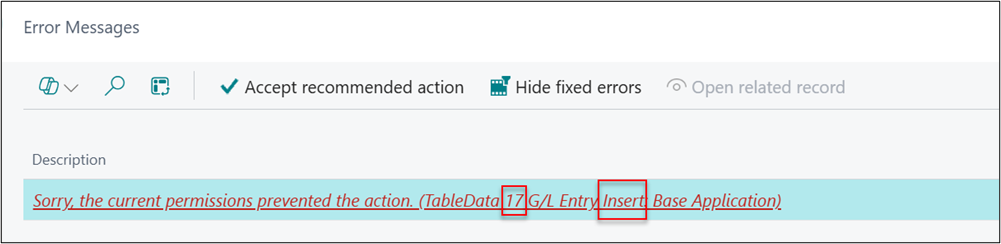
These three errors were caused in different areas, but all we need is the number and level of access. It’s also worth noting if the error says anything other than TableData, as we’ll have to match this Object Type on the permission set.
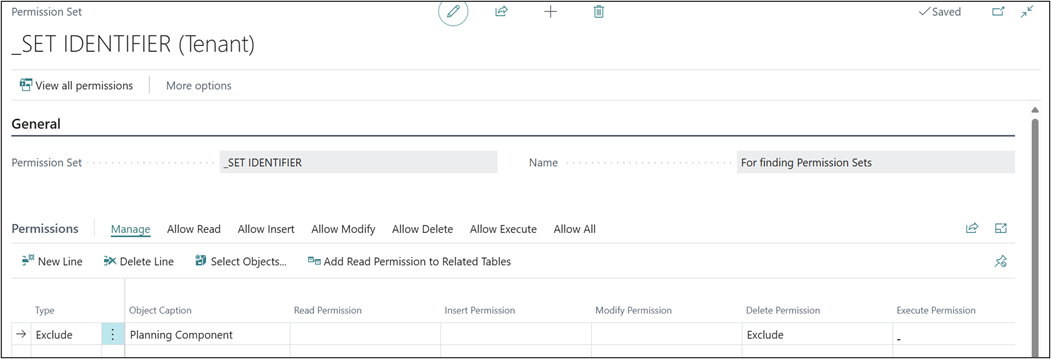
First, create a new Permission Set. This should have a name like ‘_SET IDENTIFIER’ or ‘_ERROR HANDLING’, etc., that you will be using to identify relevant sets for handling these errors.

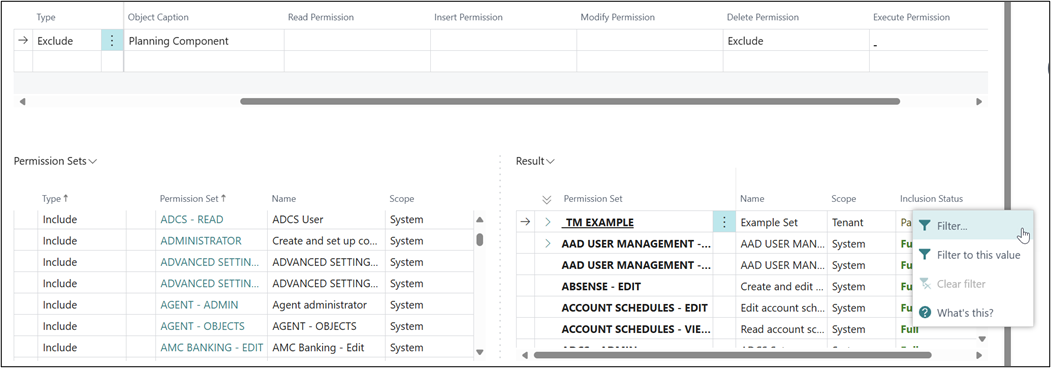
Then we need to work in the bottom left-hand section of the permission set. We’re going to add (almost) all the permission sets into the system in this area. This will soon help us see which of these sets include the permission we’re looking for.
Click Permission Sets > Select Permission Sets
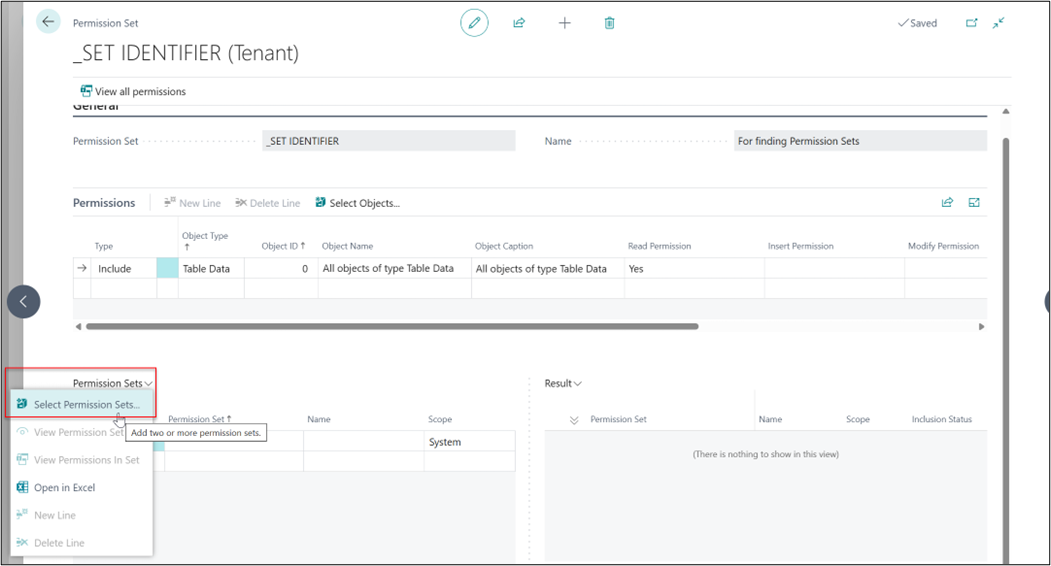
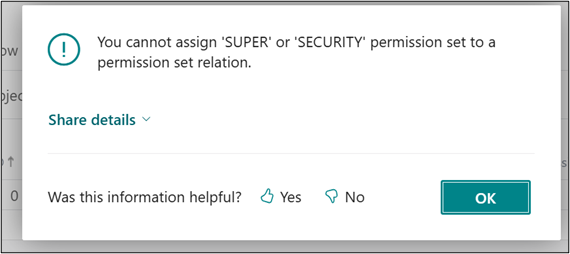
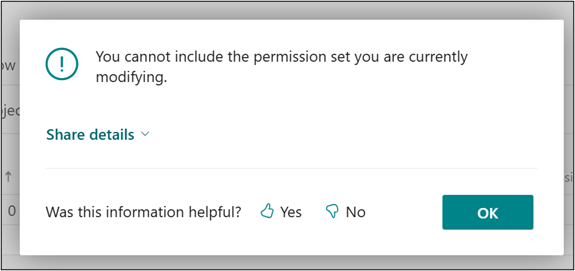
It’s very important to scroll all the way up and scroll all the way down on this selection page. This will ensure that all the sets are loaded. Then, use Ctrl+A to select everything in this list and then make sure to untick SUPER, SECURITY and the set you are currently editing. If any of these are included when you click OK, you’ll get an error, and you’ll have to select again.
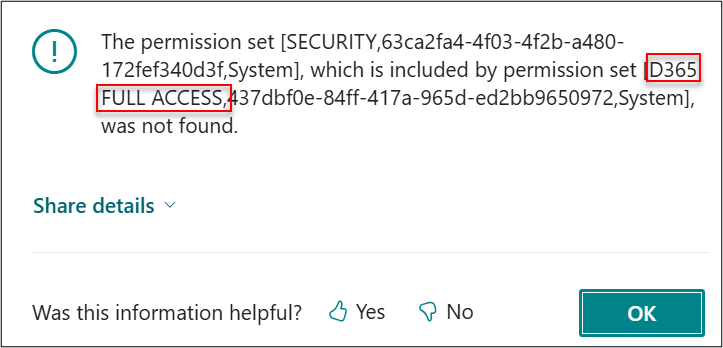
Here’s how the errors will look if you have these selected:
If you receive any further error messages, just take note of the ID and make sure to exclude that one, as well. (This may only occur if your system has upgraded from older versions.)
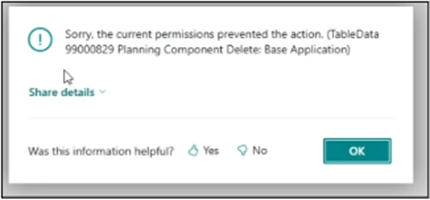
At this point, if you have reference to the permissions error/area of the system a user needs access to, add the table ID and level of access required as an ‘exclude’ line in the permissions section. For example, with the error below:
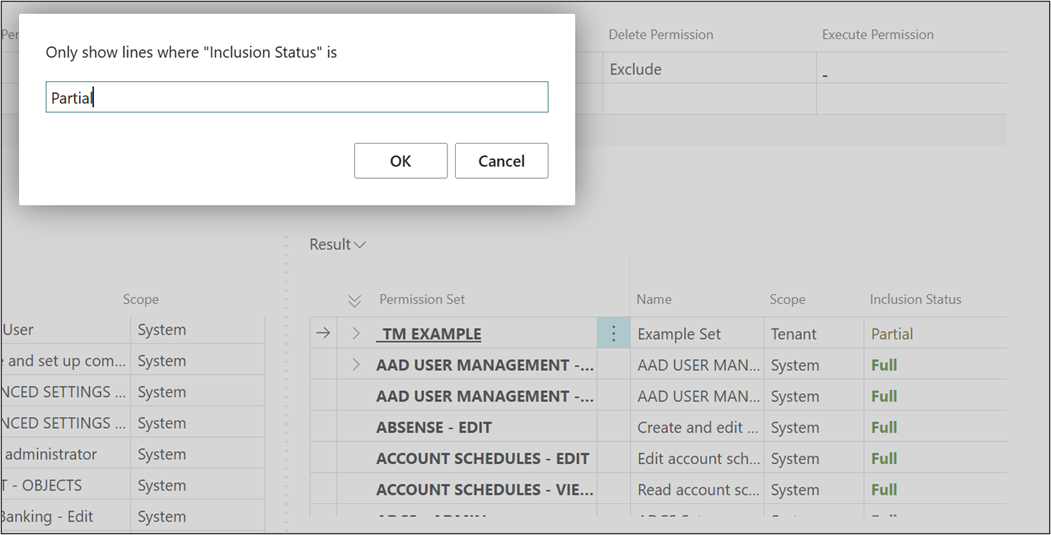
Now, scroll down to the Results section. Click Inclusion Status > Filter
Type in Partial (capital P) and select OK
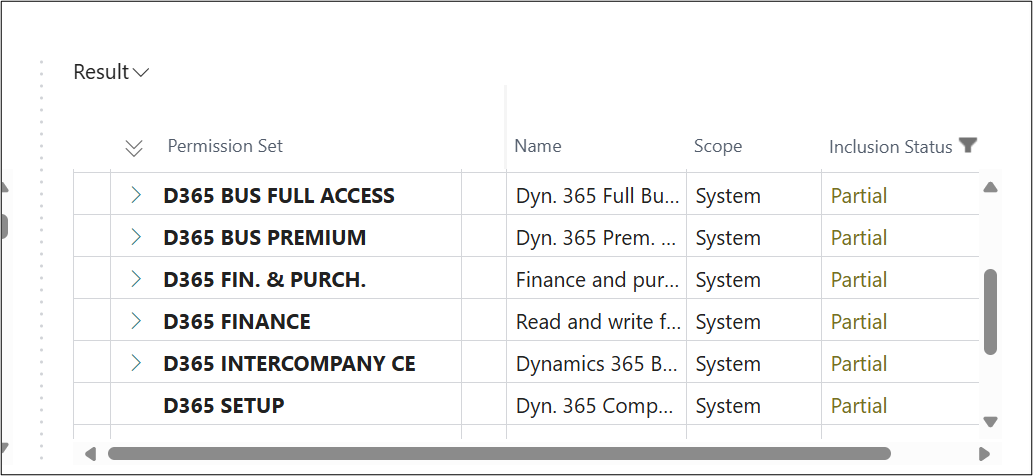
This will provide you with a list of the permission sets that have been reduced because of our exclusion. So, in this case, all the sets in the system that reference the area you are missing.
You can then pick the most appropriate one from the list for whatever issue you are fixing:
This can be repeated for every error, but here are some points to remember:
• Keep to just one exclusion on the permissions section, as multiples will affect how many sets are ‘Partial’ included and might cause confusion. One ‘exclude’ at a time will give the most clarity.
• If the permissions error is for something other than a TableData object type, set this on the exclude line to the appropriate matching type from the error message.
If you need more help or guidance on troubleshooting permission errors (or anything else!) in your Dynamics 365 Business Central system, please contact your Tecman Customer Engagement Manager or get in touch today.