


It's time to highlight a couple of under-used, yet great Business Continuity and Disaster Recovery (DR) tools that are readily available in Azure in the first of this two-part series. In this blog, I'll focus on the Azure Load Balancer and show you just how effective it can be when used in conjunction with Dynamics 365 Business Central in a real world scenario.
Why use a Load Balancer? Well the clue is in the title really, it balances the load of a front-end Middle Tier server across two or more VMs. But for me, more practically it adds a level of fault tolerance; so if you lose one VM, the other one will take the load and you can also take one out of the Server Pool to carry out maintenance while the other remains active. Consider the advantages of having all of your Middle Tier Servers in an Azure Availability Group behind a single Load Balancer.
A quick rundown of setting this up then. Firstly, create your free Azure Load Balancer resource just like you would any other resource. – yes that’s right, free!
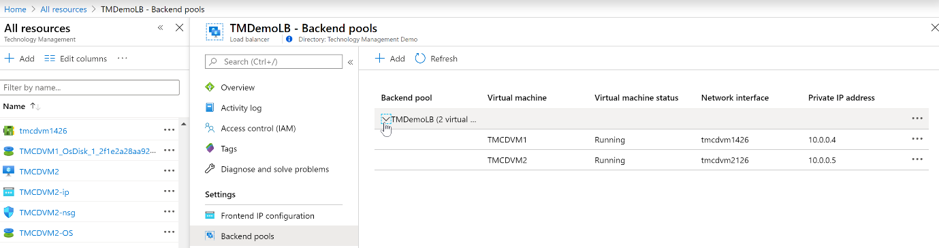
When you have your Load Balancer created you’ll need to create your ‘Backend Pool’ which you will add two or more front-end servers to. Below, I have a pool called TMDemoLB containing 2 VMs, TMCDVM1 and TMCDVM2.
Next you need to setup some health probes. Health probes are used to determine the health of the back-end resource and determine where to direct the incoming traffic. Important to note at this stage, that you can't create a load balancing rule until you have created your probe. This is because the rule will use the probe to determine which VM is ready to receive the connection.
I have two probes, HTTPS (Port 443) and the RTC port 7046 (Yes, I know we no longer have the RTC client in modern versions of Business Central, but for the benefit of those still running Business Central 14 and below, I’ve added this in for demonstration sake)
Then we have Load Balancing rules. Don’t mix this up with NAT Rules – 2 very different things. Load Balancing Rules define how the traffic is distributed to the back-end pool.
Here is my Rule for HTTPS traffic:
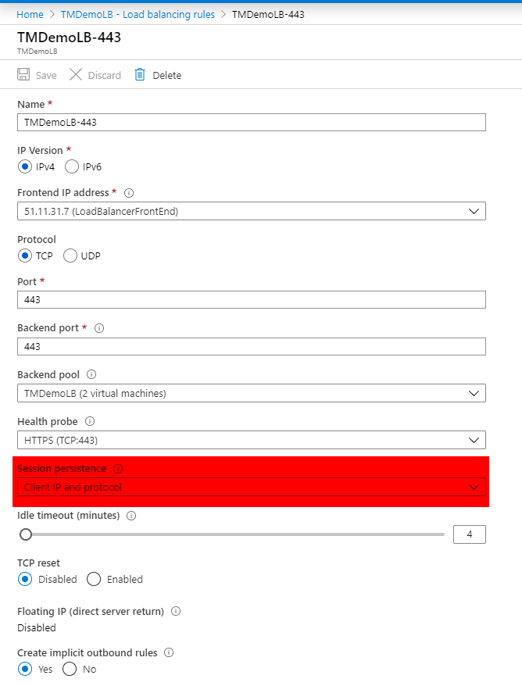
Pretty straight forward, but you’ll see I’ve highlighted in red an important setting when using Business Central behind a Load Balancer and that is to set the Session Persistence to ‘Client IP and Protocol’. This is to ensure that once a VM has been selected for a particular client, it will continue to use that same VM for the entire Business Central session. Load Balancing for Business Central will not work without this!
The last thing you may need is an Inbound NAT Rule. An inbound NAT rule is used to specifically direct certain traffic to an individual VM. In my example, I have given my VMs unique RDP ports so I can RDP on 3389 to VM1 and 4489 on VM2. If you had 3389 on a Load Balancer rule and not a NAT policy, you’d get a round robin effect trying to RDP to a specific VM – 50/50 chance of getting the right one.

Just to point out, my VMs are running Business Central 14 with identical configuration and setup for Azure Active Directory Authentication.
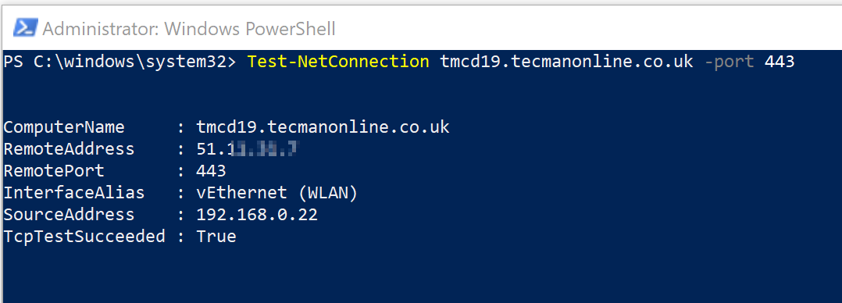
My front end DNS FQDN for my demo environment is tmcd19.tecmanonline.co.uk.
As you can see, my DNS points to the front-end Load Balancer IP Address (Individual VMs behind a Load Balancer will not have their own public IP)
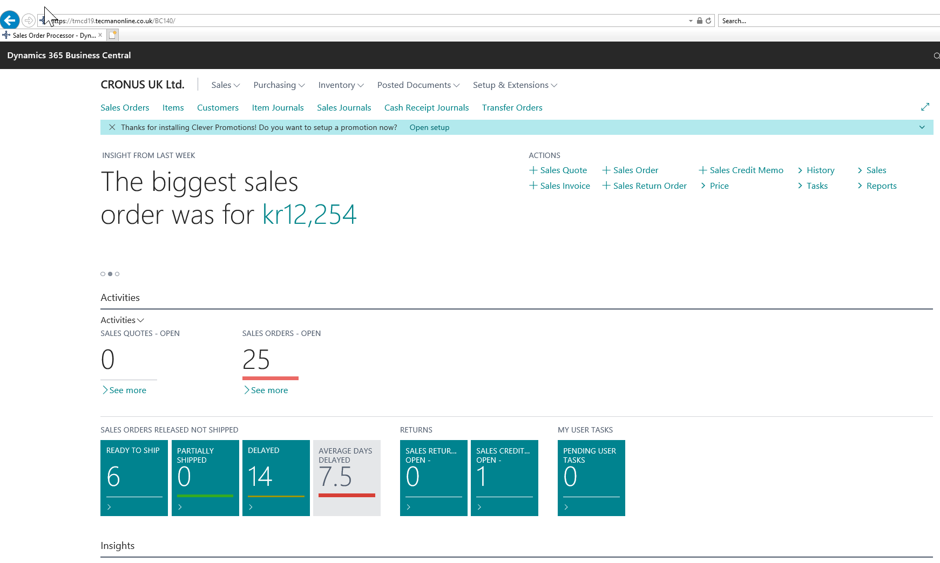
Here you can see my web client connected:
To see which server provided the front end authentication, look out for event id 232. Similar to below:

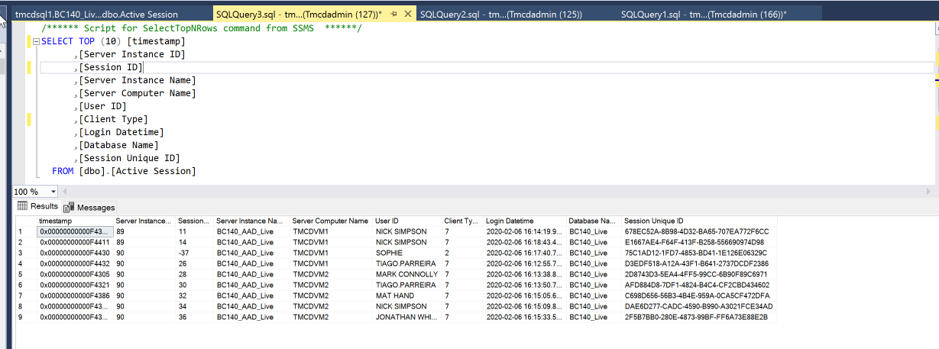
I now have a few different connections from different users from different clients. Here is a list of sessions from the active sessions table:
Now I’m going to shut down VM2 from the Azure Portal simulating either an outage or maintenance.
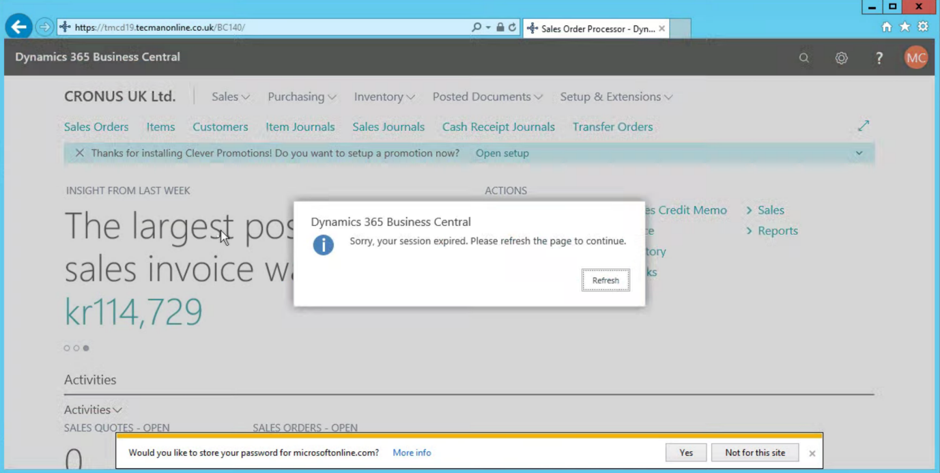
Web Client loses connection...
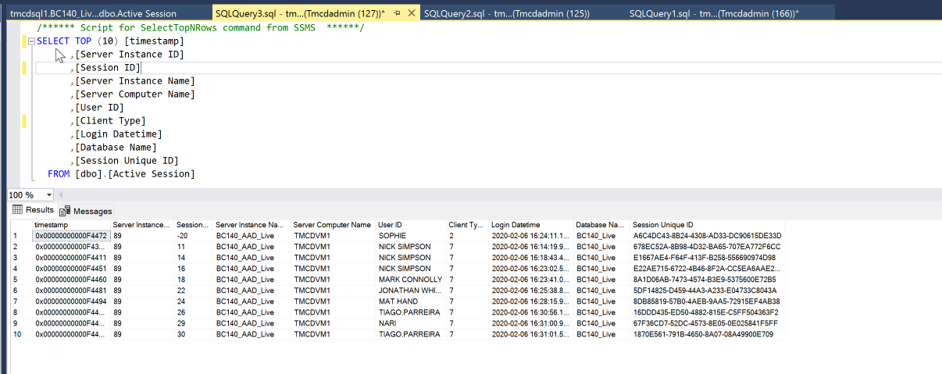
Refresh the connections and you can see from the sessions table below, that we are now all connected to VM1.
Good eh?
In summary, while the Load Balancer is free, you obviously need to run and pay for an active second VM. However, if it’s a business requirement then it really is an easy, quick and highly effective way of providing load balancing and adding in some additional fault tolerance.
In the second-part of this series, I will discuss the benefits of Azure VM Disaster Recovery and again reveal how effective this tool can be in a real world scenario. To learn more, specifically about the benefits of running Dynamics 365 Business Central in the private cloud, check out our Cloud Control service.