


Having trouble extracting key information from your Microsoft Dynamics 365 Business Central Item Ledger Entries? From inventory levels to who posted manual adjustments, this blog covers useful filters to help you analyse Item Ledger Entries more efficiently.
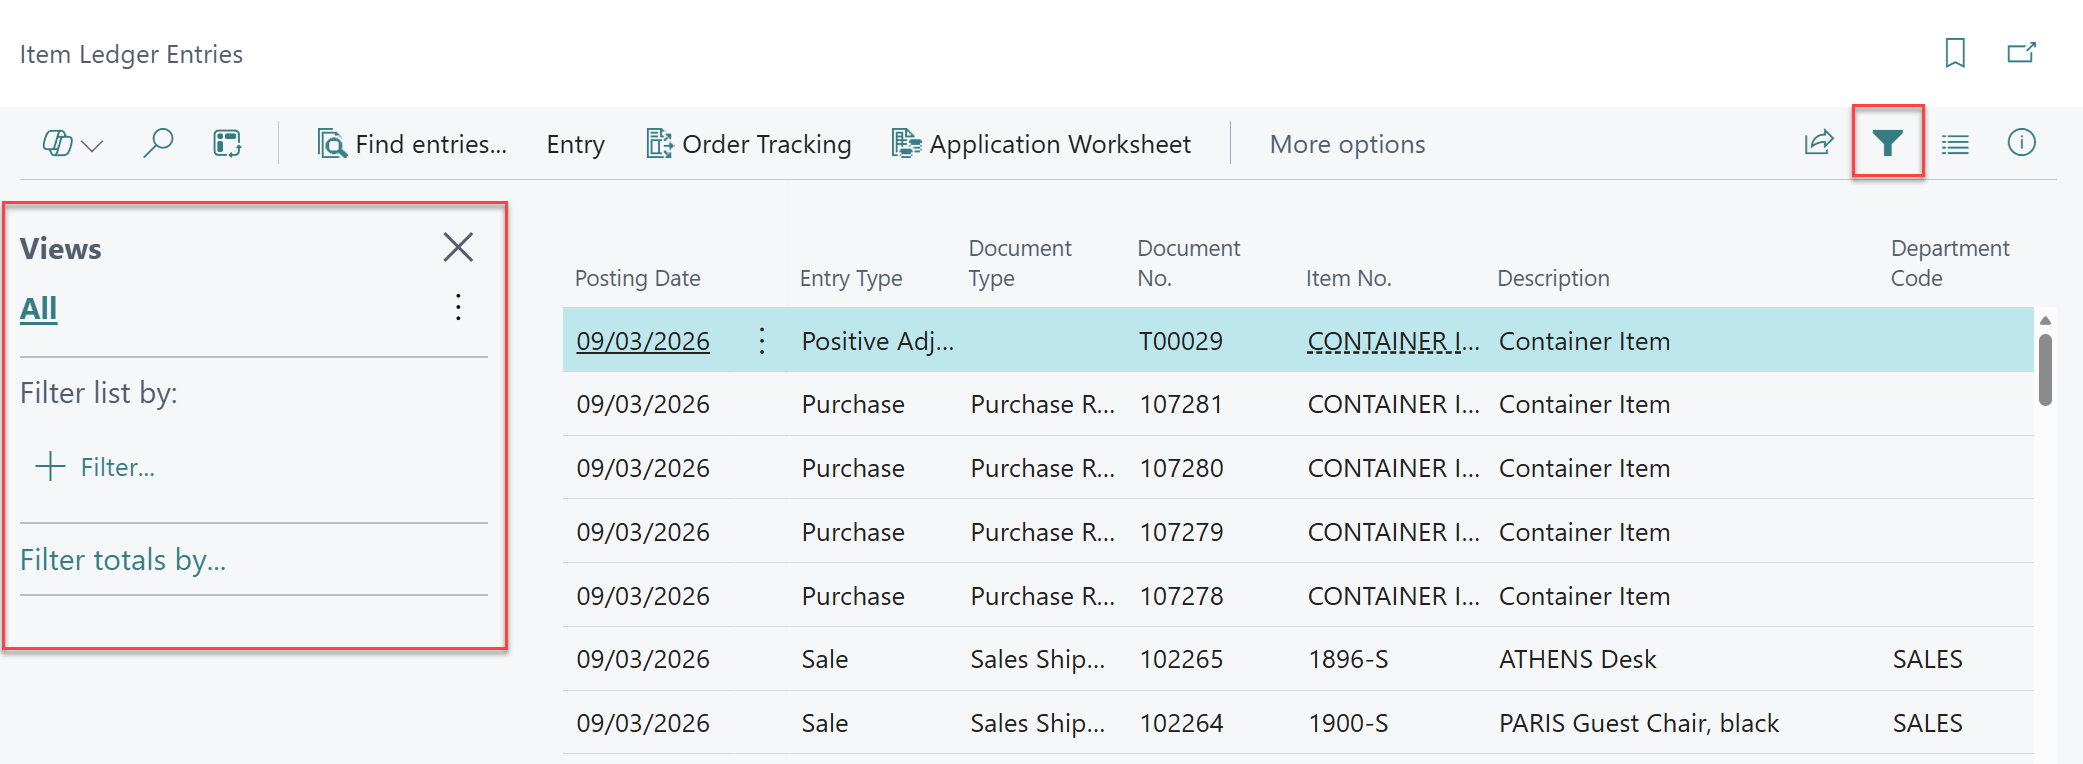
Navigate to the Item Ledger Entries list to get started and make sure the filter icon has been selected to open the filter pane on the left-hand side.
Let’s start by learning how to create a filter and Saved View to only view Available stock. Once you’ve chosen the + Filter… option, locate the ‘Remaining Quantity’ field in the available fields list. Enter >0 in the filter field – this will filter the Item Ledger Entries so that only entries that have a remaining quantity greater than zero. Alternatively, you can add a filter on the ‘Open’ field and select Yes from the drop down, as only entries with a remaining quantity will remain open.
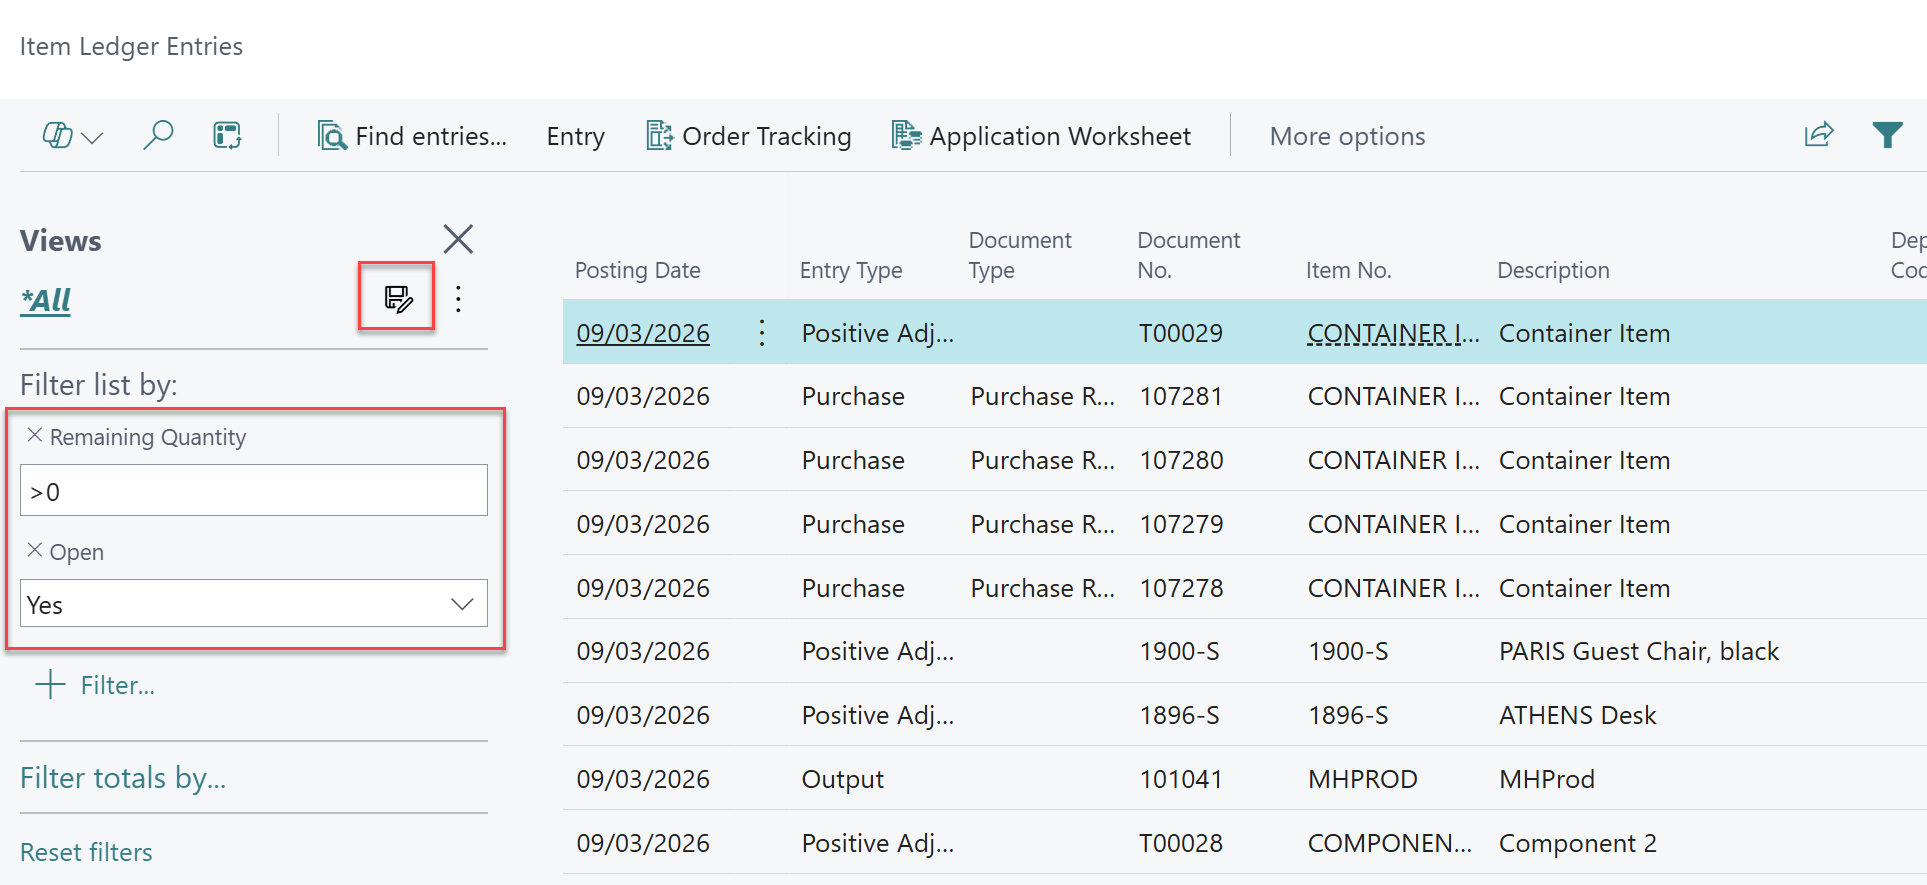
Once the filter has been applied, select the floppy disc icon to save the view.
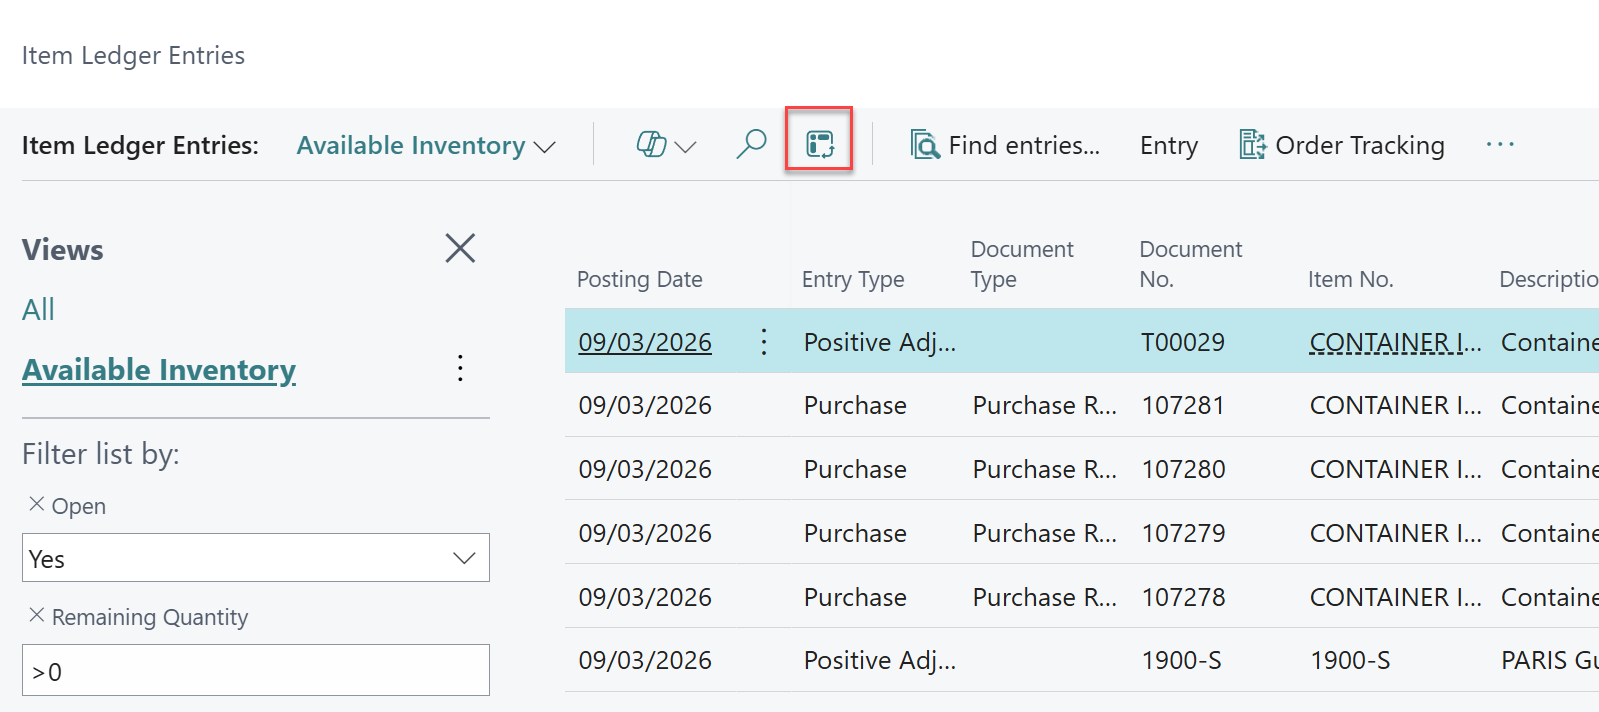
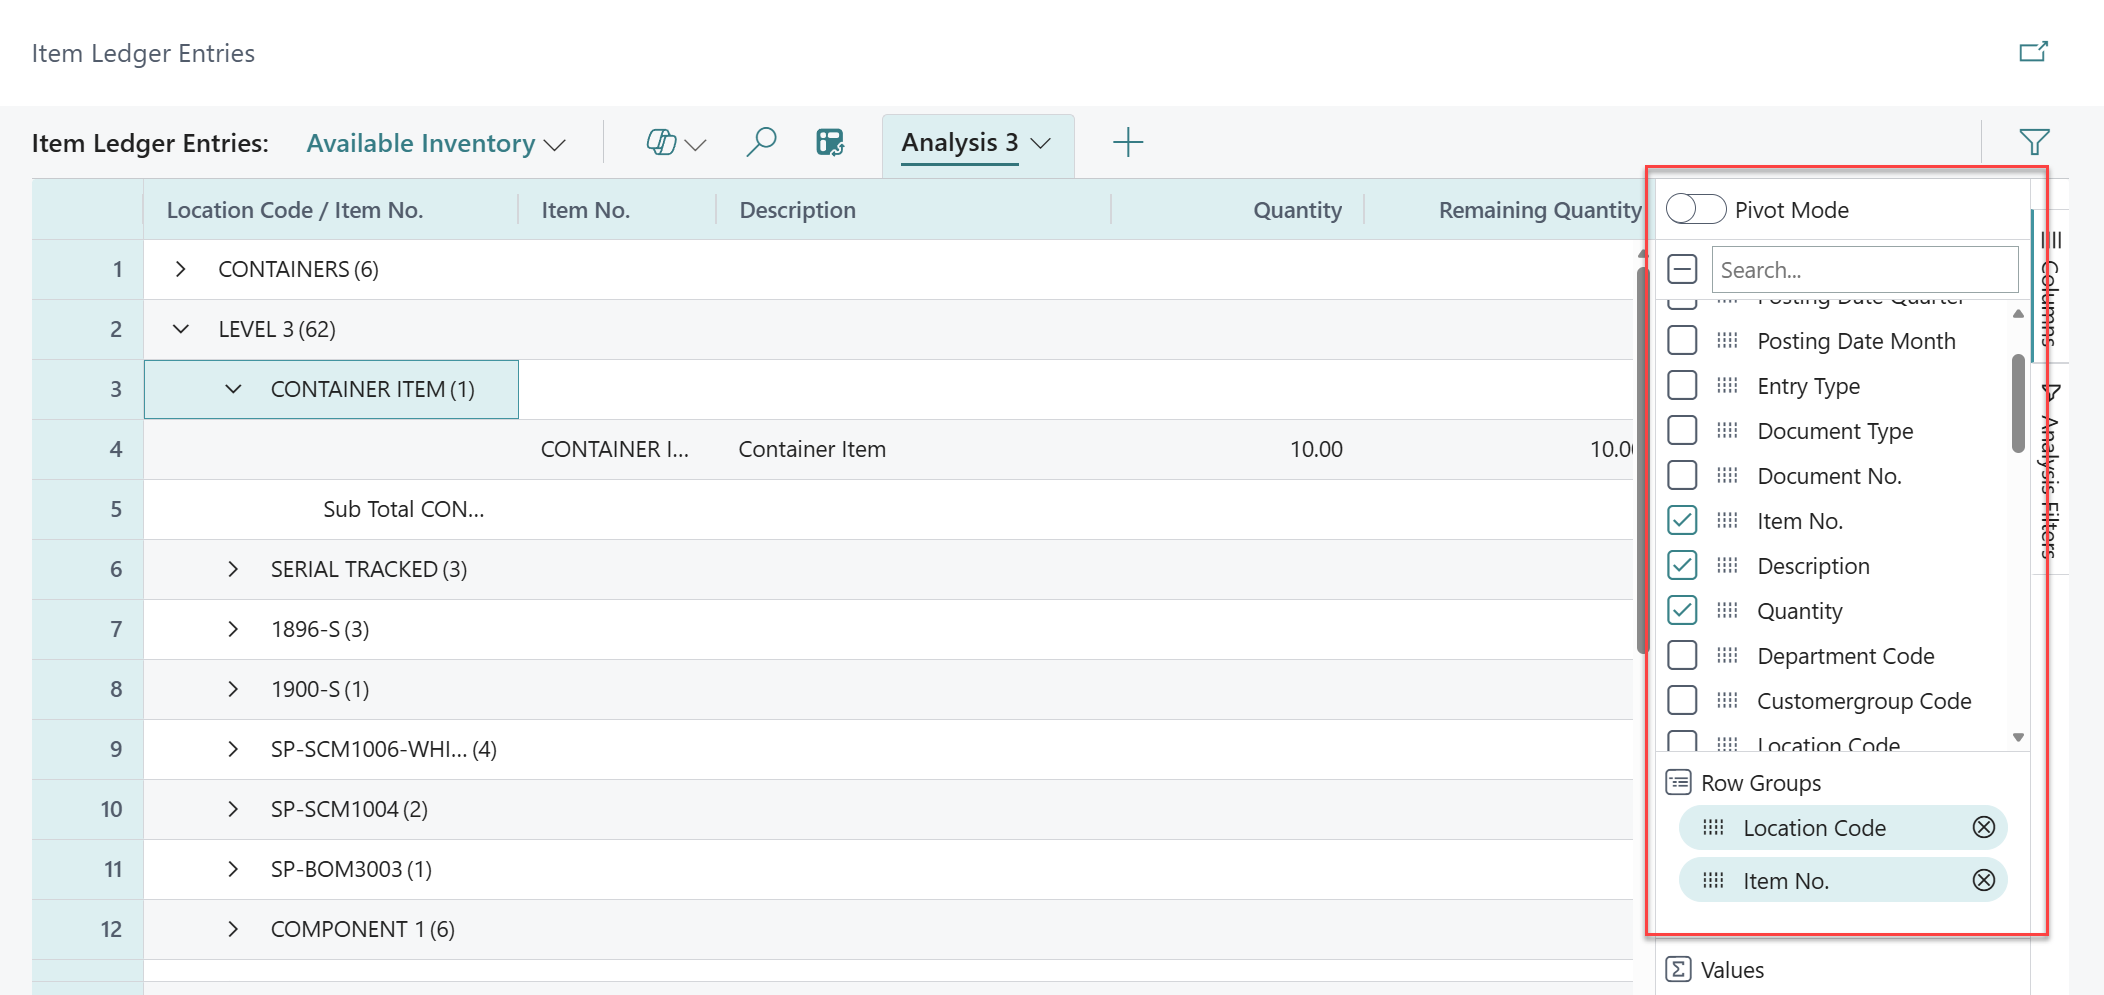
Now, we are going to use the filter we have just created as a base for an Analysis View which will allow us to group available inventory by location. Remaining on the Saved View we just created, select the Analysis View icon from the ribbon.
Next, within the pane that appears on the right-hand side, first untick the columns you are not interested in. (In our example, we’re just focused on the Item No., Description, Quantity and Location Code and so have removed the rest of the fields.) With the other fields removed, we have then moved both the Location Code and Item No. fields into the Row Groups by selecting the six dots on each of these fields.
This has provided a nice interactive report that we can continue to add columns to as needed and provides much more flexibility that the inventory availability reports that come with Business Central.
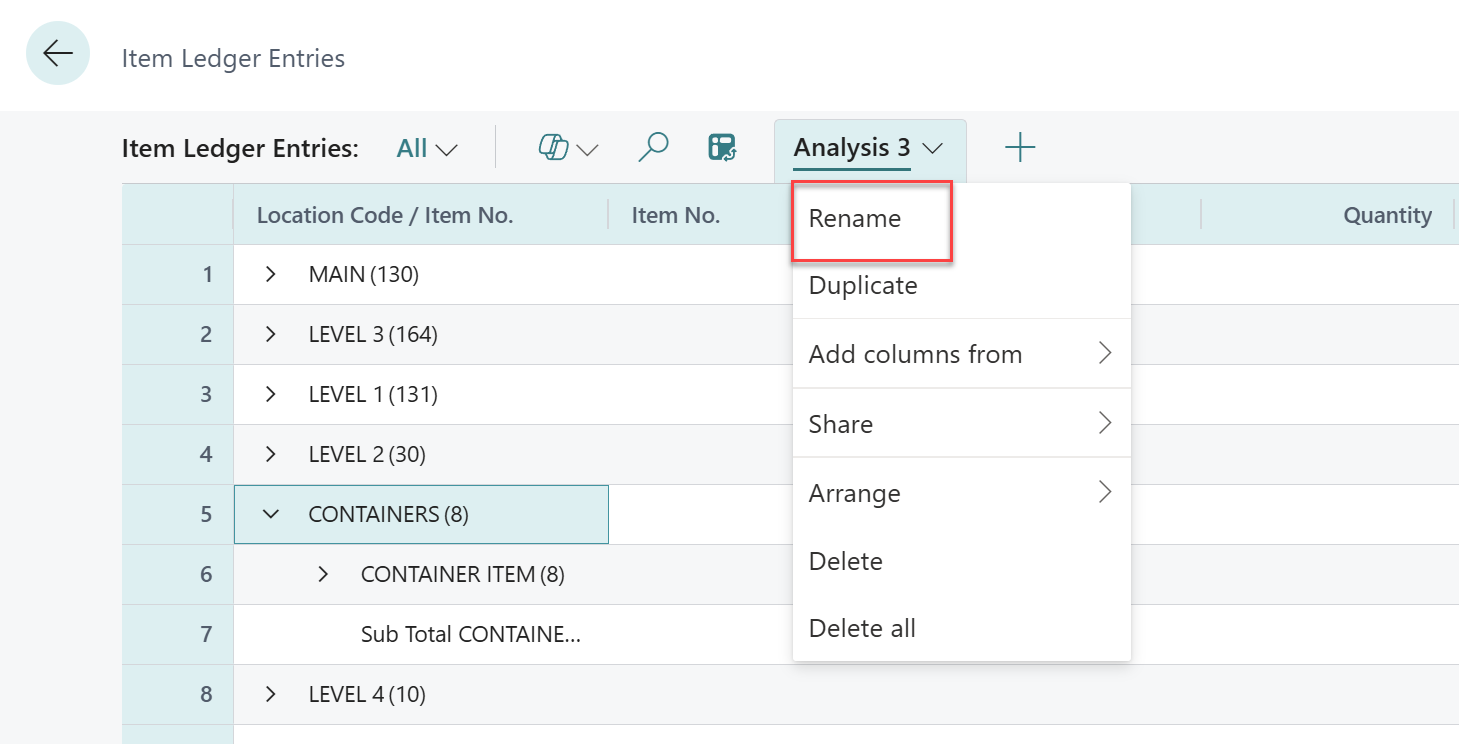
Should you wish to save this Analysis View to revisit later, simply select the drop down from the ribbon and select rename.
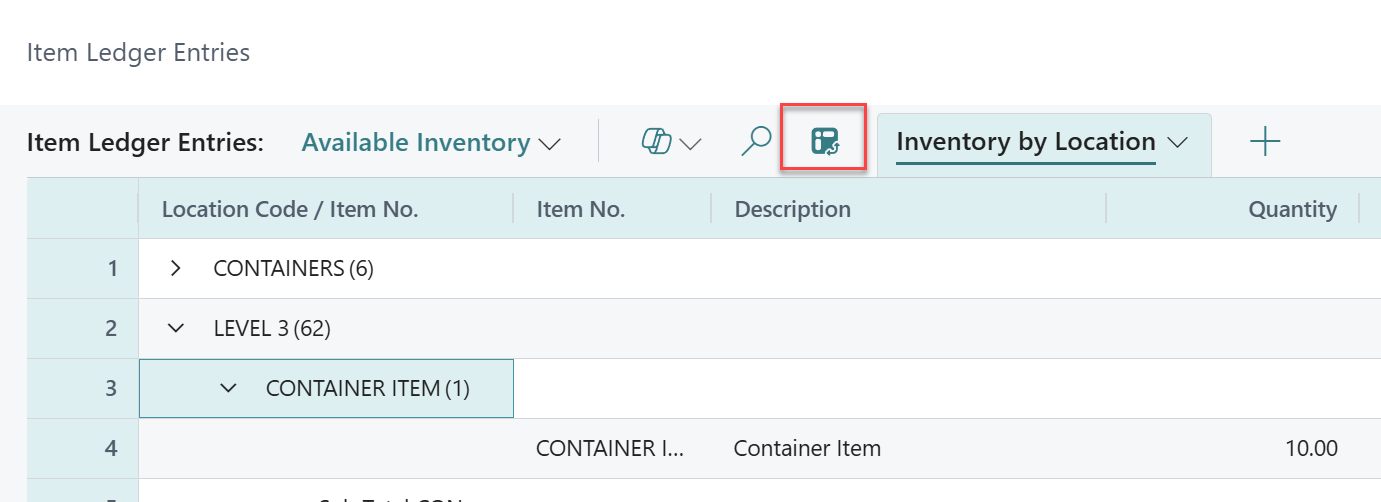
To return to the List View, simply select the Analysis View icon from the ribbon.
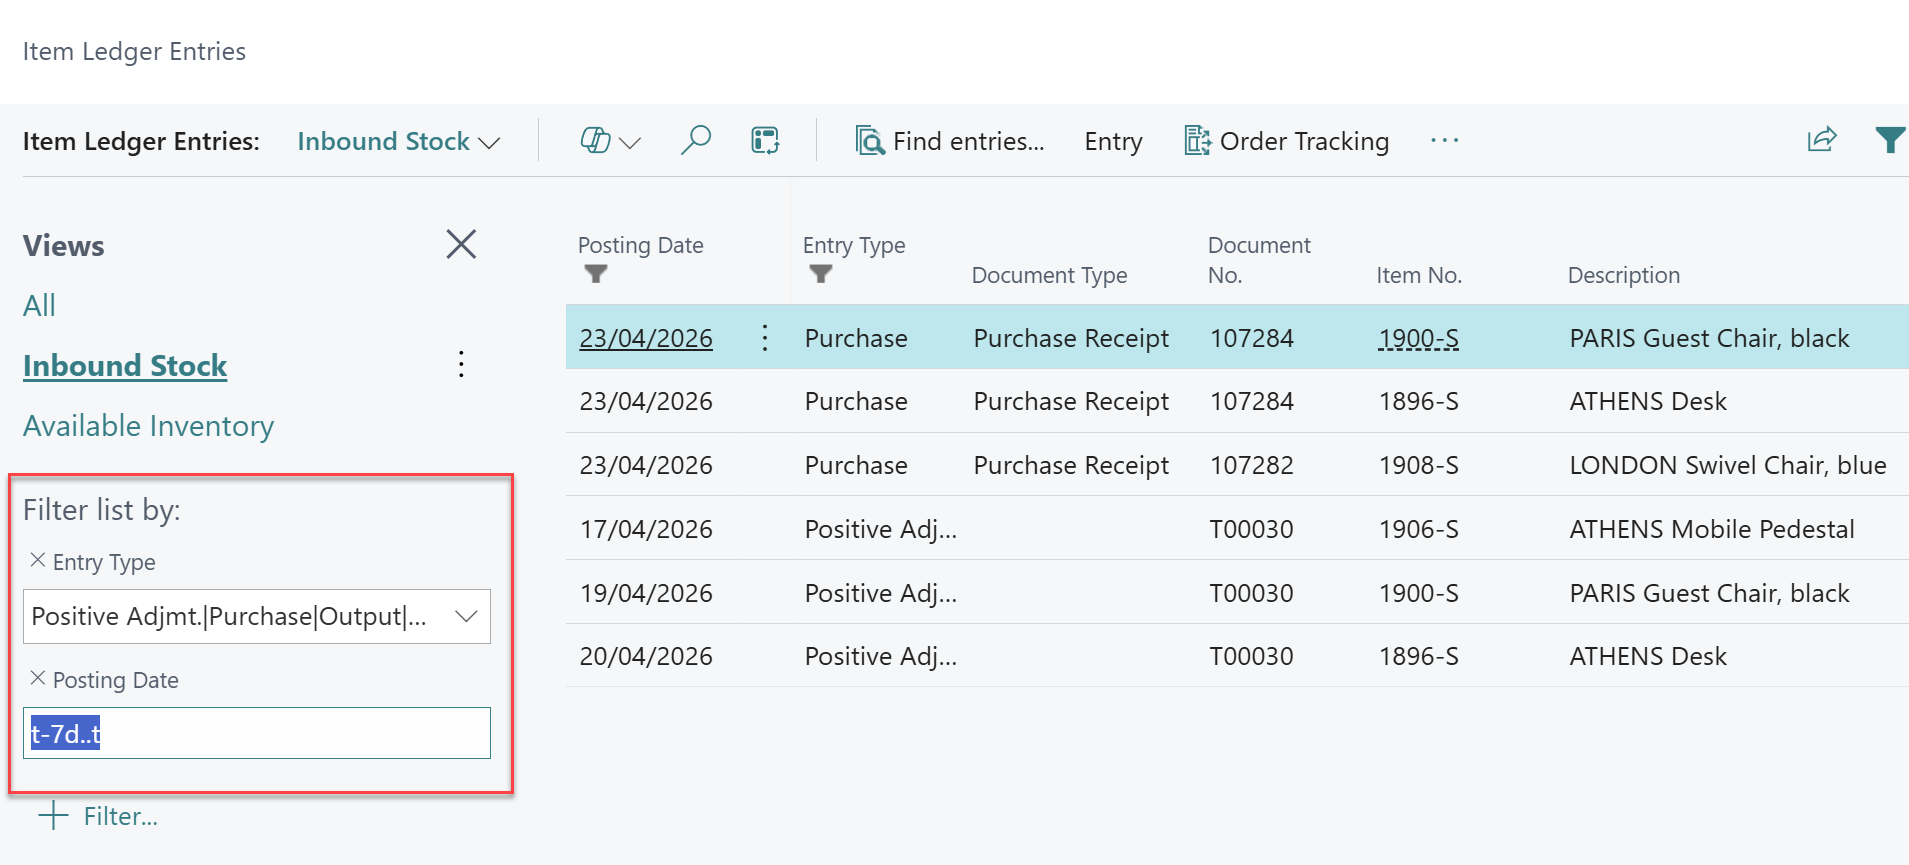
To set up a Saved View for inbound stock that arrived during the past week, start by setting a filter on the ‘Entry Type’ field and choose Purchase, Positive Adjmt., Output, and Assembly Output, since these all increase inventory. Then, apply a filter to the ‘Posting Date’ field and use t-7d..t so you’ll see entries posted from today back to seven days ago. By using this date filter expression rather than a static date, the filter will automatically update every day, eliminating the need for manual adjustments.
These filters can also be applied for Entry Types related to outbound stock by selecting the Entry Types of Sale, Negative Adjustment, Consumption and Assembly Consumption. Once the filter has been applied, select the floppy disc icon to save the view.
For Business Central training, or a conversation about moving your Business Central support to Tecman, drop us your details today.