


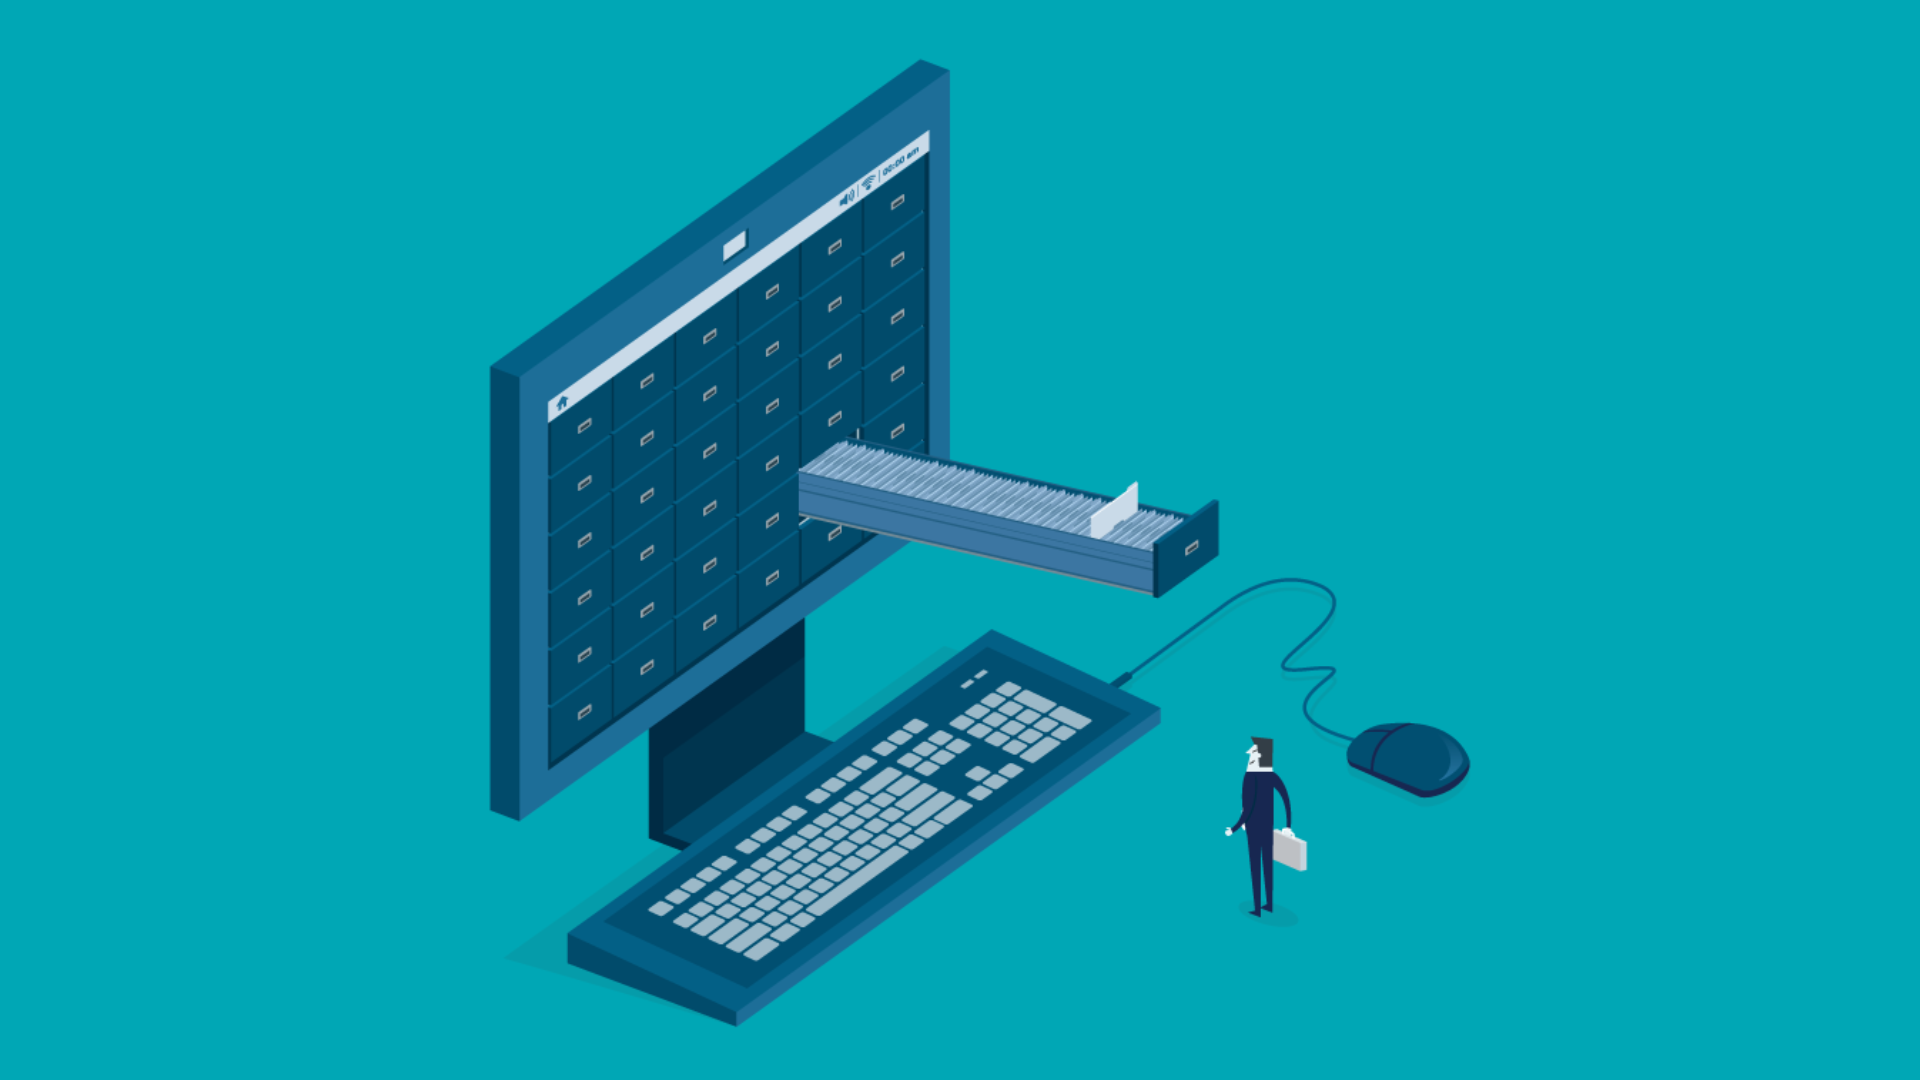
Storage in Microsoft Dynamics 365 Business Central comes at a premium and the last thing you want is incurring any additional costs because you’re over your limit! One of the ways you can stop this happening is using Retention Policies to clear out data you no longer need.
A Retention Policy is simply a bit of logic we can setup in Business Central for certain areas that says: ‘If this kind of data is this old, delete it’. Some areas have more options than others, but ultimately they are simple to get working with.
1. Start from the Retention Policies page: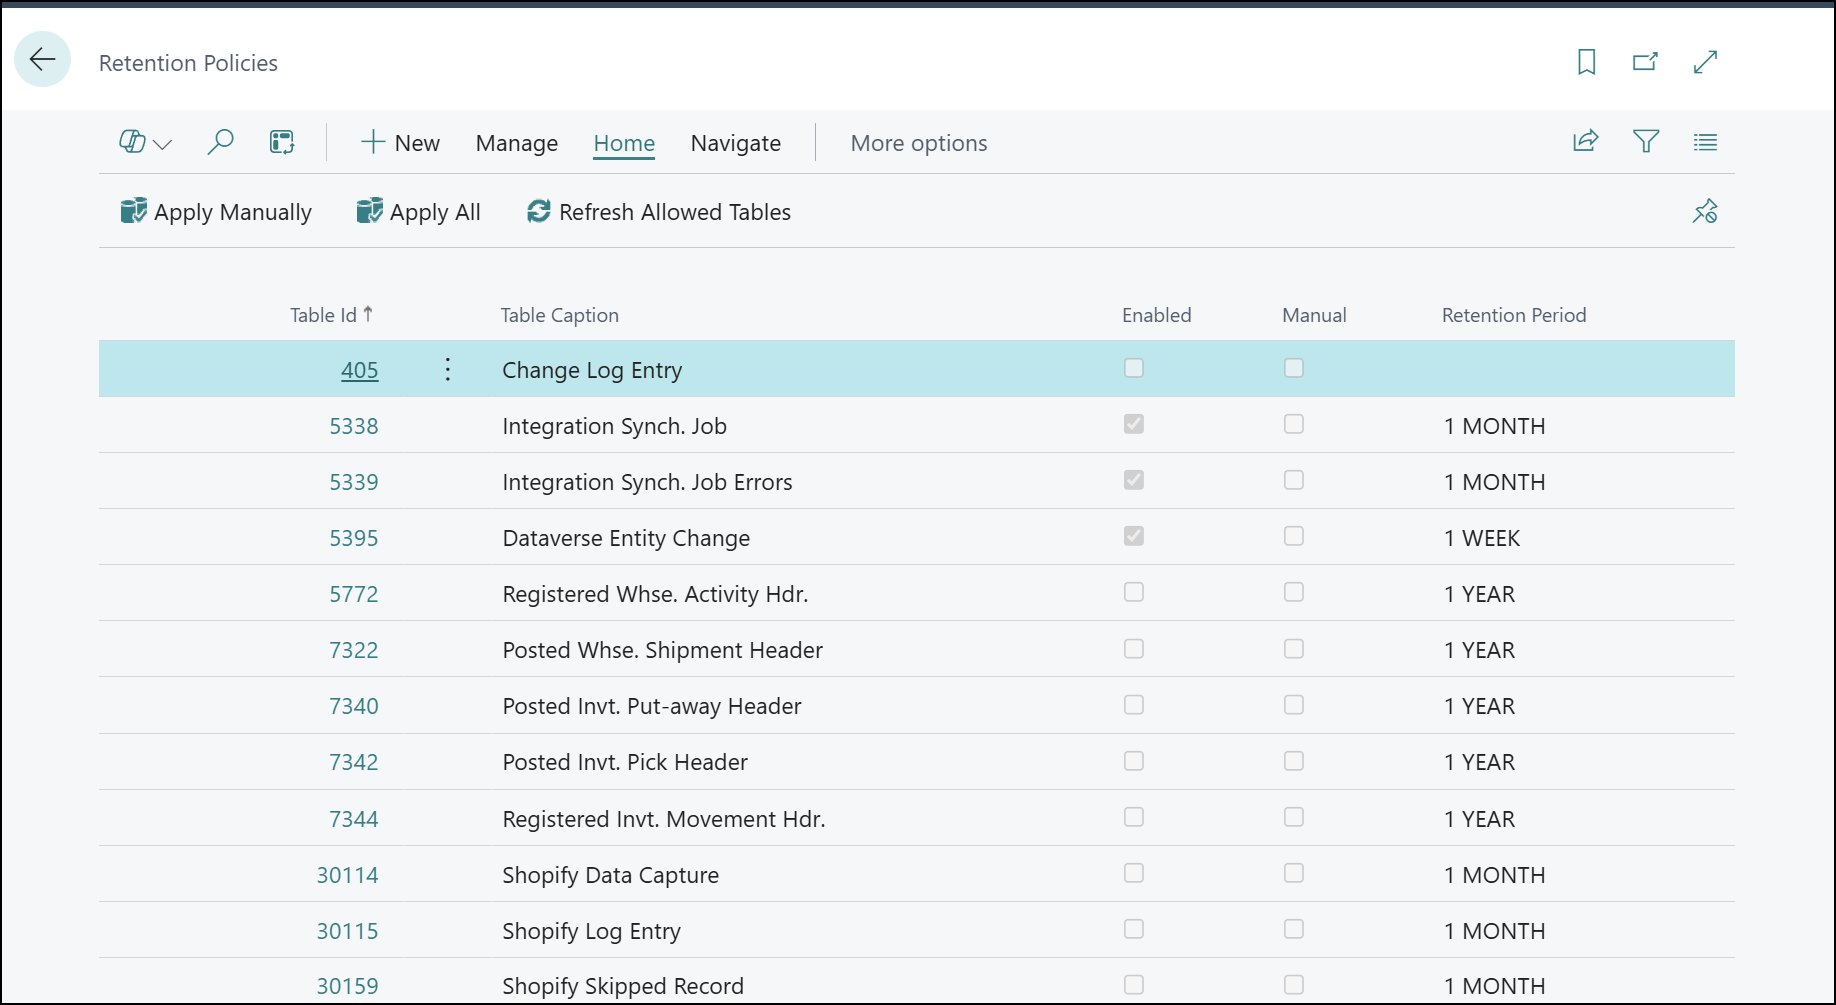
This page should already be populated with some example policies we can turn on (but we’ll also see how we can add more later). Let’s take a look at one of the policies that has more options, Change Log Entry – this is actually an area that can grow quite large and consume storage capacity if left unattended or badly setup. 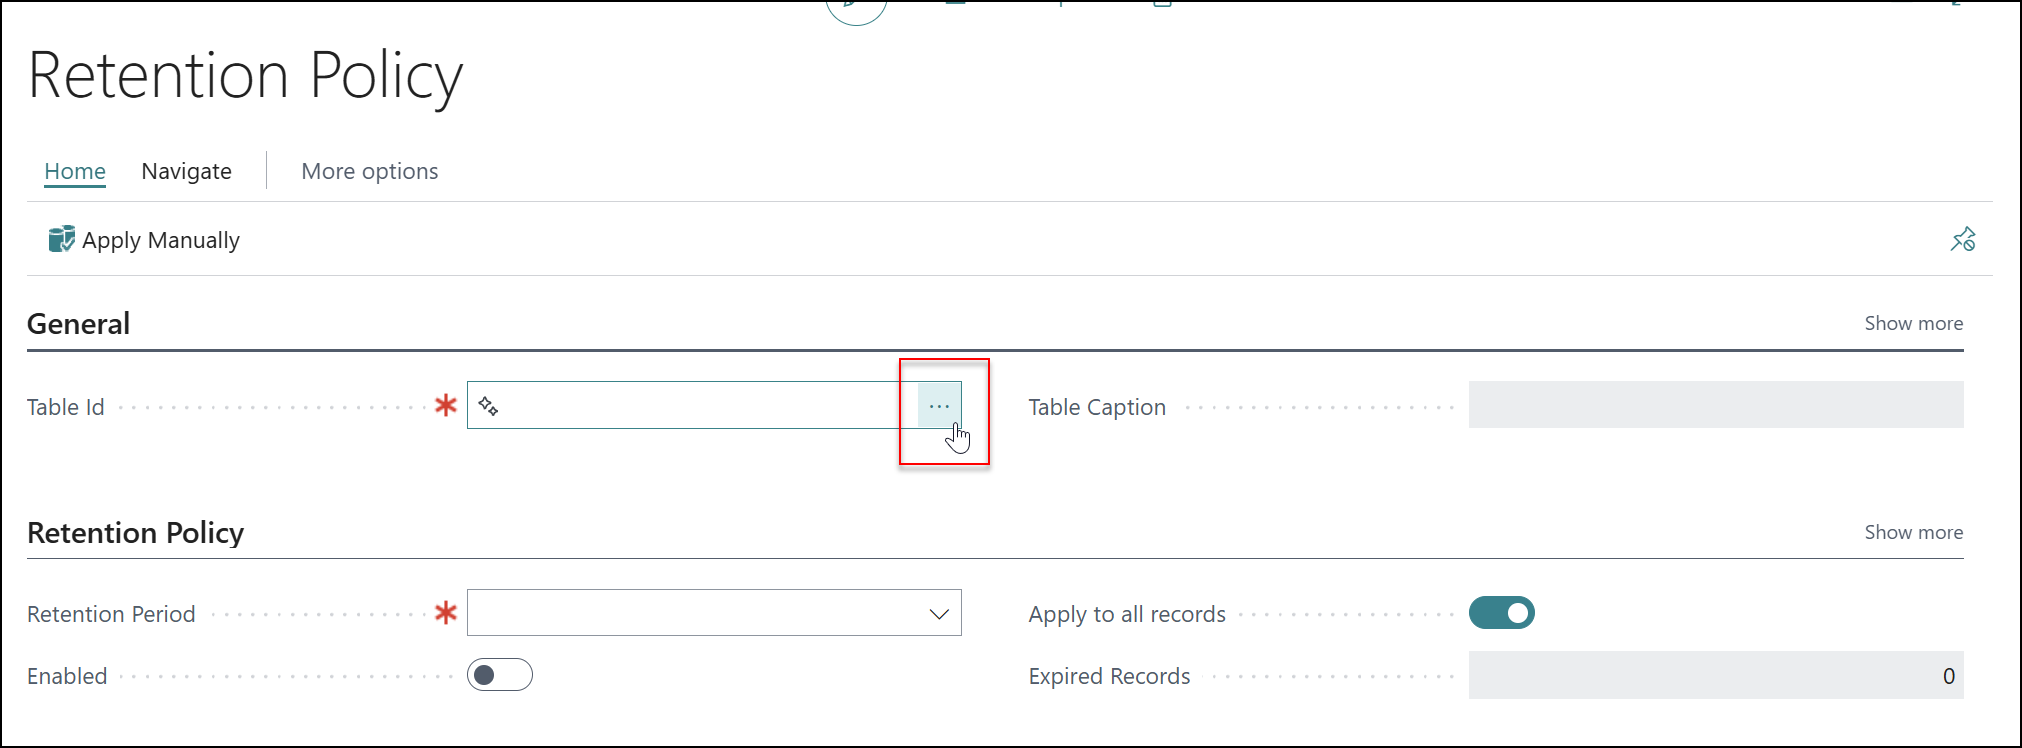
2. To turn a policy on, we just need to make sure the Enabled is checked.
3. Next, we need to say how long we’ll keep these records around for. As the Change Log Entries is an example of a more complex policy, we have a whole section called Record Retention Policy at the bottom that essentially controls how long we keep certain data within the entries, and we can add to or change this as needed.
To quickly explain what you’ll find here, Business Central talks about Protected: No and Field Log Entry Feature: Monitor Sensitive Fields | All.
These are in reference to a Business Central feature called data classification, where you can classify all data with a degree of sensitivity (Protected, Sensitive, regular etc.). These established rules say any data marked as Protected stored in the change log, retain for a year then delete; anything marked as Sensitive store for 28 days; everything else, delete after one year (the Protected: No line).
All our data unless marked otherwise will not be marked as Protected, so we can adjust this third line to another period (or create new ones) from the Retention Period Drop down.
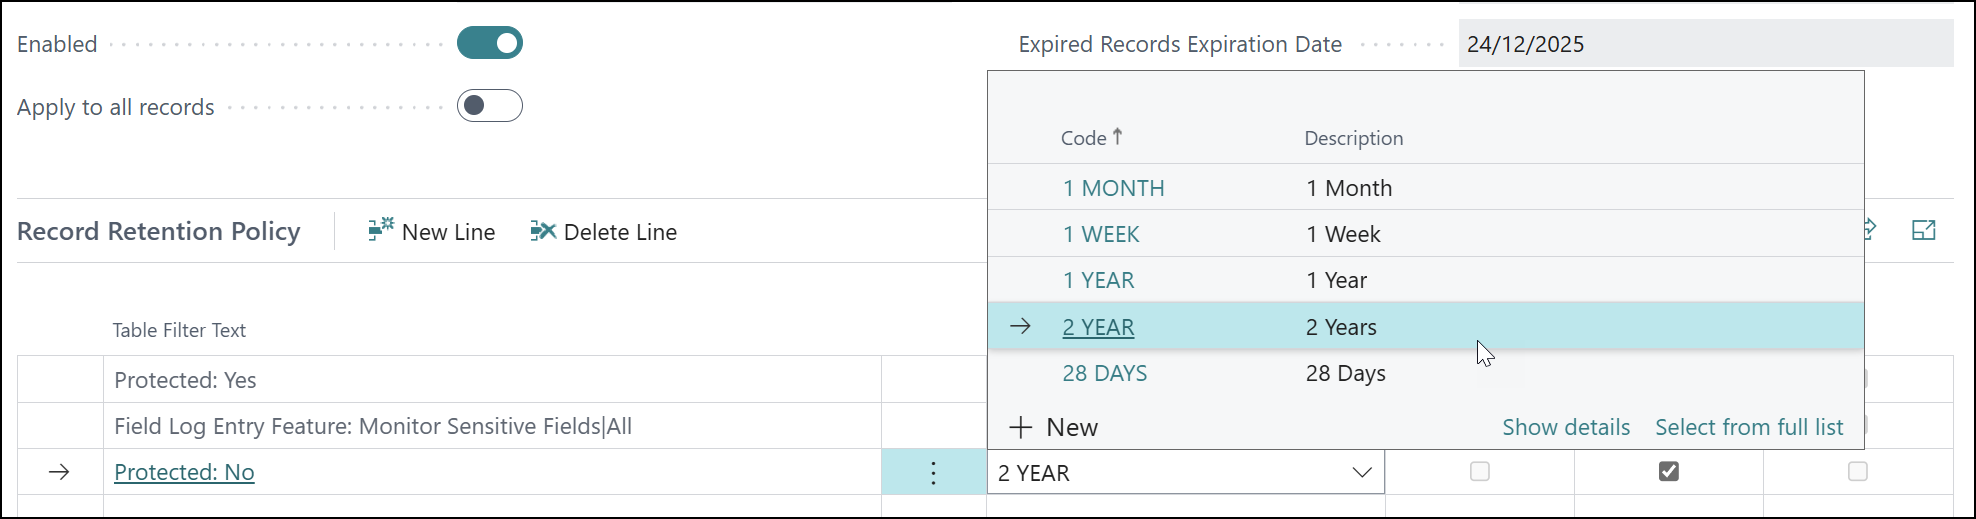
4. Press +New to set up new ones.
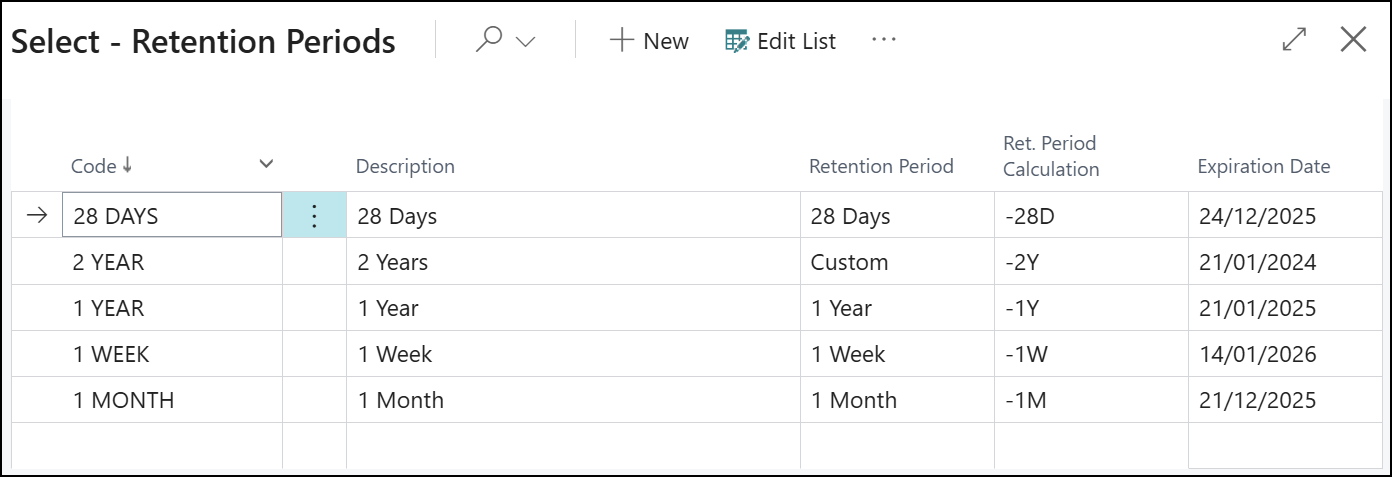
For example, in the above, I’ve created a new two year option not available by default.
While it’s outside the scope of this blog, you can even add more lines to this Record Retention Policy section to add additional rules to delete certain data more often, if an area you’re tracking is producing many more entries than other areas.
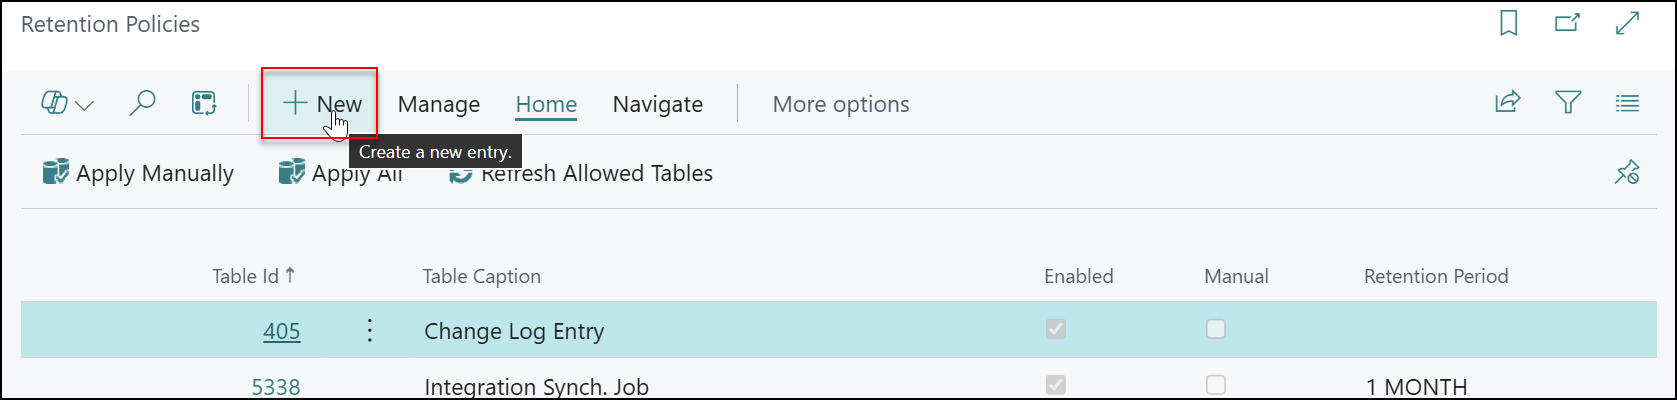
5. If we go back to the Retention Policies page, we can add more polices in for other areas as well via New.
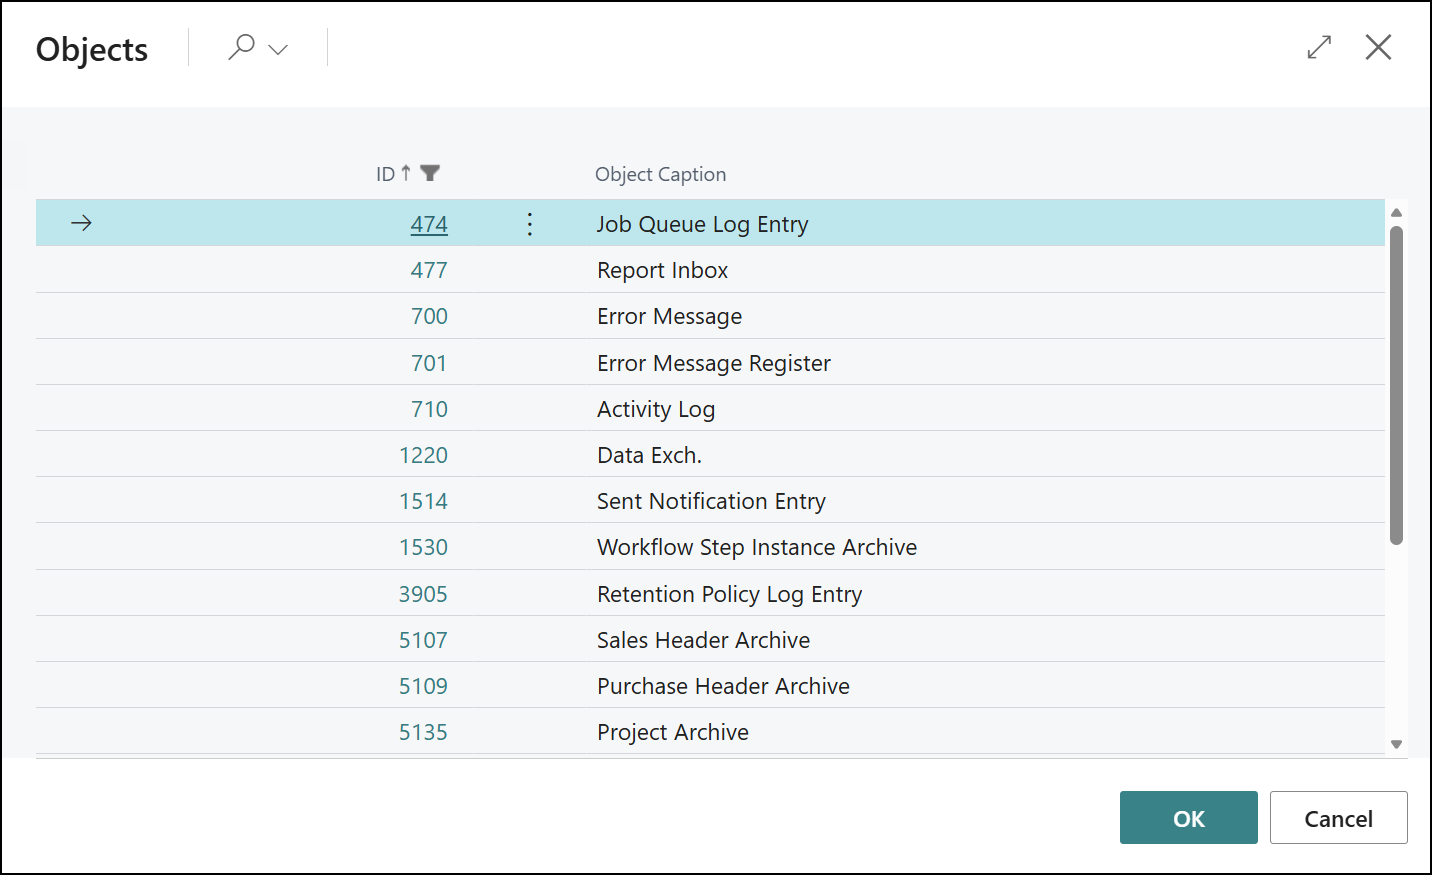
6. Then click into the three dots next to Table ID.
From here, we get a list of areas we can set Retention Policies up for that have yet to be configured.
7. As a recommendation, it’s useful to add things like Job Queue Log Entry and Report Inbox as these areas can grow quite large depending on your system if left unaddressed. (You should also scroll to the bottom and see if any policies are available for any Apps you have installed, if an app developer has developed a Retention Policy, there’s a good chance it’s useful!)
8. Then, we just need to set how long we want to retain this data for in the Retention Period and turn it on with Enabled.
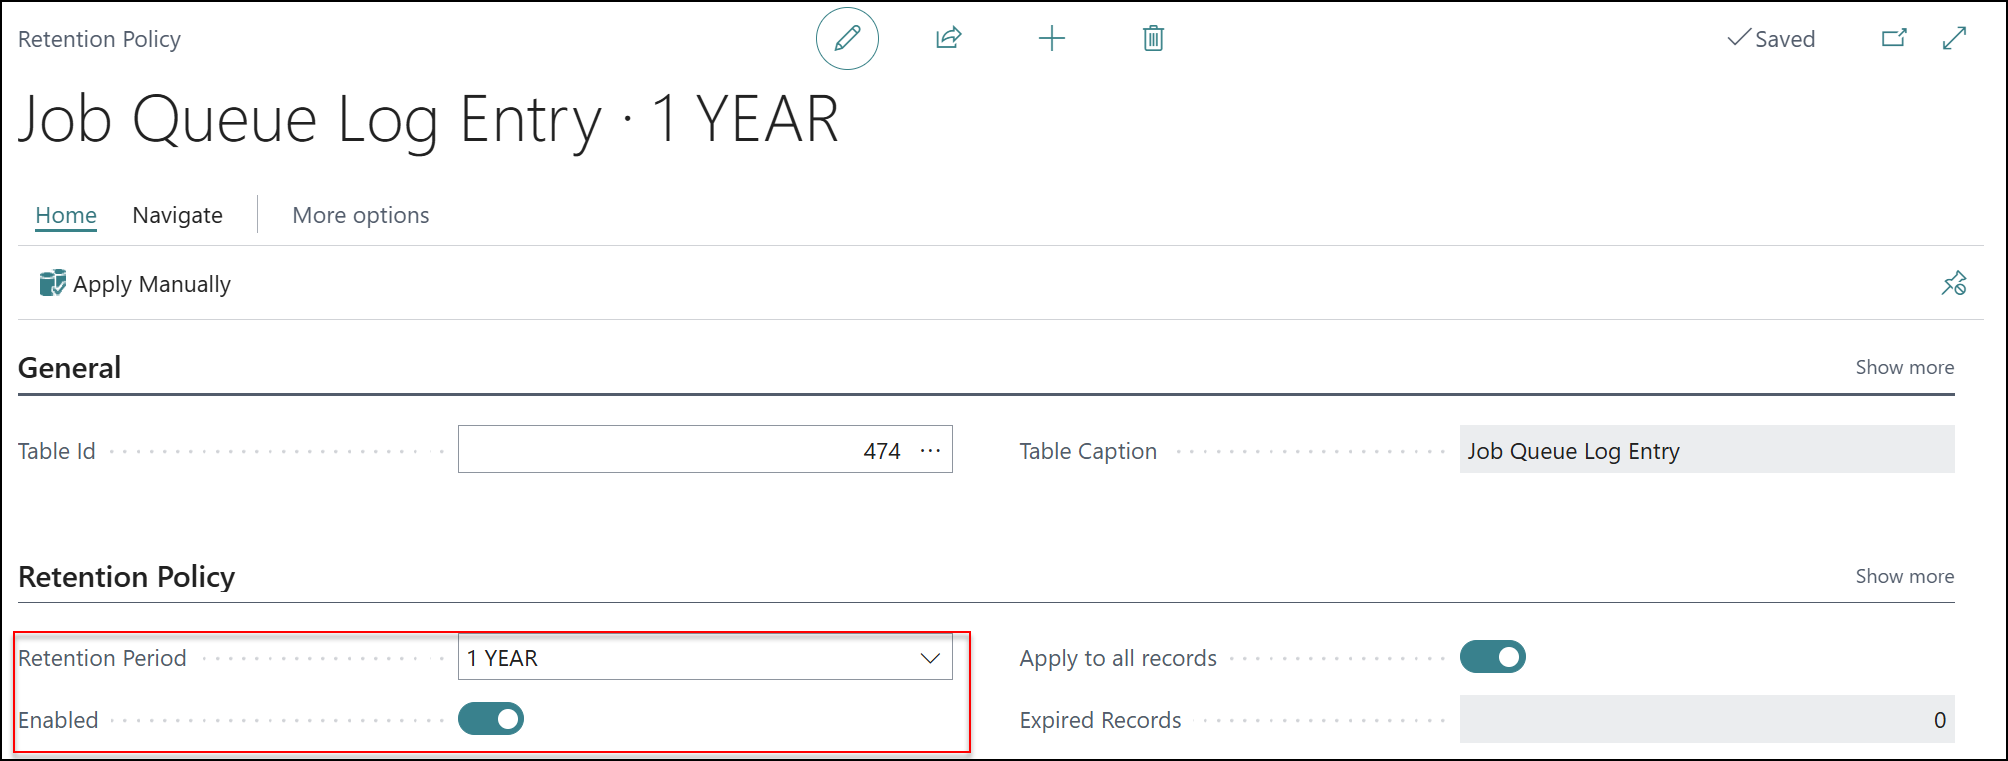
This is a more basic policy, so we only need to set a Retention Period, not as complex as the Change Log Entries before.
9. One final thing you’ll want to check to ensure this will clean your system when data becomes older than the Retention Periods, is in the Job Queue Entries page.
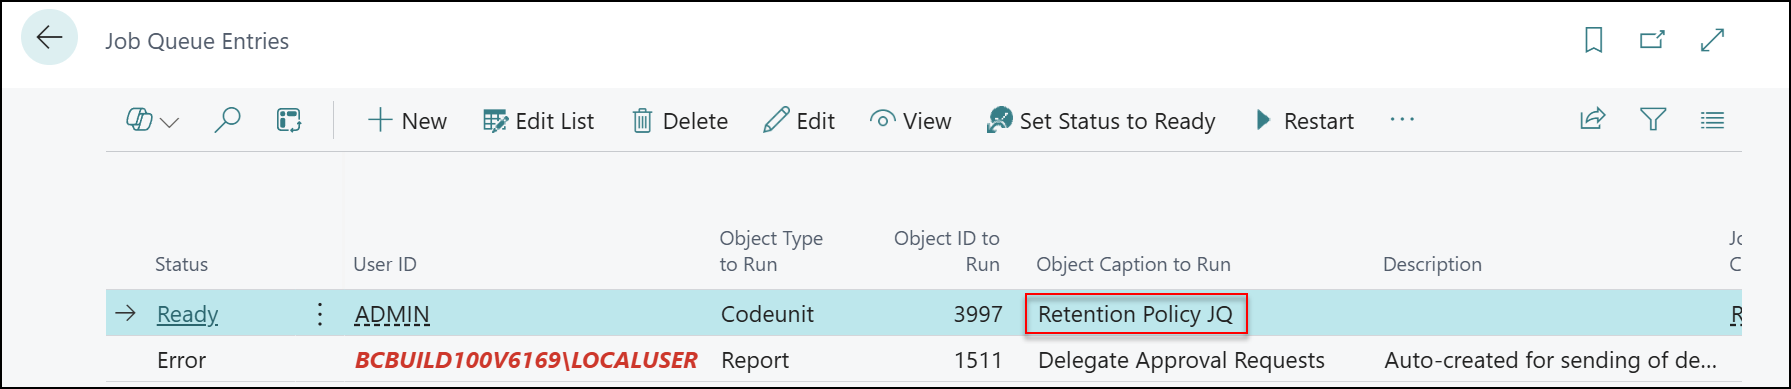
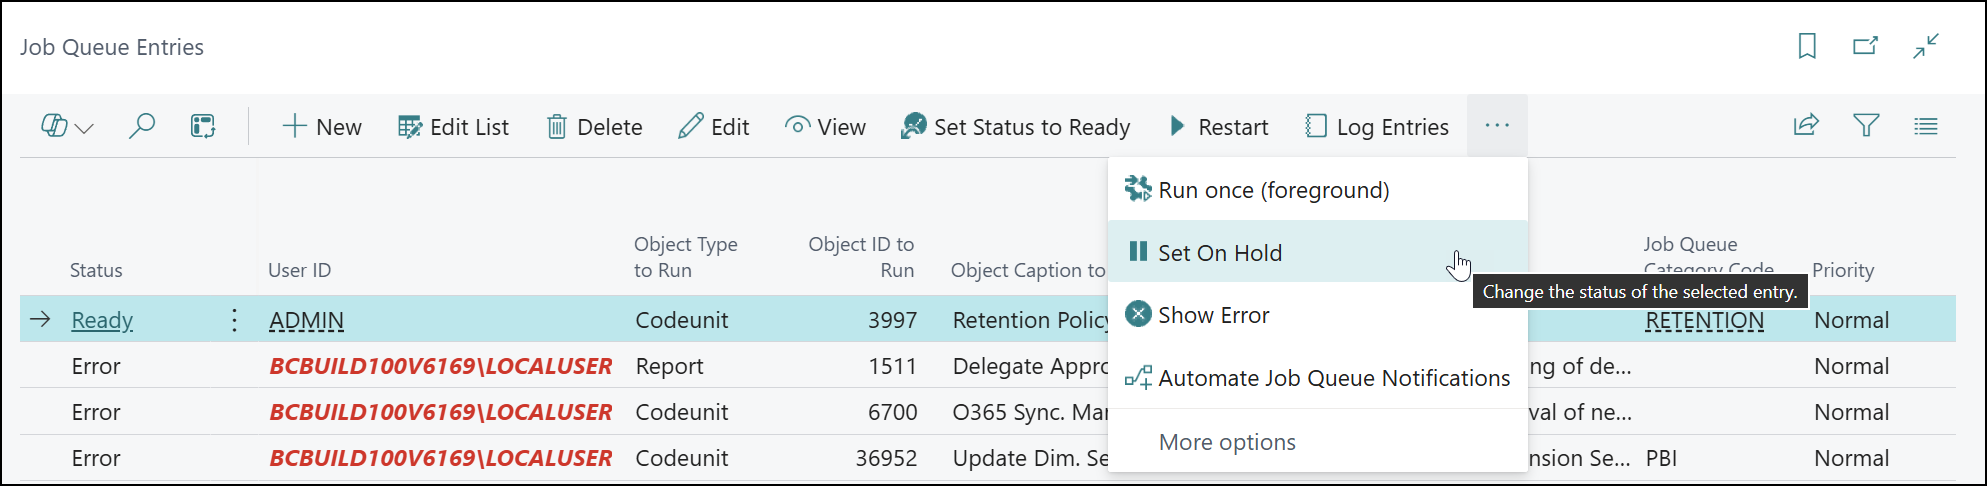
The Retention Policy JQ runs the background task to delete expired data. This needs to run in the name of a valid, licenced user like the above. If the User ID is red or running in the name of an incorrect user, it will fail and not delete data. This can be replaced by having a user use the Set on Hold option, then Set Status to Ready to restart the job, and replace the User ID with their own.
And that’s how you can turn on and use Retention Policies in Business Central! Something better done earlier so your storage won’t go out of control for any areas of worry.
If you want to find out more about Retention Polices and general data management, Tecman customers can register for our free customer training session: Manage and control your data storage and quality within Microsoft Dynamics 365 Business Central.