


Users who are new to Microsoft Dynamics 365 Business Central can sometimes struggle to find data within the system.
Traditionally, if you're asked to find a piece of data (like a customer, shipment document, invoice, etc.) you’d have to go to the matching page to search the data within – and newer users might not be familiar enough with the correct pages or page names to be able to do this at speed.
That’s where Search company data comes in! Rather than going to the page with your data on it, why not just search for the data via Business Central search?
Via the magnifying glass in the upper right (the search, also known as Tell Me) simply type in the data you wish to find – Customer information, Vendor code, Item information, Document number, etc., and select Search company data.

This will return a full list of areas found based on the search term. Here, I’ve searched for ‘Helen’ which matches a contact in our system. It’s found the Contact, the customer they are linked to and several Posted Sales Invoices where Helen was set as the contact. Clicking any of these will open up that record, and if more than three have been found, a link to show all results will be available.

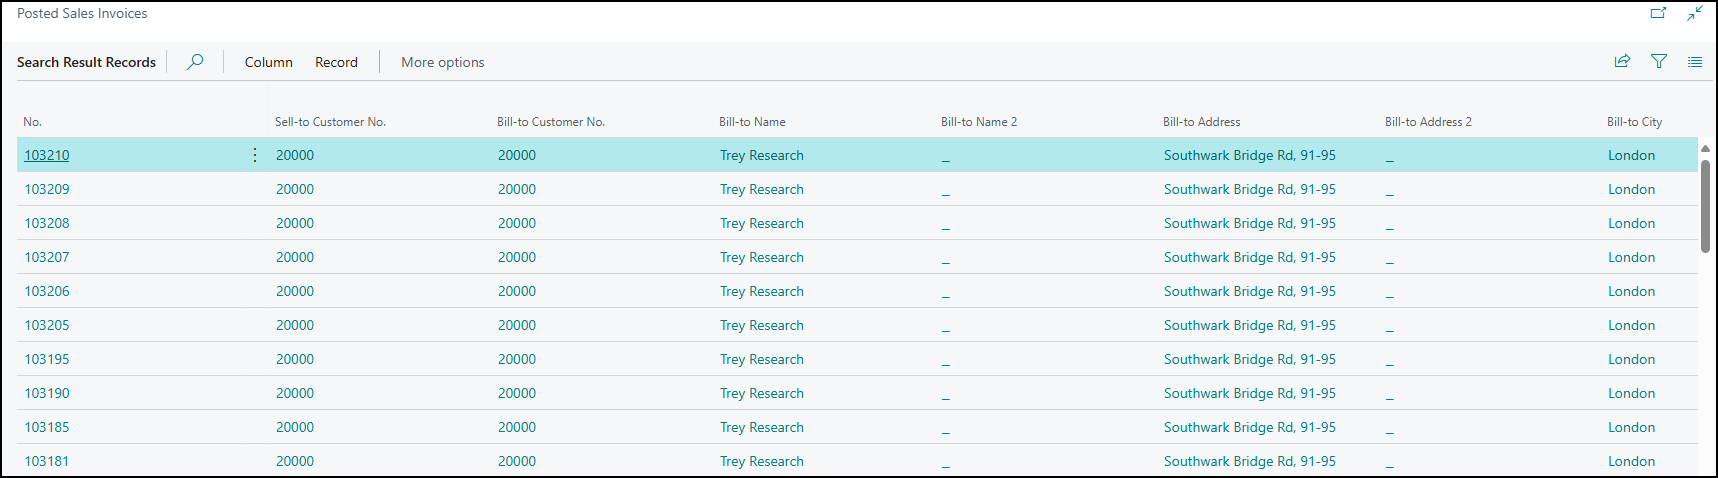
Show all results gives:
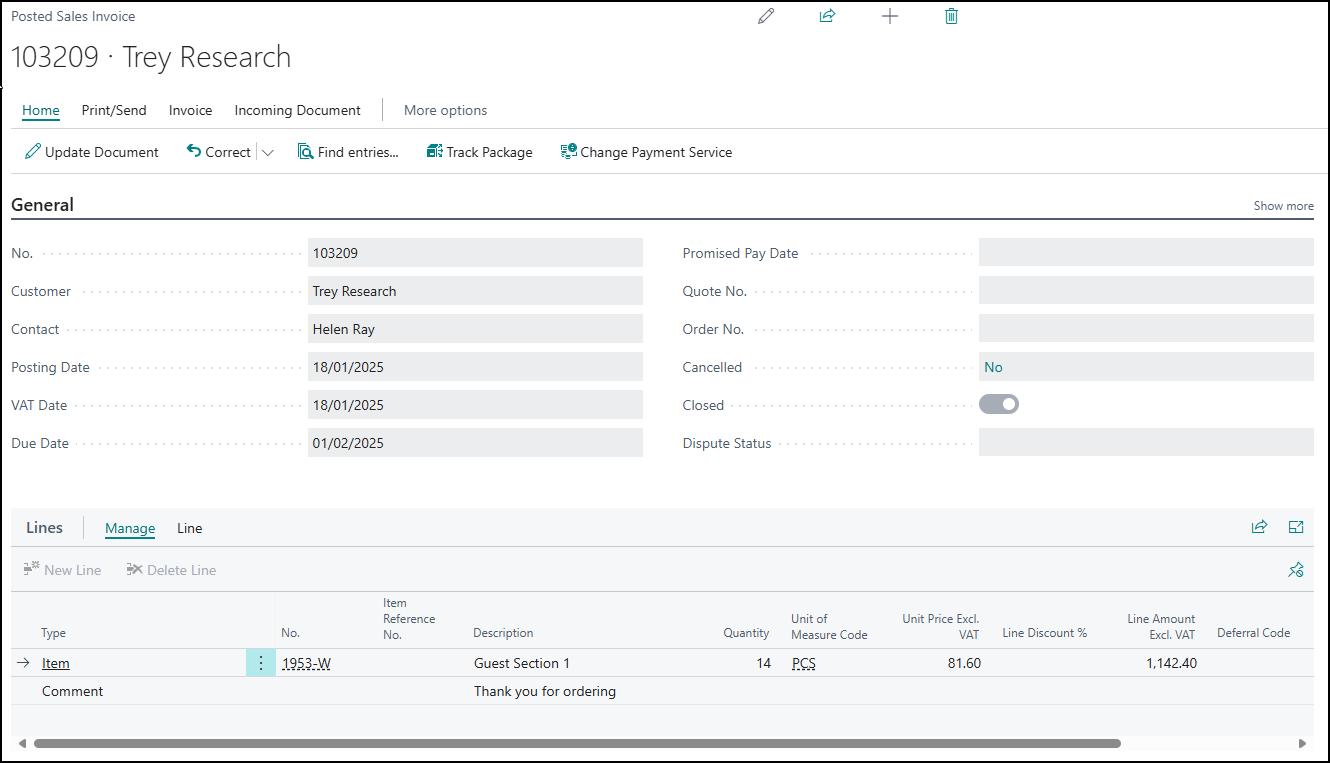
While opening a document would do just that:
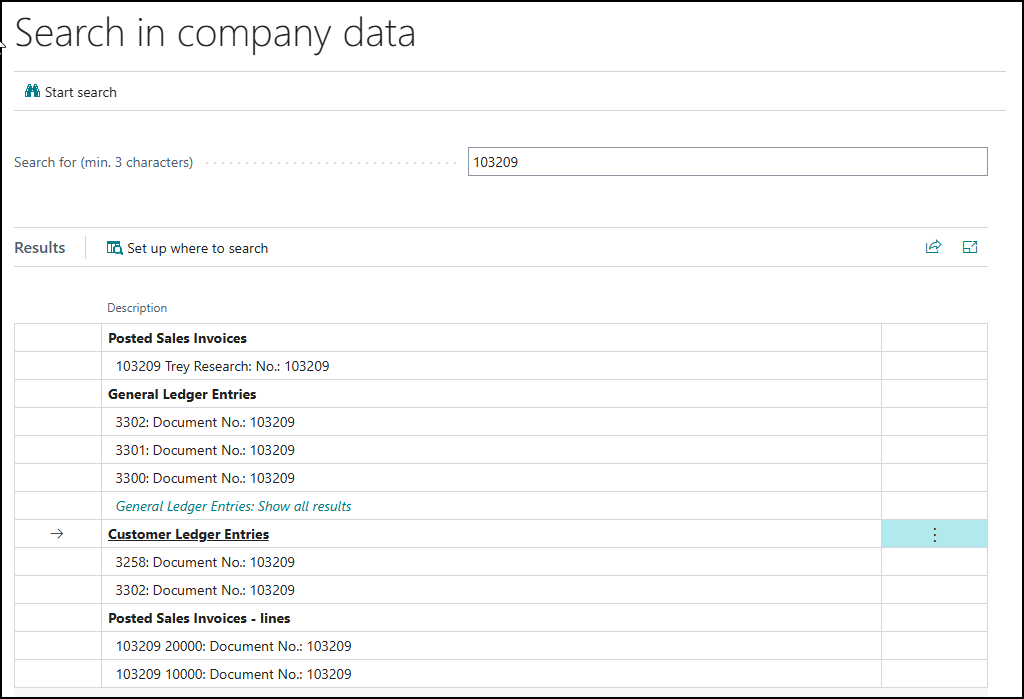
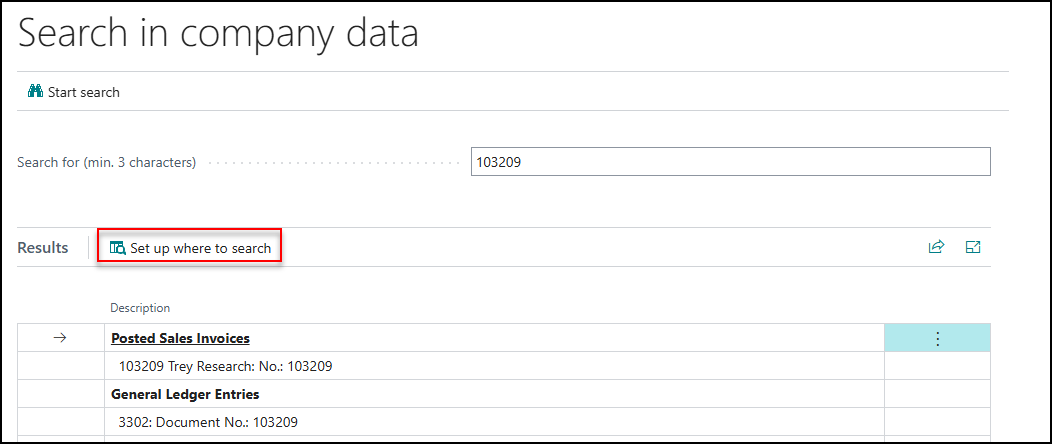
We could have just searched based on that Posted Sales Invoice number that we opened. That would have given us said invoice, but also the General/Customer Ledger Entries and more.
(It’s also worth noting that if you change the search, use Start search in the upper left to search based on the text!)
If you’re searching and not finding what you’re looking for, there are a couple of things to watch out for.
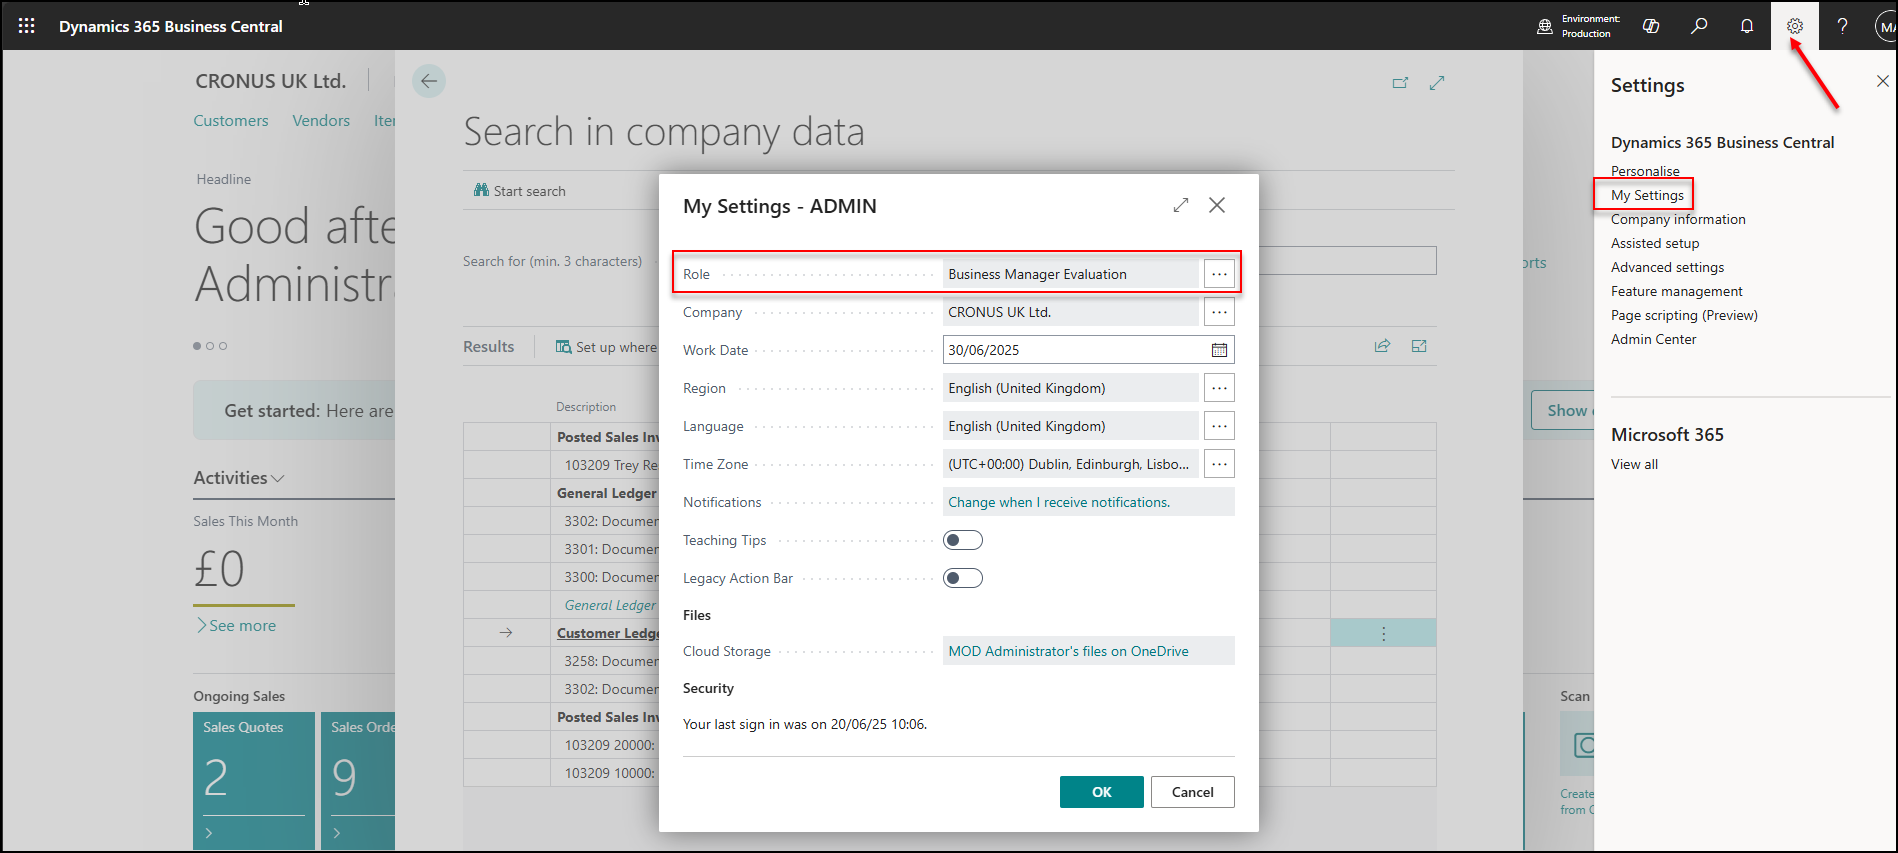
What areas of the system it searches against depends on what your Role is. (You can check your role via the cog wheel in the upper right > My Settings > Role.)
You’ll notice that when you’re using the search, there’s an option for set up where to search:
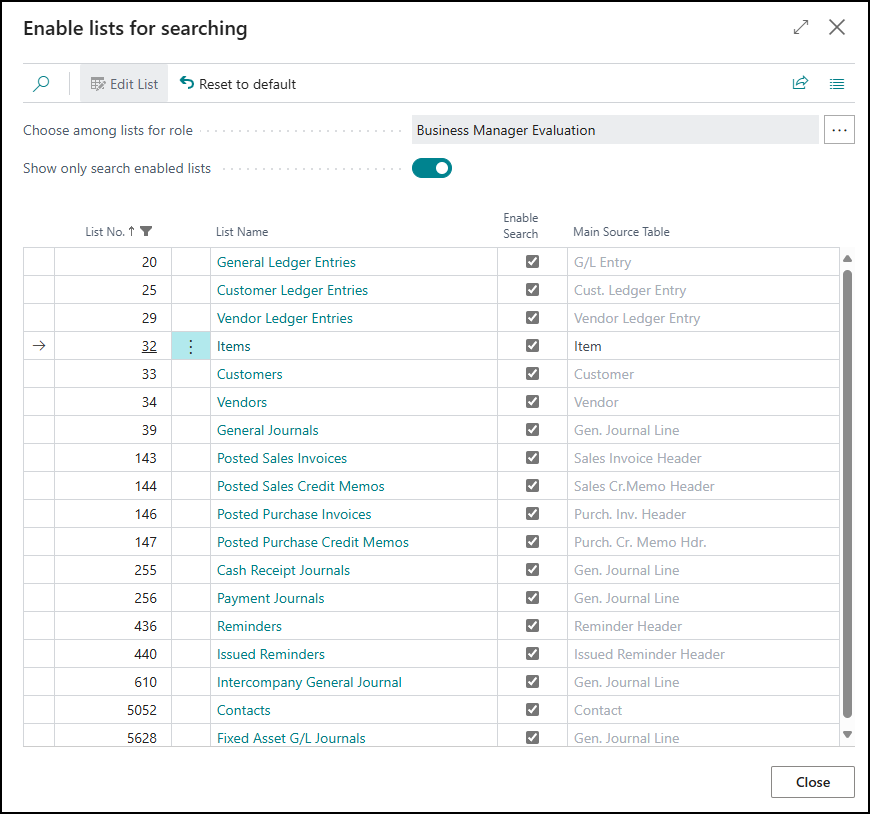
For example, Business Manager (Evaluation or otherwise) will search against these areas:
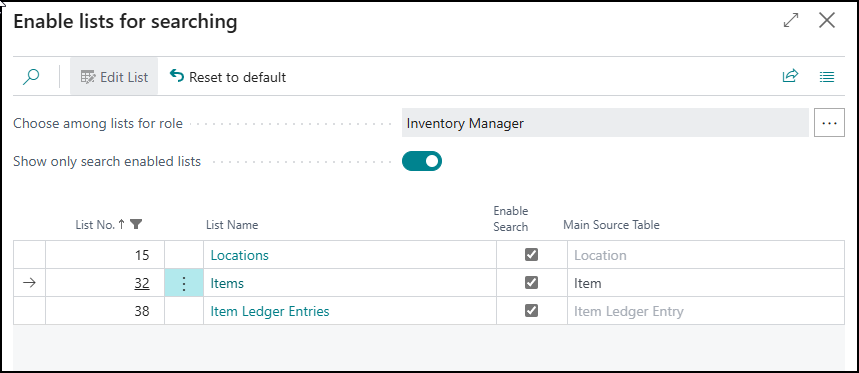
While Inventory Manager only searches against these:
You can use those three dots next to the role to answer the question of ‘what areas does this role search against?’ without having to swap your current role.
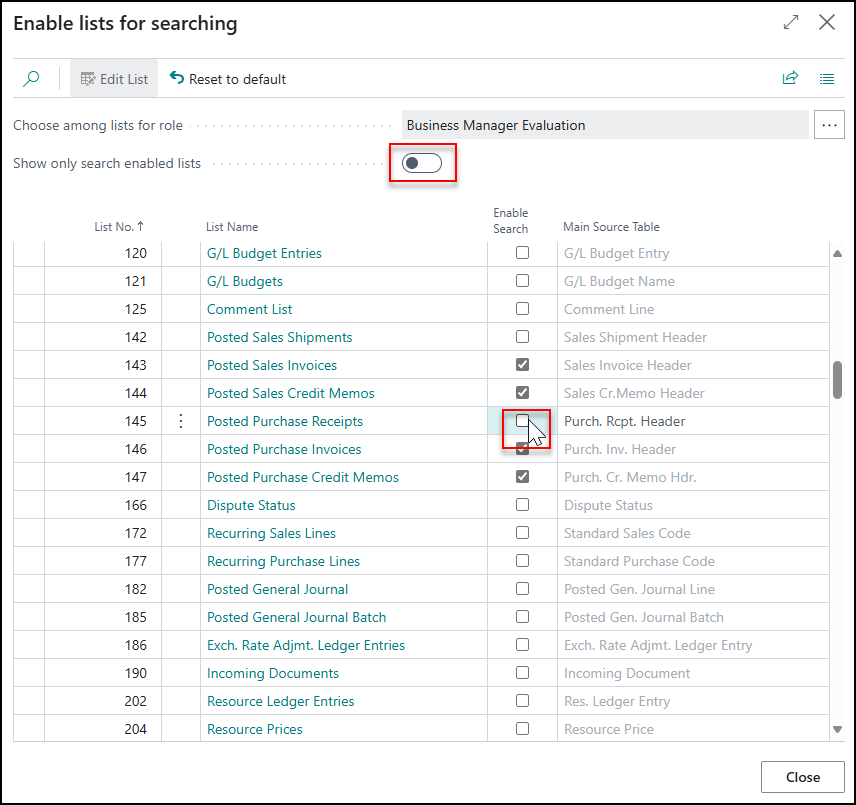
So, if your search isn’t finding what you want, just untick Show only search enabled lists, and you can set the area you’d like to turn on for searching via the Enable Search column. There are a lot of options here so might want to make use of the magnifying glass in the upper left to search the list. You’ll even be able to select areas associated with apps installed on Business Central.
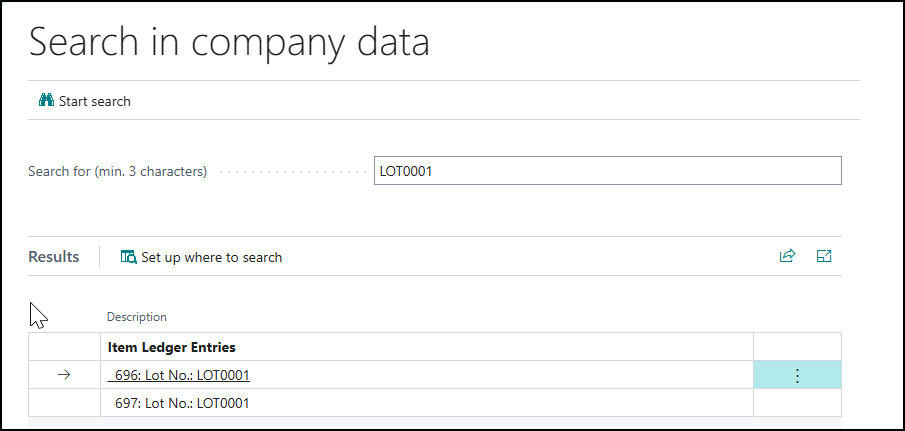
Now you’re free to find whatever you like! You could even configure this to search for references to particular Lot or Serial Numbers on relevant pages like the Item Ledger Entries. You could also consider adding in areas associated with Returns, Credit Memos, or Bank Account Reconciliations, for example, if that would be relevant to your role.
Note: the more you have enabled for searching, the more intensive the search and longer it can take to provide the result you want.
Once something is enabled, it’s enabled for all the users using that Role, as well.
So, there we have it! That’s how you can use and get more out of the search in company data option within Business Central. Keep an eye on our blog for more tips and tricks and, if you have any questions about how Tecman can enhance your Business Central system, please get in touch today.