


Welcome to the first in a mini-series of blog posts where we attempt to change MTD from Making Tax Difficult (Digital) to Making Tax Delightfully easy. Because tax shouldn’t be taxing, as someone once said.
Throughout the series, we’ll be giving you some quick wins and best practices to make your VAT return a smoother and less worrying process.
(Please note: this article is not VAT advice – we suggest you get that from an appropriate source. This is about how Microsoft Dynamics 365 Business Central can work better to present the VAT information from your system.)
This post may be light-hearted but the intention is serious: to save you time and make things clearer in your VAT Statement in Business Central, so the reconciliation process prior to submission is easier and quicker.
If you are using a VAT statement that is the Default from Microsoft, then this is making your life harder than it needs to be as it has pointless subtotals and is quite unclear which Boxes which pieces of information will be placed in. We can fix this!
Before we begin, some suggestions... It is always best to try things out in a Sandbox first, then you can check the end results with no risk. Secondly, before starting, export your current VAT Statement to Excel so you have a record and can use this for cross reference to look back at.
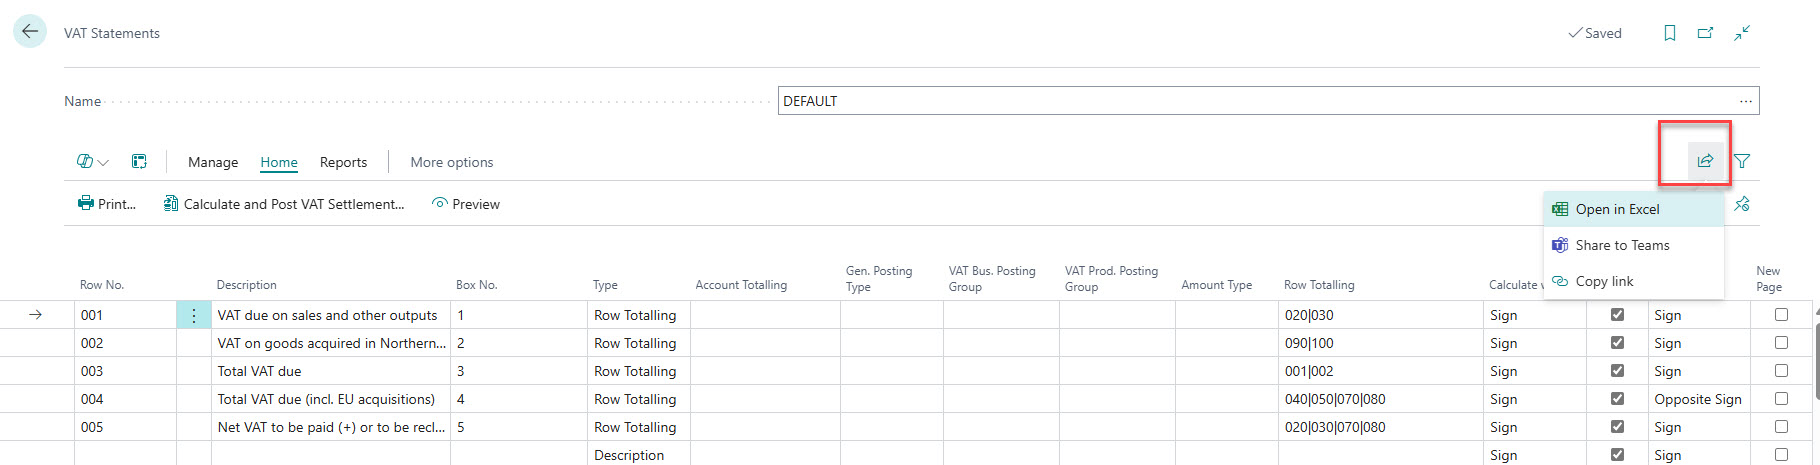
To do this, go to your VAT Statements list page, choose you current VAT Statement, choose Edit VAT Statement then on the statement itself use the share button to Open in Excel. Keep this file for reference.
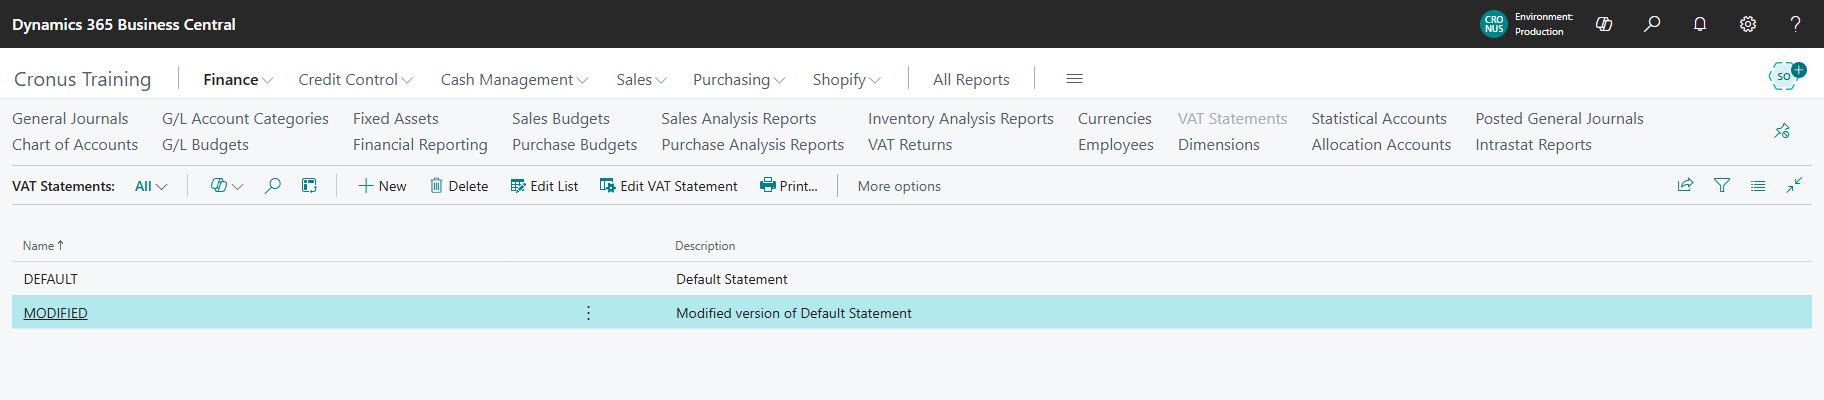
You may also want to create a duplicate of the VAT statement in your live company. This means you can check that the new version gives the same answers as your current one. This is optional and can be done fairly easily by creating a new line on the VAT Statements page using the New option, then copying the lines out of the old one into your new copy using Ctrl+C and then Ctrl+V.
(We would recommend doing it in chunks as not all the lines will be selected if you try to do it all in one go. It’s a bit of swapping back and forth but it works.)
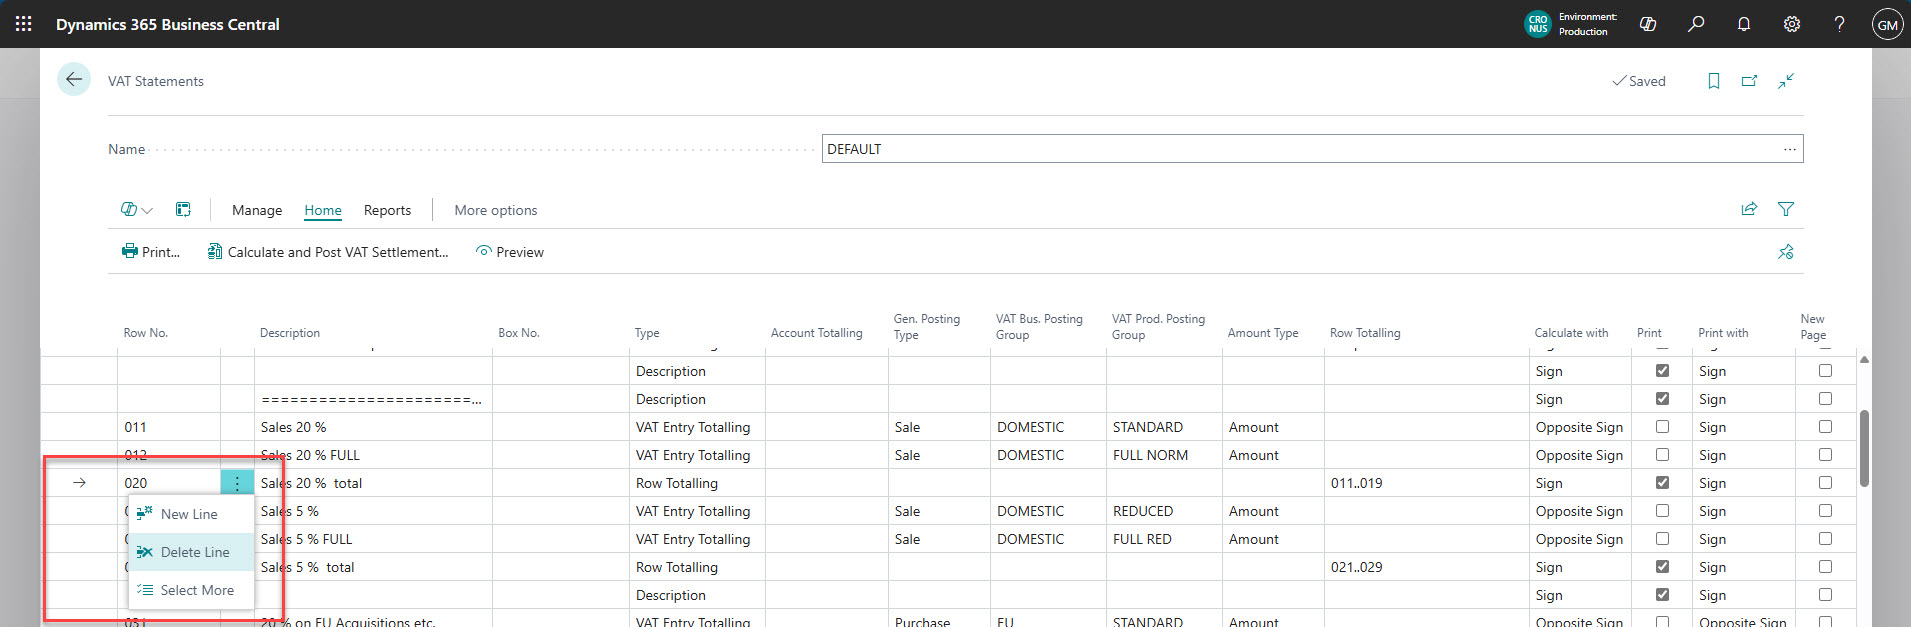
Let’s begin! So, the Default VAT Statement from Microsoft has more subtotals than even an accountant needs! Most of them are utterly pointless and just reduce the readability of the statement.
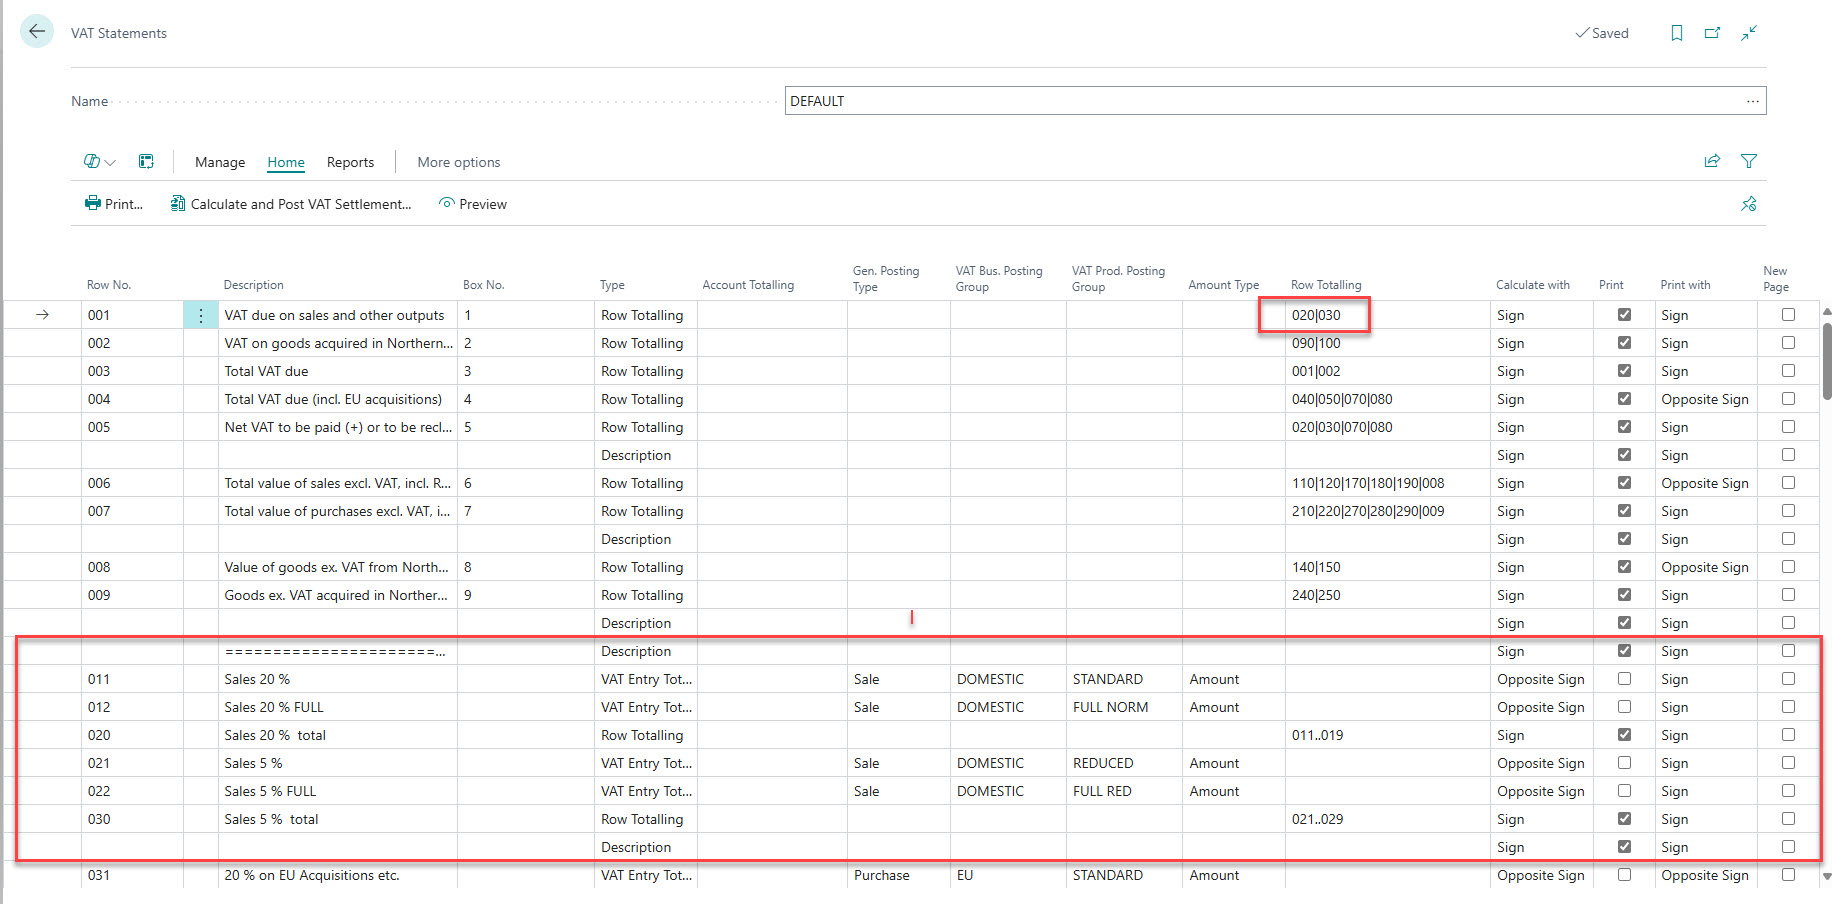
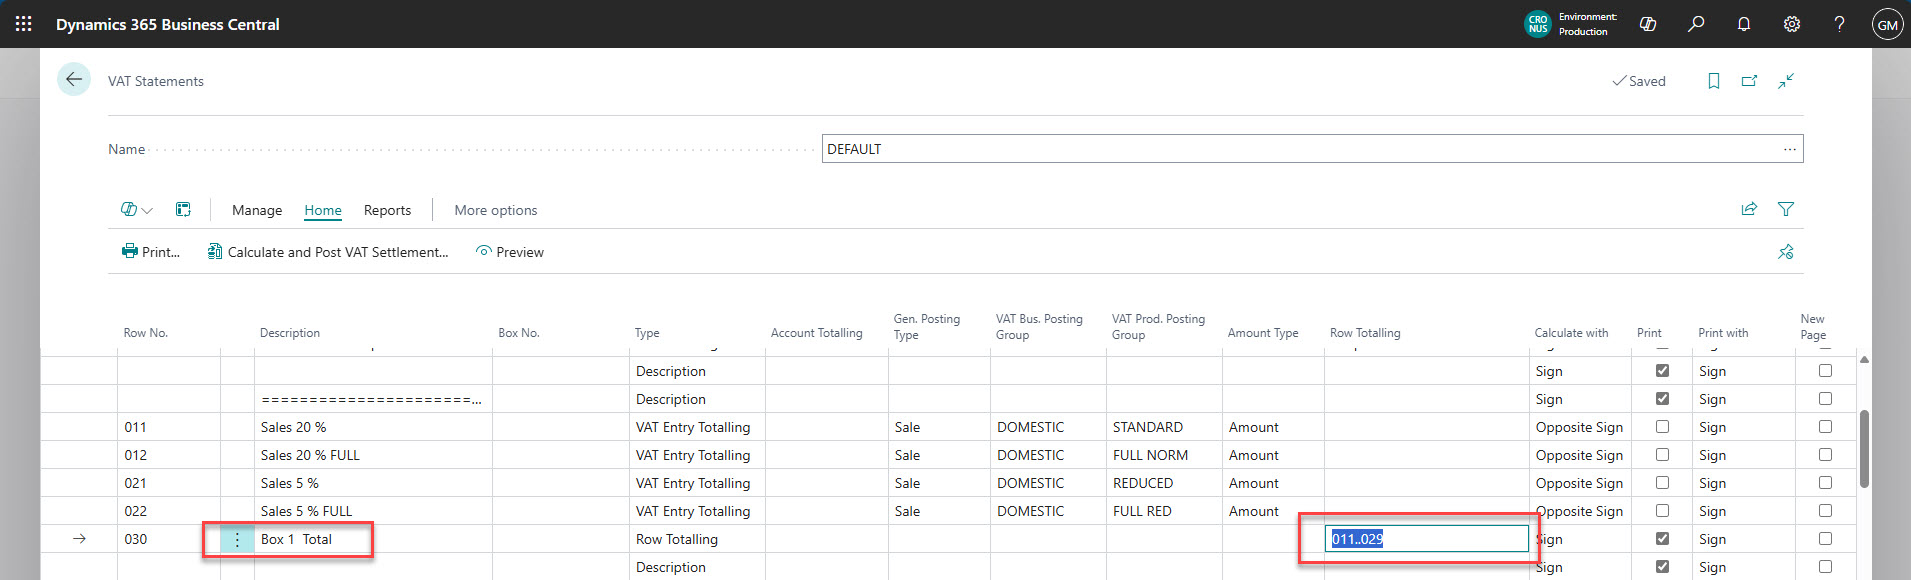
Here we see the large section in red that relates to Box 1, presenting the Sales VAT or Output tax. The job of this part of the VAT Statement is to filter the appropriate VAT Entries, group them, total them and then the Row Totalling in the top section presents that total as the actual Box 1 figure.
You now have a cleaner view!
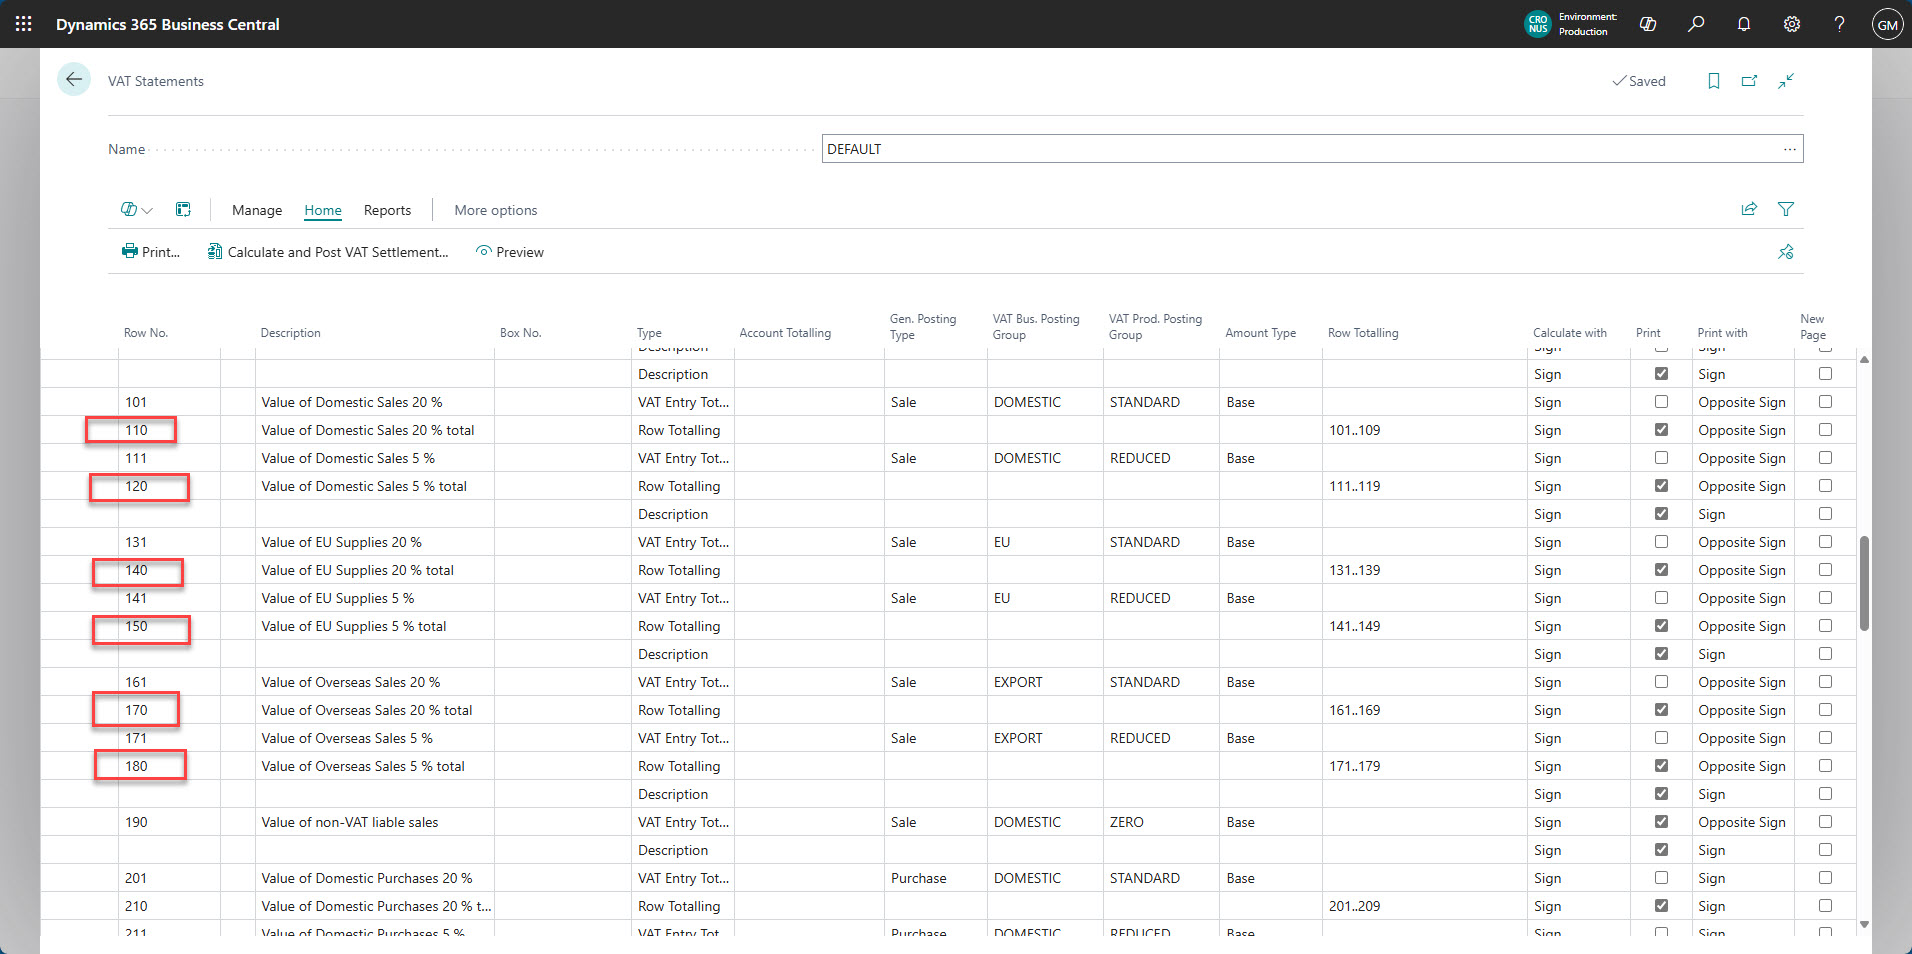
It’s the same for the Box 6 section that picks up the net value of your sales (the Base) – it’s an unreadable mess! Remove the excessive sub-totals, add in a Description line and it all looks far less intimidating and a lot more readable.
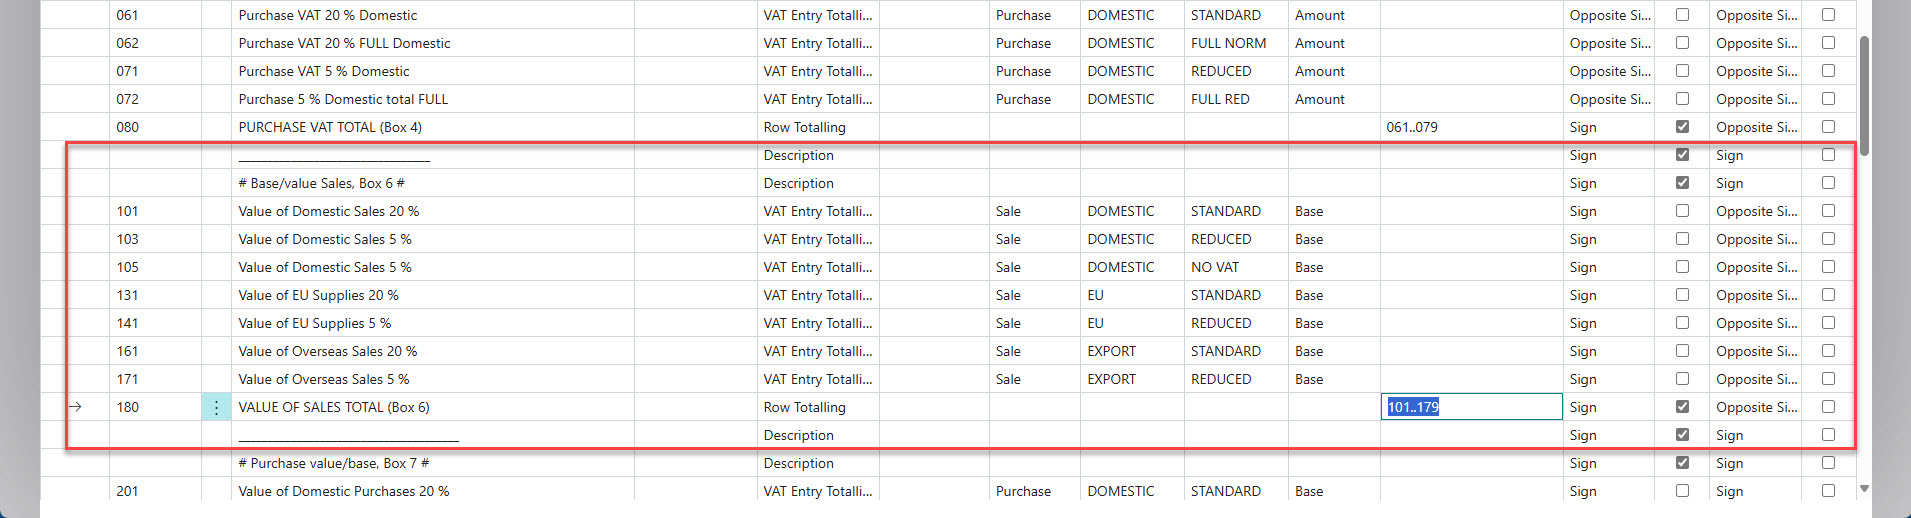
After cleaning it up, it’ll be much easier to read...
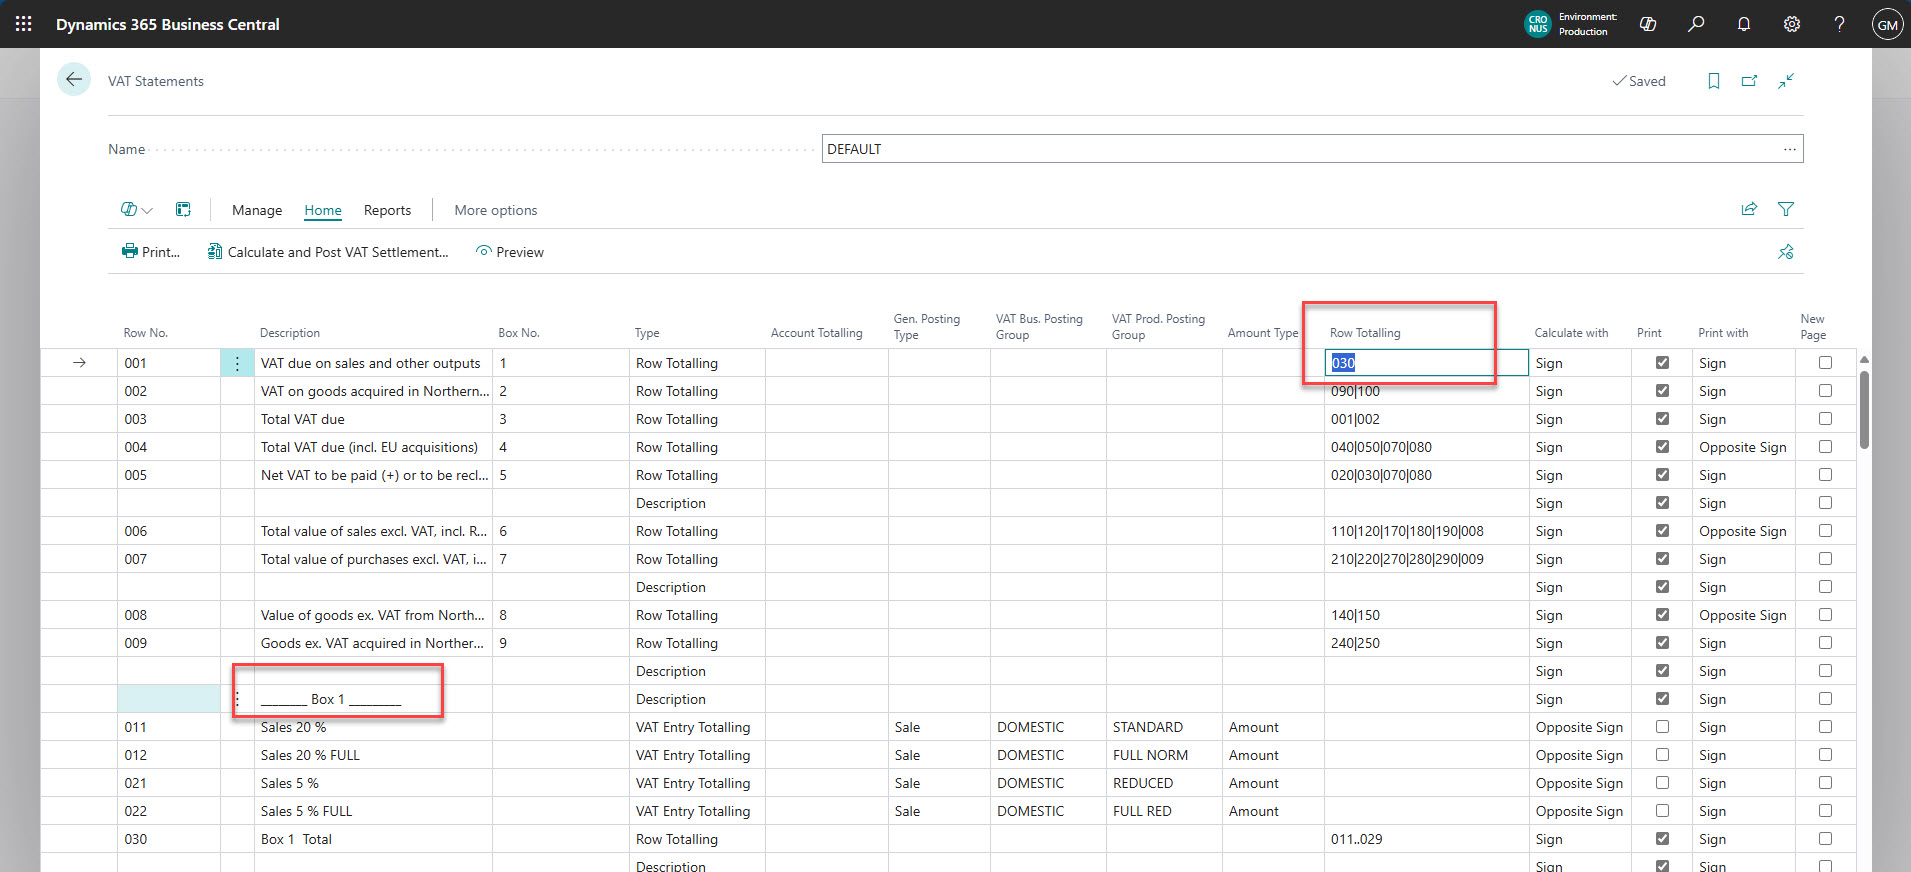
All these Row Totals are being referenced in the top section and you will notice that the Default VAT Statement is unchanged since Brexit and therefore includes entries in Boxes 2, 8 and 9 that are now only meant to be used by businesses established in Northern Ireland. We will look at that in a later blog post.
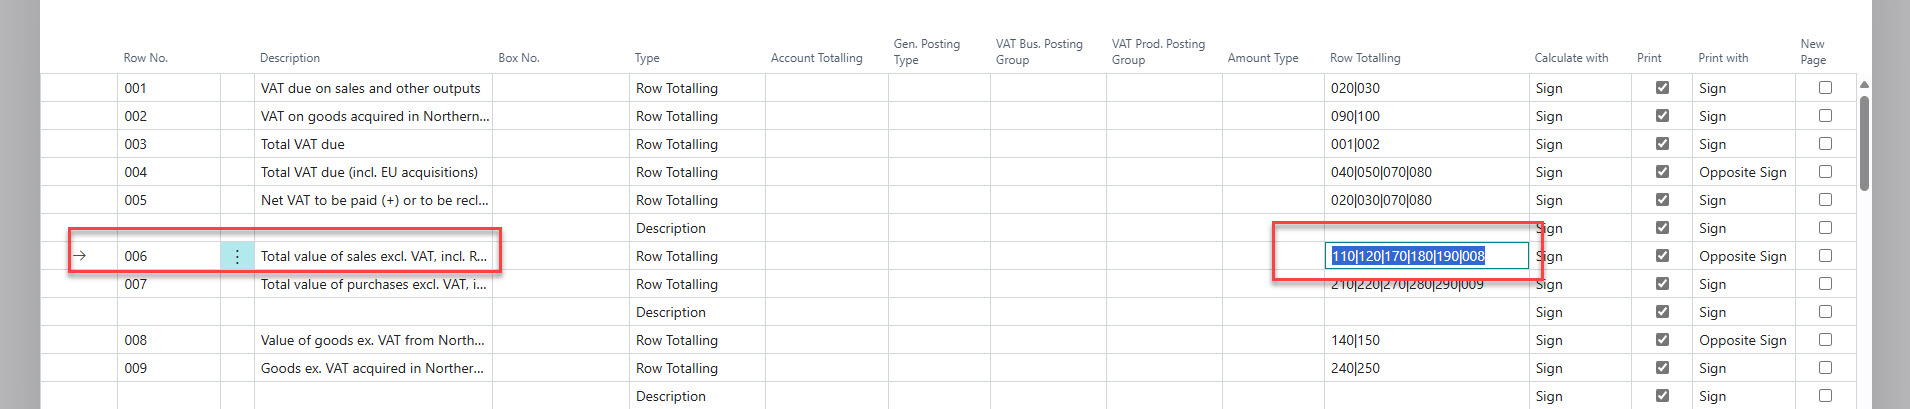
When we remove the subtotals, we need to update this top section so it references the correct rows.

Now you can do the same for your Box 4 and Box 7 that handle the Purchase VAT/input tax. Take it from a mess to a clean view. It’s the same process: review the Row Totalling lines, check how these are being used at the top, remove the superfluous subtotals, update the final total for each section and make sure that it is referenced in the top section.
In all of these examples, we have not changed any of the filter lines. The ones that say VAT Entry Totalling mean we are safe in the knowledge that all of the VAT Entries that were being picked up before still will be, and as long as the Row Totalling column for each section is updated correctly, your VAT statement will give the same answer as it did before, just in an easier to read format. But now use the Preview button to check it.
Hopefully this helps things run more smoothly when you come to reconcile your VAT next quarter. If you would like to talk to us about getting tailored help with your Business Central challenges, then please get in touch with the team.