


In a recent Microsoft Dynamics 365 CRM project, a client we were working with wanted a solution to help structure SharePoint attachments related to an opportunity. The process of an opportunity requires you to capture specific information that ensured if the opportunity was won, it could progress to a quote and on to an order.
In the past, staff had attached files (from within Microsoft Dynamics 365 CRM into SharePoint) to the opportunity and manually created their own folder structure, which was messy and time-consuming. The opportunity form itself has yes/no fields such as ‘Attached MSA Agreement’, but these attachments would just get dumped in the SharePoint library and became hard to find over time.
After a discussion to outline the specifics, it was decided that when an opportunity record was created, they wanted to make the following folders automatically, so if a staff member looked at the related documents, the following folders would be there:
1. Customer Documents
2. MSA Agreement
3. Signed Documents
Having dealt with SharePoint integration in the past, we were aware of its cons. The main one being, even if a table (entity) is enabled for SharePoint integration, the SharePoint folder is not actually created until you ‘load’ the Files or Documents tab on the form. To circumvent this drawback, we needed to use Power Automate to bypass this manual step and create the folders in question.
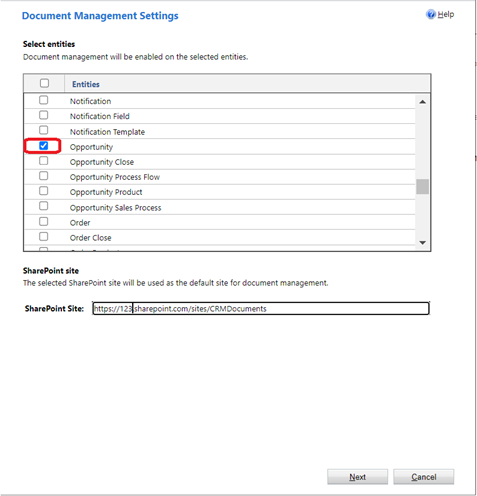
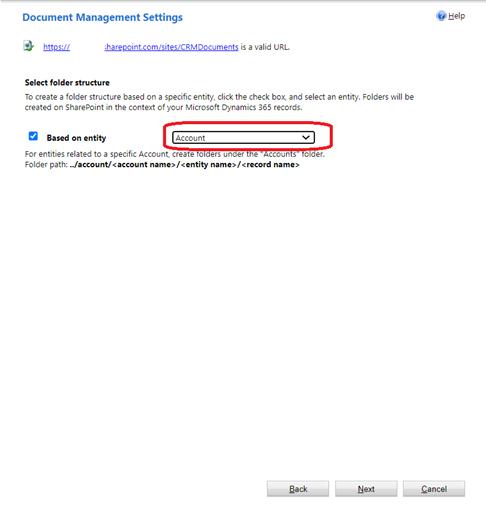
First of all, we looked that the SharePoint integration to check opportunities were included as a SharePoint enabled table. Then we needed to find out if it was based on the Contact or Account table, as this would determine the SharePoint folder path we needed to create.
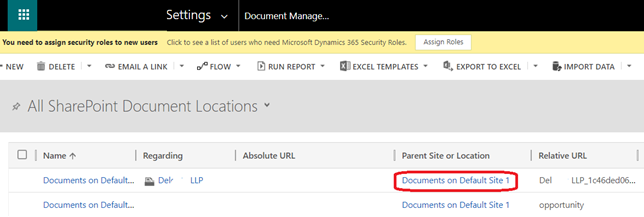
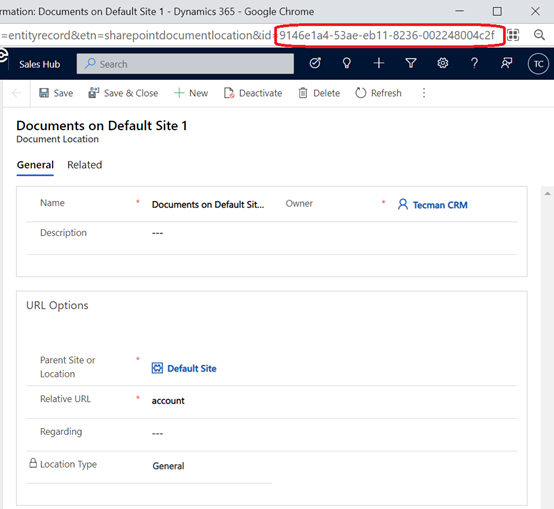
The final piece of information we needed was the SharePoint Document Location guide. This is required when a new SharePoint folder is created automatically from Microsoft Dynamics 365 CRM. There is also a Document Location record created, which means when you look at the Files tab on say an ‘opportunity', the Document Location record linked to it dictates where in SharePoint you are.
We needed the Default Site Guide, which can be found here.
Now with this information, we started to build the flow.
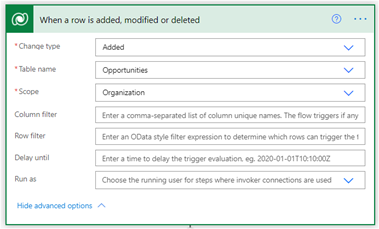
Naturally, the trigger was ‘when an opportunity is added’.
The next step was to create the folders required in SharePoint.
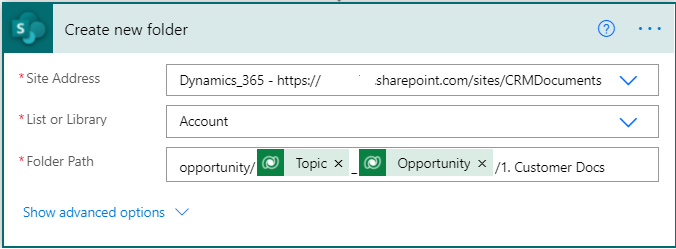
In ‘Folder Path’, we created it as follows:
https://example.sharepoint.com/sites/crmdocuments/account/opportuntity/opportunityname_guid oftheopportunity/1. Customer Docs
The reason we used topic_opportunityguid is that, by default, when any new record is created in SharePoint from CRM, it always appends the guid of the record. This is to stop any two folders from having the same name.
Now the next step is the important one as this is where we are creating the document location in CRM that points to the opportunity folder that was just created.

Again looking at the Relative URL, you will find we have it set as accountname_guid. Below is an example of what it looks like in Document Management in CRM.

The last step was related to the new Opportunity record with the SharePoint DocumentLlocation created in the previous step.
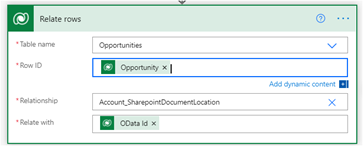
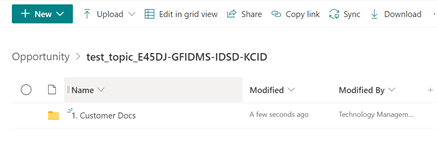
With all that in place, the SharePoint subfolders are automatically created every time a new opportunity is created.
This is just one example of extending the functionality between Microsoft Dynamics 365 CRM and SharePoint. Although the integration between the two platforms has been great for CRM storage, other simple ideas such as the example above can really help businesses manage and structure their data.
For more information on Microsoft Dynamics 365 CRM, please contact your Account Manager today.