


As a Microsoft Dynamics 365 CRM and Power Platform Consultant when I create a new field either on an out of the box table, or as Custom table, I (naturally) assume every user of the system will know what data to enter into that field.
But what if the data required is more complex? An example might be a description field where I want to help the user to add the correct type of information.
How can you let them know what information the business expects?
The answer is a tooltip! A tooltip is a backend setting which we can fill out so when your user hovers over a field, it will define or describe what type of information is expected or even give them ideas of what to enter.
Let’s illustrate this from both the front end of CRM and the back end. First, let’s see what a tooltips looks like to your users.
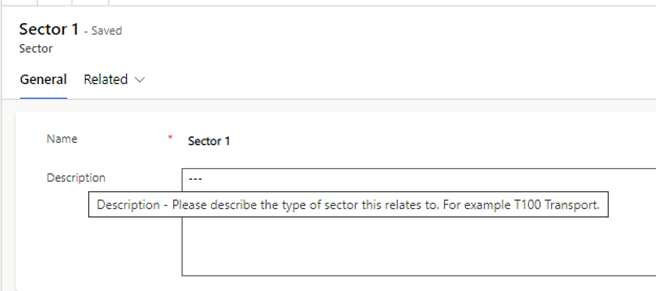
Your user can simply hover over a field, like Description in the above screenshot, to get a definition of what this field means.
Here’s how to set up a tooltip on the back end:
• Go to make.powerapps.com
• Within the desired solution file, open the field where you need to add or edit a tooltip.
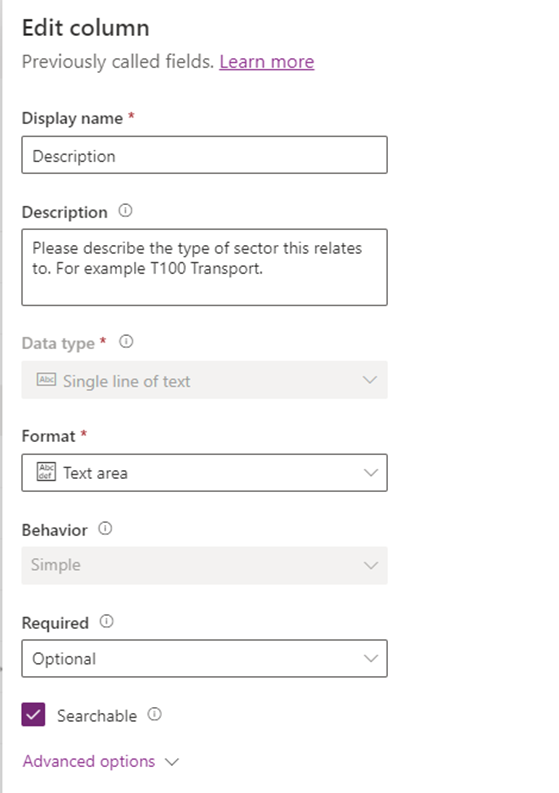
• In the Description field, enter the text that should appear when a user hovers over a field in Dynamics 365.
And that’s it! Simple yes? We all want to encourage user adoption of our Dynamics 365 system. Tooltips are a very simple way to help that little bit.
It’s also worth noting that these tooltips can also be enabled on Power Portals to help guide users!
If you feel like your CRM system could use this type of guidance, please reach out to your account manager.