


If you have previously purchased the Clever Essentials Bundle you will already have access to the Clever Data Validation Application, but you may not be getting the most from it.
Clever Data Validation can easily check data automatically without needing to depend on manual interference which may cause data discrepancies further down the line. Although in this blog we will be discussing how it can be used for Brexit, we also run a course on Data Validation, which will help you get the most from the application with more user case scenarios.
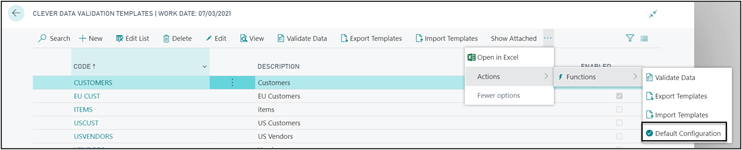
Upon installing Data Validation, you will first need to run the Default Configuration. This can be found by navigating to Clever Data Validation Templates. From there, select the three dots, actions, functions and then Default Configuration. This will bring across some pre-made templates for you but will also bring across the background setup required for the EU Template we will be creating.
Next, select New on the Data Validation Templates Page.
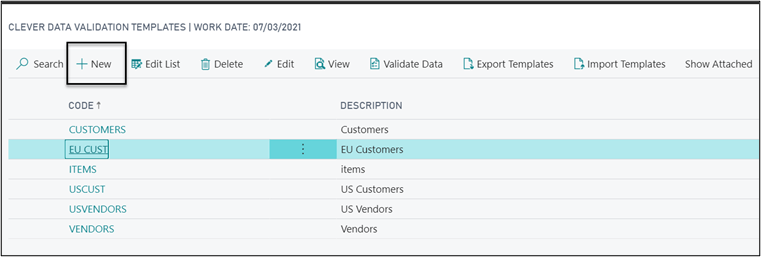
Now, populate the Code and Description fields with easily identifiable names and then select the drop-down next to Table No. As I am validating against the Vendor Table, I have chosen Table 23, which has populated the Table Caption for us.
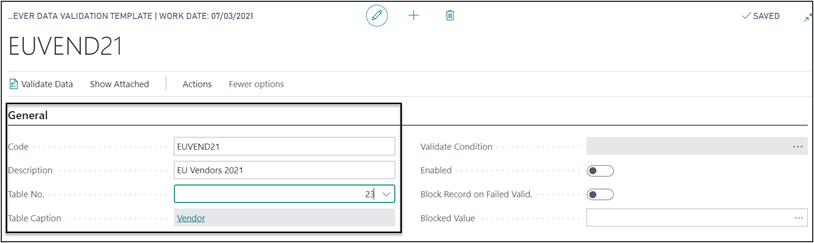
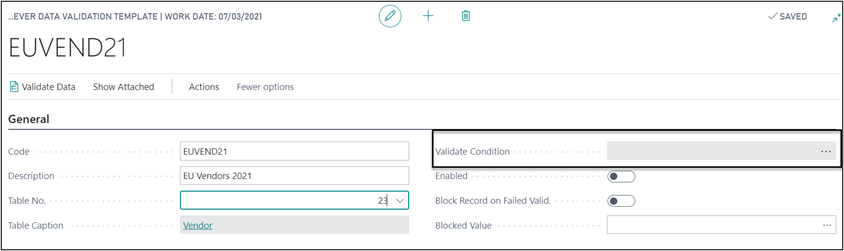
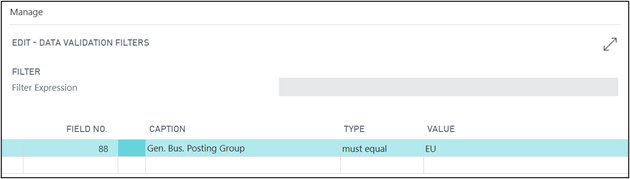
As this will only be affecting EU Vendors, we will need to filter the validation to only include EU Vendors. To set this filter, select the three dots on the Validate Condition field.
This will present you with the below page. Here you will need to set a filter that is applicable for all EU Vendors. In this example, I have set a filter stating that the Vendor’s General Business Posting Group field must be equal to EU for the data validation process to pick the Vendor up.
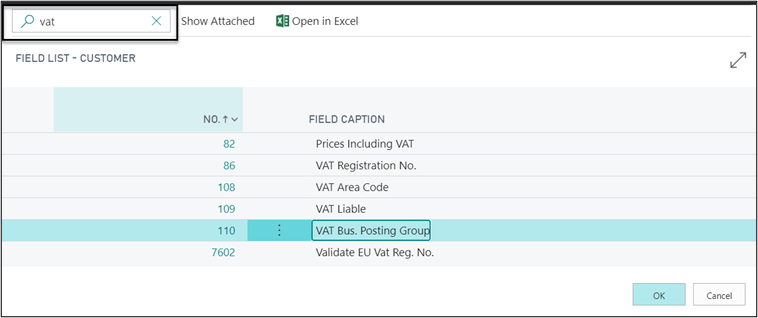
Moving back to the Validation Template, let’s move down to the Data Validation Rules FastTab and select which Field No. we will be validating. You can select to validate multiple at this point, but again we just want to validate the VAT Business Posting Group. To select a Field No. select the ellipses (three dots) icon on the field.

If you’re unsure of the Field No. you can search for the field you wish to use. Here I’ve searched for VAT and have selected the VAT Bus. Posting Group.
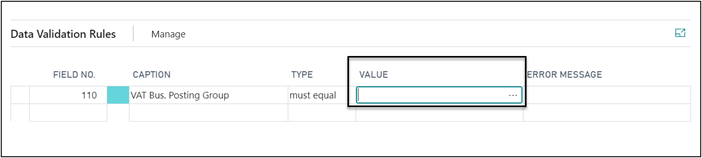
As you can see the Caption automatically populates based on the Field No. and I’ve set the Type to must equal. From there, select the ellipses (three dots) icon on the Value field.
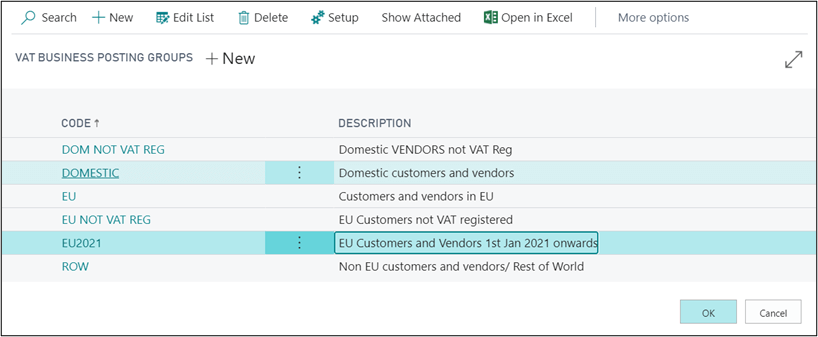
Here you will be presented with all available VAT Business Posting Groups. I have selected EU2021 so that I can ensure that this value is selected on my Vendors.
Now you can manually enter an Error Message that will appear after running the validation process. In this example, I’ve just entered ‘Please amend VAT Business Posting Group’.

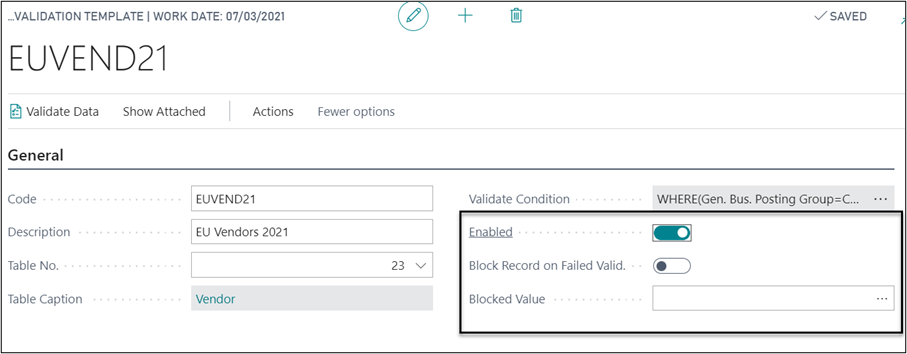
Once you’re happy with the filters that have been set on the Template, you must now enable it to run the process. You may also wish to block any Vendor Records that fail the validation to prevent users from accidentally creating documents using the old Posting Setup. If you enable blocking, you must also drop down on the Blocked Value Field and determine whether to block for Payment or All.
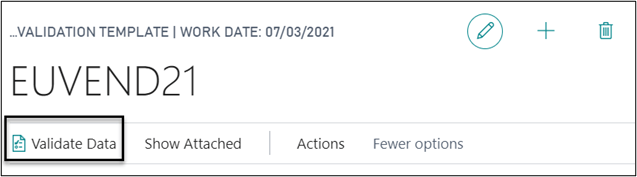
To run the Validation Process select Validate Data that can be found on the ribbon.
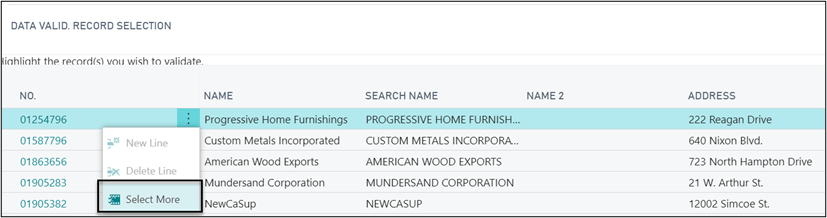
To Validate all records that fit the filter, select the ellipses (three dots) icon on a line and then choose Select More.
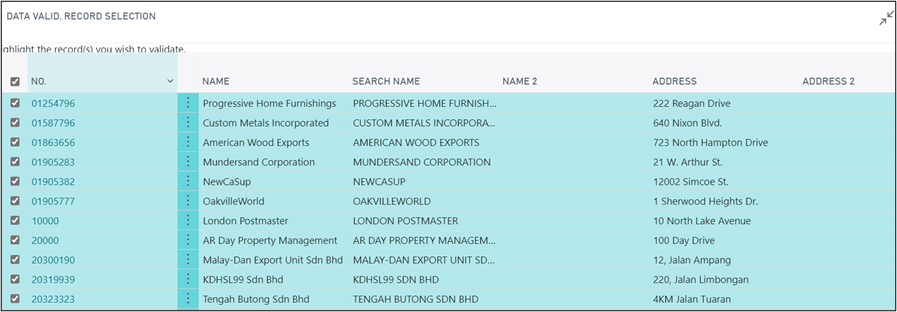
From there select the tick box found at the top of the page next to the No. field to highlight all entries, and select OK.
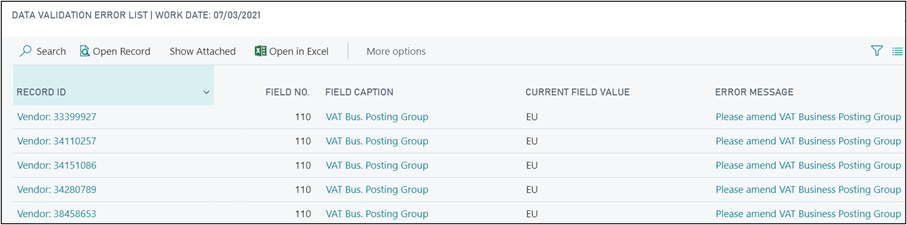
This will then create a Data Validation Error List that will contain all vendor records that need to be updated to the new VAT Business Posting Group. You may wish to export this to excel to help you work through the vendor records; you can open Vendor Cards directly from this list by selecting the Open Record action.
You can find out more about Clever Data Validation from our website https://www.cleverdynamics.com/ and this YouTube video playlist https://www.youtube.com/channel/UCdGgx-HGhIUhGhDPg-uWKAA/search?query=data%20validation or contact your Tecman Account Manager.