


Following on from my latest featured blog on the benefits of an Azure Load Balancer, next we’ll focus on the built in VM Disaster Recovery feature. This is a must in any scenario for me. The service is free and easy to set-up and you will only pay for the second Operating System disk.
In my demo here, I have a 3rd VM. Again, with Dynamics 365 Business Central 14 installed with Azure AD authentication and an external facing web client.
Note Public IP, CNAME (UKSouth) and FQDN:
I won't go into great technical detail but will demonstrate a failover and the behaviour of Dynamics 365 Business Central.
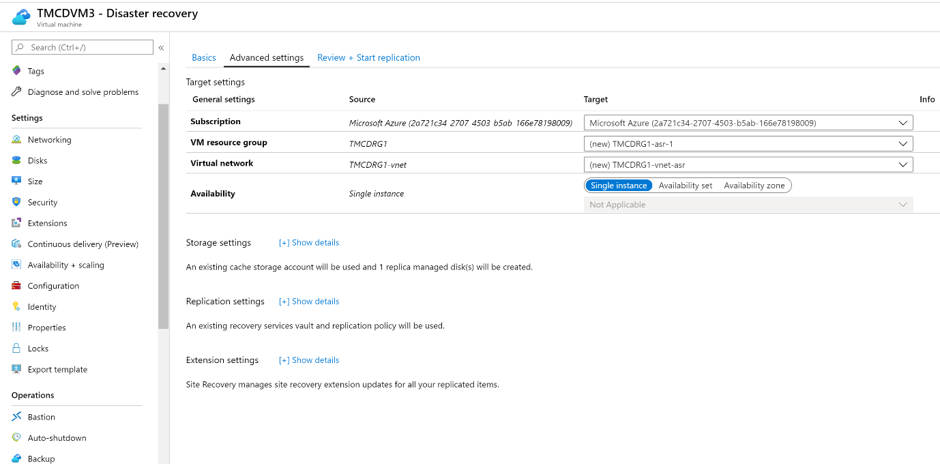
The initial DR setup couldn’t be easier. When you open ‘Disaster Recovery’ from the VM Management pane, you’ll be met with a simple set-up wizard, where you’ll be asked to select a Destination Location then Enable Replication. This wizard will now create a resource group and a VNET in the destination data centre (Same Subscription) and prepare the VM for replication. When the VM has replicated, you will also have a Virtual Hard Disk in the destination Resource Group that you will be charged for (you won’t pay compute for the VM, just storage for the managed disk).
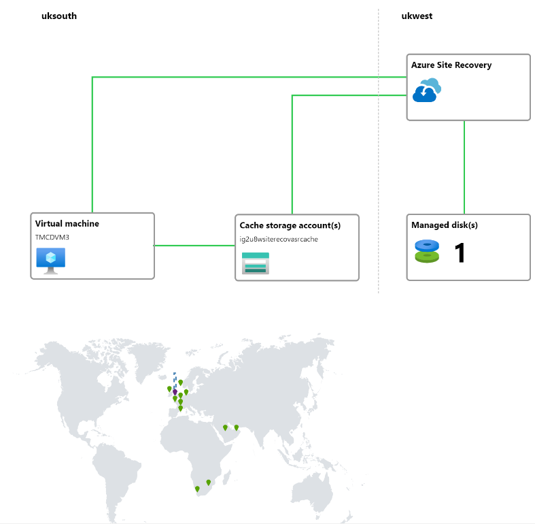
Once that’s setup you’ll see the resources in the source and destination folder and the Infrastructure Overview of your Disaster Recovery, as shown below:
Now, we’ll simulate a failover manually by hitting the Failover button on the Disaster Recovery Overview screen.
You’ll be asked to select a recovery point, so we’ll select the latest processed RPO that gives us a low Recovery Time objective, in our case, 4 mins prior to failover.
If the VM is still running it will power off and start the DR process. Ours took less than 10 minutes to fully fail over to the secondary region.
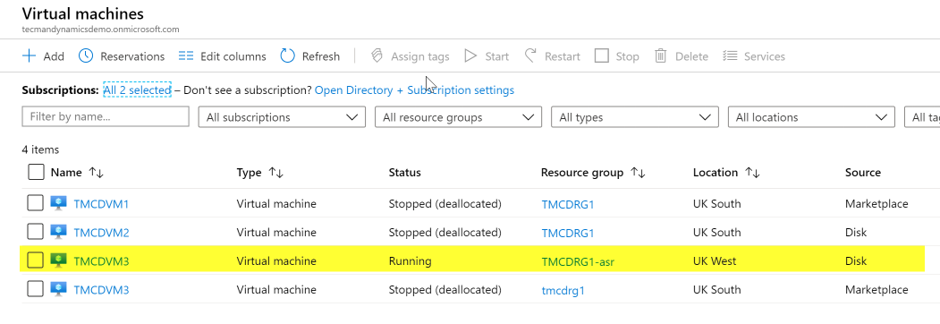
Once failover has finished, you’ll see a replica of your VM running in your destination region:
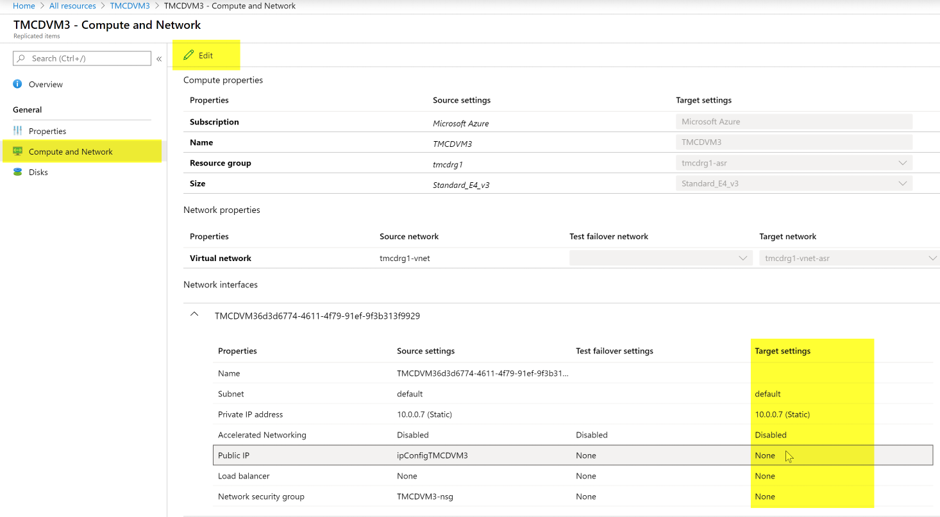
You’ll notice that the new VM doesn’t have a Private or Public IP Address, so you’ll need to create them manually, re-assign your network security group and change your DNS records to point to the new resource. However, a great tip here that could save you an hour or so of downtime while DNS propagates, is to pre-empt all of this by navigating to the Disaster Recovery Pane on the VM, select Compute and Network and configure all of your target networks VNET, Subnet and Public IP and CNAME records in advance!
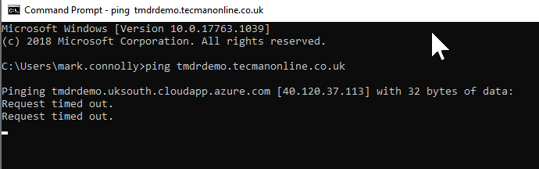
So, my VM has now failed over to UK West, a quick flush of my DNS cache and you’ll see I’m now resolving to the UKWest Datacentre, if I launch Dynamics 365 Business Central again, then I’m back online with the Middle Tier in the destination:

Our Azure Managed Services team is always here to support your business with the following: dedicated platform support, tailored back-ups and high availability, DNS, Certificate & Comms Management, patch management and Office 365 integration. Are you interested? Get in contact with us today.