


Change has been coming to the way automation within CRM works for a while now.
With the advent of Power Automate (Formerly Microsoft Flow), the way we as Dynamics 365 Consultants think about and handle automated task within CRM has changed significantly.
One of the more common automations that people set up and then just forget about are Automatic Record Creation rules and Service Level Agreements.
If your organisation has been using Dynamics 365 for any period of time, chances are, you set these up when the system was first installed, and they now just happen in the background and no one gives them any further thought.
With the 2020 Wave 2 roll out, Microsoft have introduced a handy little tool that will enable you to migrate these automations into Power Automate Flows, so you can get them turned into ‘Modern’ ARC’s & SLA’s and then go back to forgetting about them and letting them just run in the background.
And the even better news is that it does all the hard work for you, so don’t worry if you haven’t gotten to grips with Power Automate just yet.
You just need to follow the steps below.
Step 1:
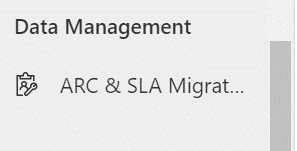
Navigate to ARC & SLA Migration in the Customer Service Hub.
Change the menu to the Service Management menu.
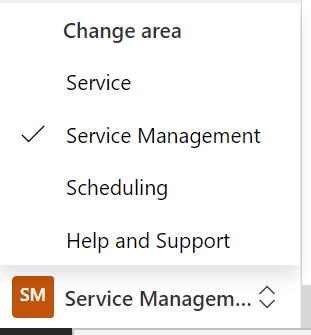
Then select the ARC & SLA Migration option.
Step 2:
Select the records you want to migrate.
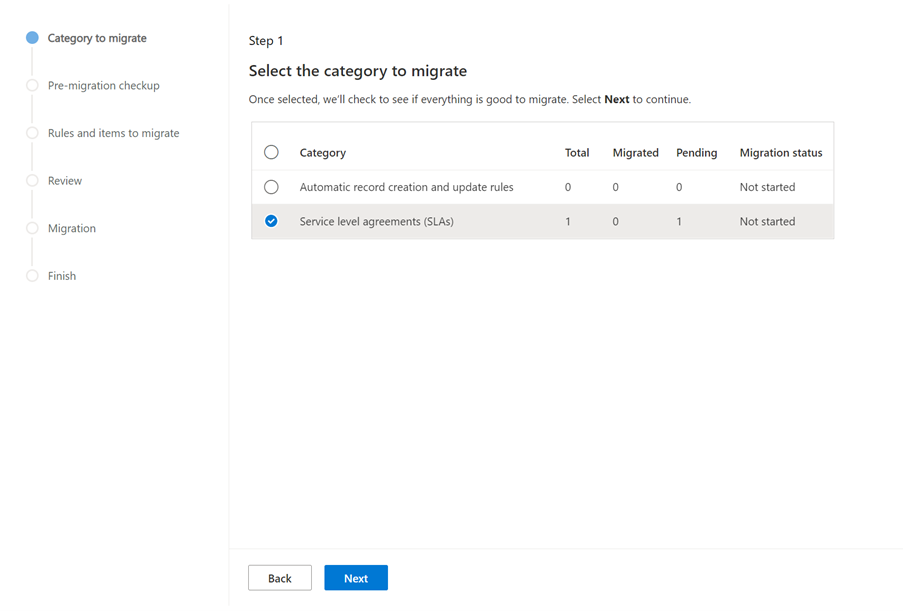
Click next.
Step 3:
Keeping following the steps to run the Pre-Migration Check Up. This will check that the tool is able to migrate your rules for you.
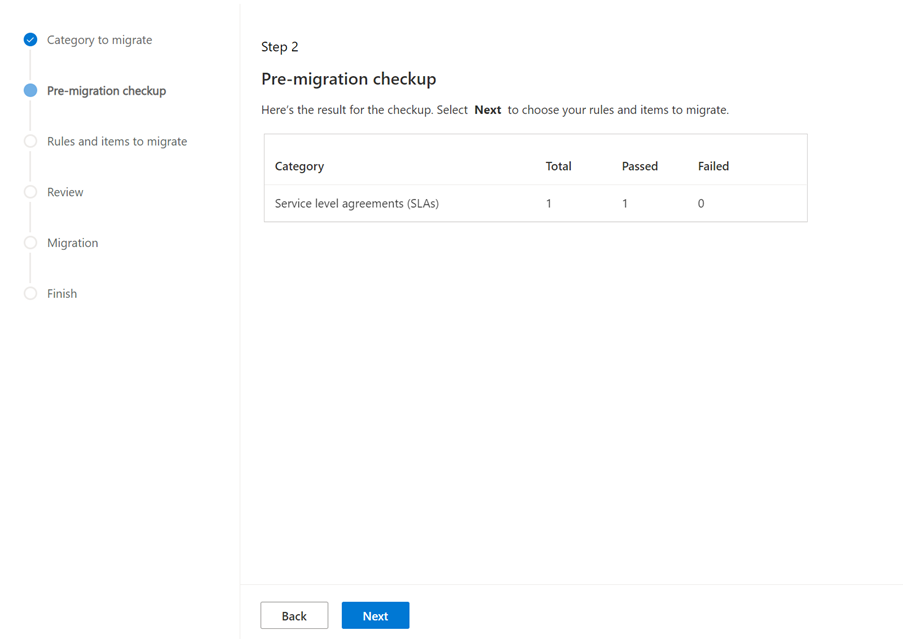
Any that fail this Pre-Migration check up most likely contains actions that couldn’t be translated into Flow steps and may require you to engage help to get these migrated if you are not familiar with Power Automate.
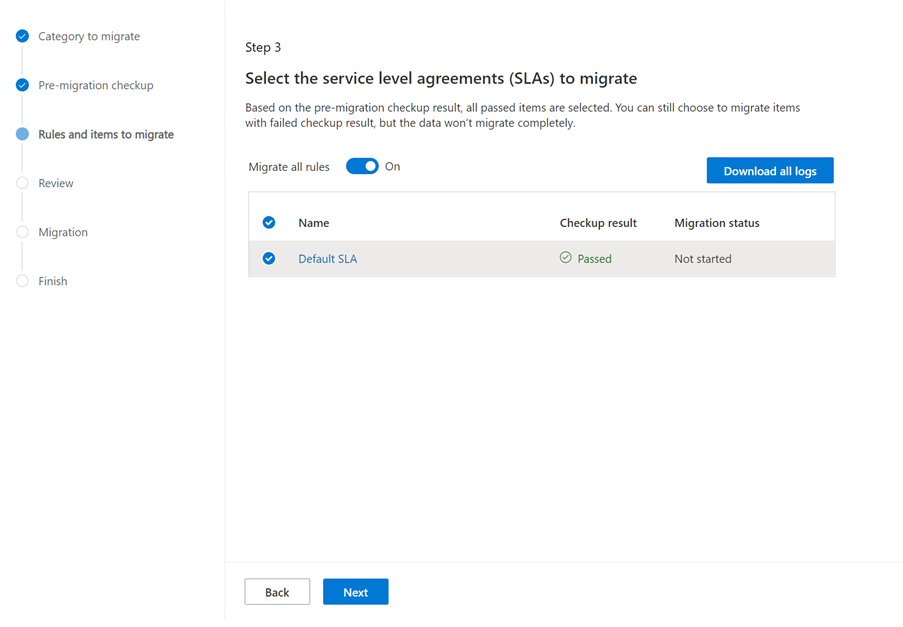
Step 4:
Here you choose which rules you want to migrate. There is also a select all option.
If you have a large number of different SLA’s or ARC’s, it is probably worth doing a few at a time.
Step 5:
The system will do another check on the individual SLA’s to make sure they are viable.
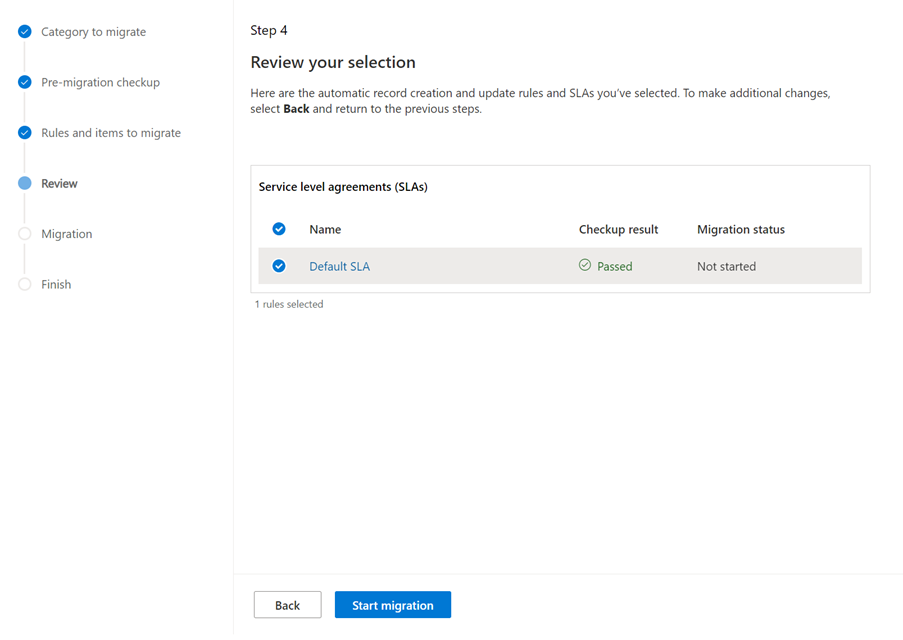
Click start migration.
Step 6:
The system will now run the migration. It provides a handy progress bar while it is converting the rules so you can keep an eye on how it is going.

Click Finish.
Step 7:
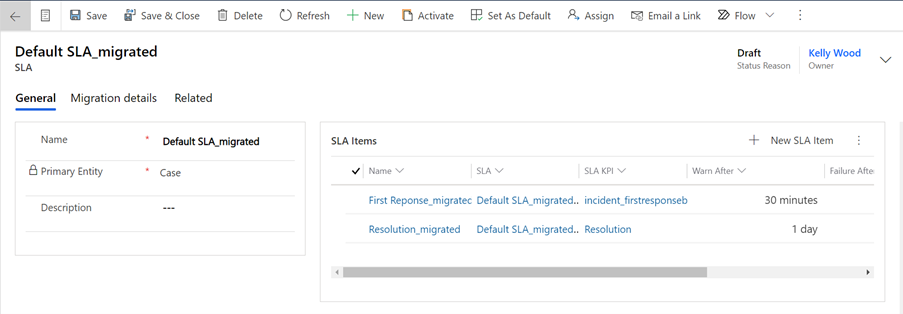
Go and check your newly migrated SLA’s or ARC’s.
They will be in a draft state, so you will need to reactivate them, and designate which one you would like to be the default rule.

Step 8:
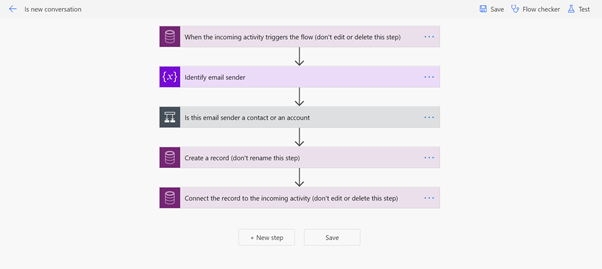
Check the Actions in Power Automate:
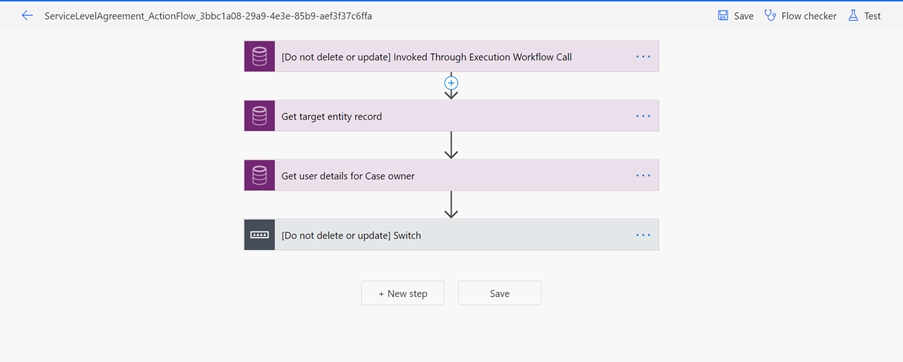
The system will have put all these steps in place for you. It is recommended that you do not amend any of these steps unless you are comfortable editing Flows.
The checks no diverge based on whether you are migrating Service Level Agreements or Automatic Creation Rules.
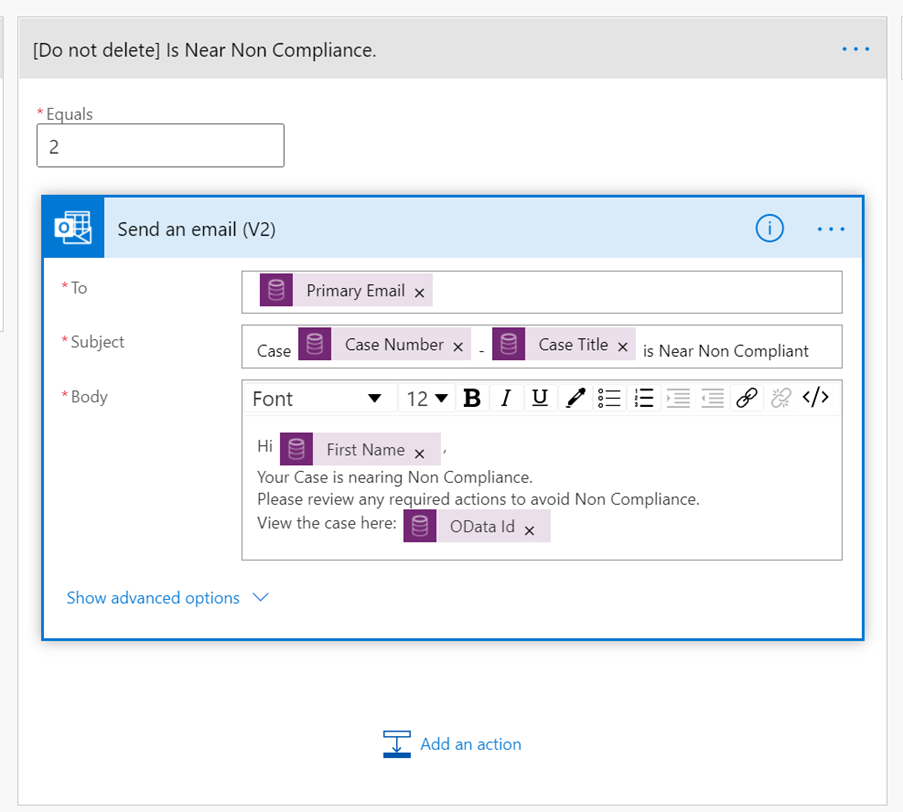
Step 9 (SLA’s):
Check the actions that happen based on the status of the SLA.

When you expand the switch option, you will see the conditions based on the status of the SLA.
We will look at the Is Near Non-Compliance action as our SLA doesn’t do anything if it has succeeded, but recommend you check all of them.
Step 10 (SLA’s):
Once you are happy all of your actions are correct, go back to the SLA record with Dynamics 365 and activate (and set as default if required).
 Step 9 (ARC’s):
Check that the actions match what you expect them to be.
Step 11 (Both):
Once you are happy that your migrated SLA’s & ARC’s are all set up correctly, simply go into the list view and deactivate the old ones.

It is probably worth keeping them for a few weeks while the new ones are running for the first time, just so you have them if something does go wrong, but once you are happy that the new ones are functioning correctly, you can then delete the old ones.
Then you can go back to forgetting they are there and letting them just get on with their work in the background until the next time you need to update them or create a new one.