


As a consultant, whenever we’re given access to a new system, one of the first tasks I’ll do is go to the Personalisation Settings and make a few obvious changes that help me with using the system. I usually cover this in training sessions that I deliver to clients, but it wouldn’t do any harm to write about them as well.
So, let’s get started. In the top right of the screen, click on the cog icon and then select Personalisation Settings.
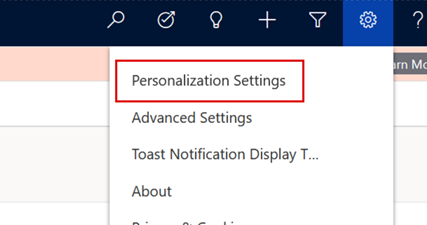
I know what you’re thinking, and it’s exactly what I’m thinking too: my URL has CRM11 in it, and I’ve specified the United Kingdom as my location. So why Microsoft is giving me the American spelling of Personalisation is anyone’s guess. Anyway, that’s a subject for another time.
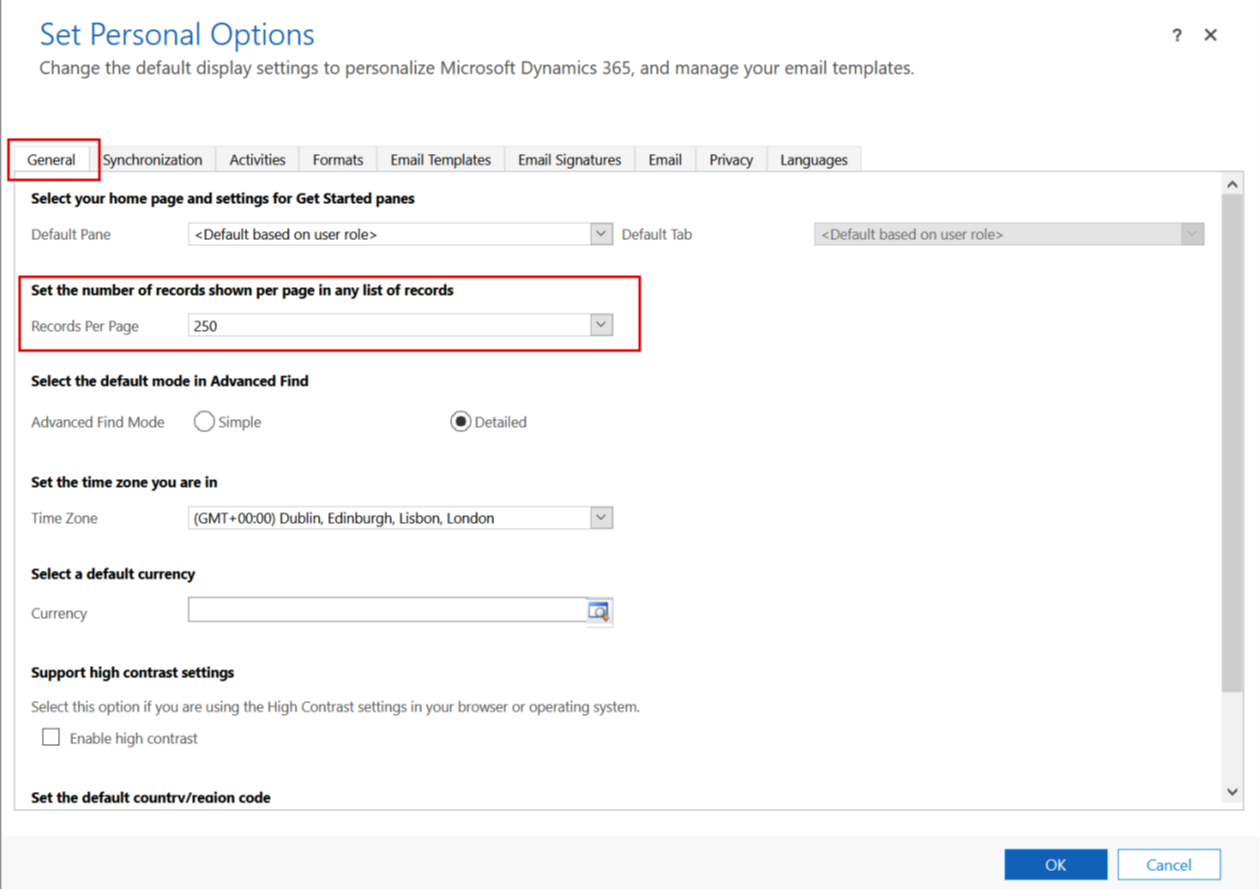
Once you’ve clicked on this option and the pop-up box has opened, there’s a wealth of choices available to you. I’m not going to go through them all, but I’ll highlight the five that I think will make the most difference to your experience.
By default, you’ll have the option selected at 50 records per page. My opinion is, this is a hangover from the days when internet connections were slow, and people didn’t want to burden their systems with large data loads. We live in better times now; you can download more records, so put a higher number in there so, in the General tab on the options, update your records per page:
You may find that your time zone isn’t set correctly. This doesn’t sound particularly important, but it can make a massive difference to how your system behaves. Let me explain…
Going into these settings, you may see your time zone has defaulted to ‘(GMT) Coordinated Universal Time’. Now suppose that another user has updated their time zone to ‘(GMT +00:00) Dublin, Edinburgh, Lisbon, London’ – which is what I’d recommend. This other user fills in a date-only field with 6th June 2021 – perfectly normal. Even though it’s not being displayed in the Dataverse database, all dates need a time element, so it’s stored as ‘06/06/2021 00:00’ so, effectively, midnight.
Now let’s say that you access the same record from your different time zone. The system will get the data from the database and convert this for your location so that it will become 11 pm on 5th June 2021 but, as it’s only showing the date part, you get to see 5th June 2021, so it looks like it’s a day out.
There is an argument for making sure that your data fields are created with an appropriate format. But, for now, this should avoid a lot of problems.
You’ll find the time zone settings in the General tab:

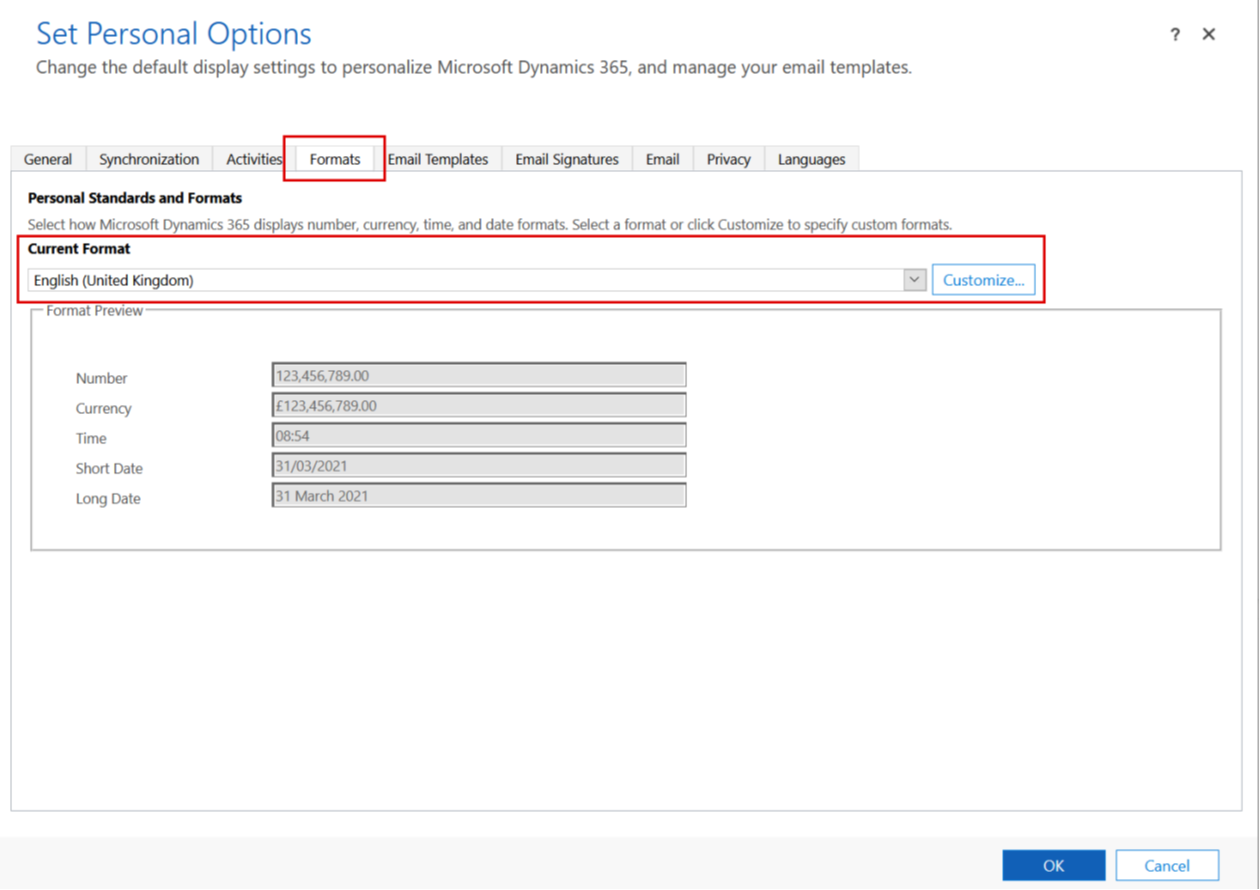
To be fair, this is usually set correctly, but it’s worth highlighting in case it’s not. In the Formats tab, select the regional format that suits you best. So, if you’re seeing American-style dates, this is where they’ll need to be updated:
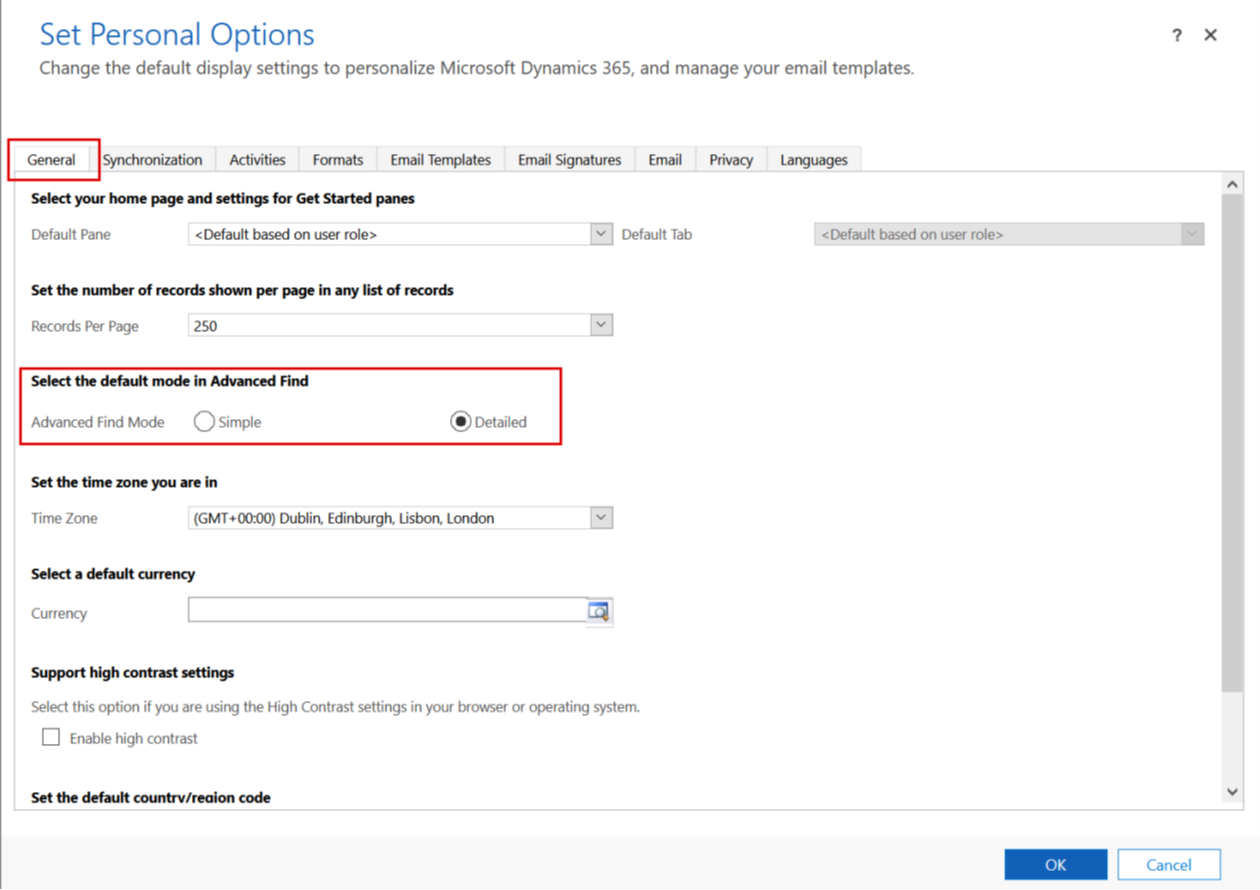
I was quite late to discover this one but, when you load up an Advanced Find, you may have to click on the Details button to be able to edit your query. You can have this set up by default if you alter your Advanced Find default settings in the General tab; they’re likely to be set to Simple, but you can change this to Detailed, and you’ll never have to click on the Details button again:
This is one that’s not as relevant as it used to be but, if you’re on an older system, it could still be annoying.
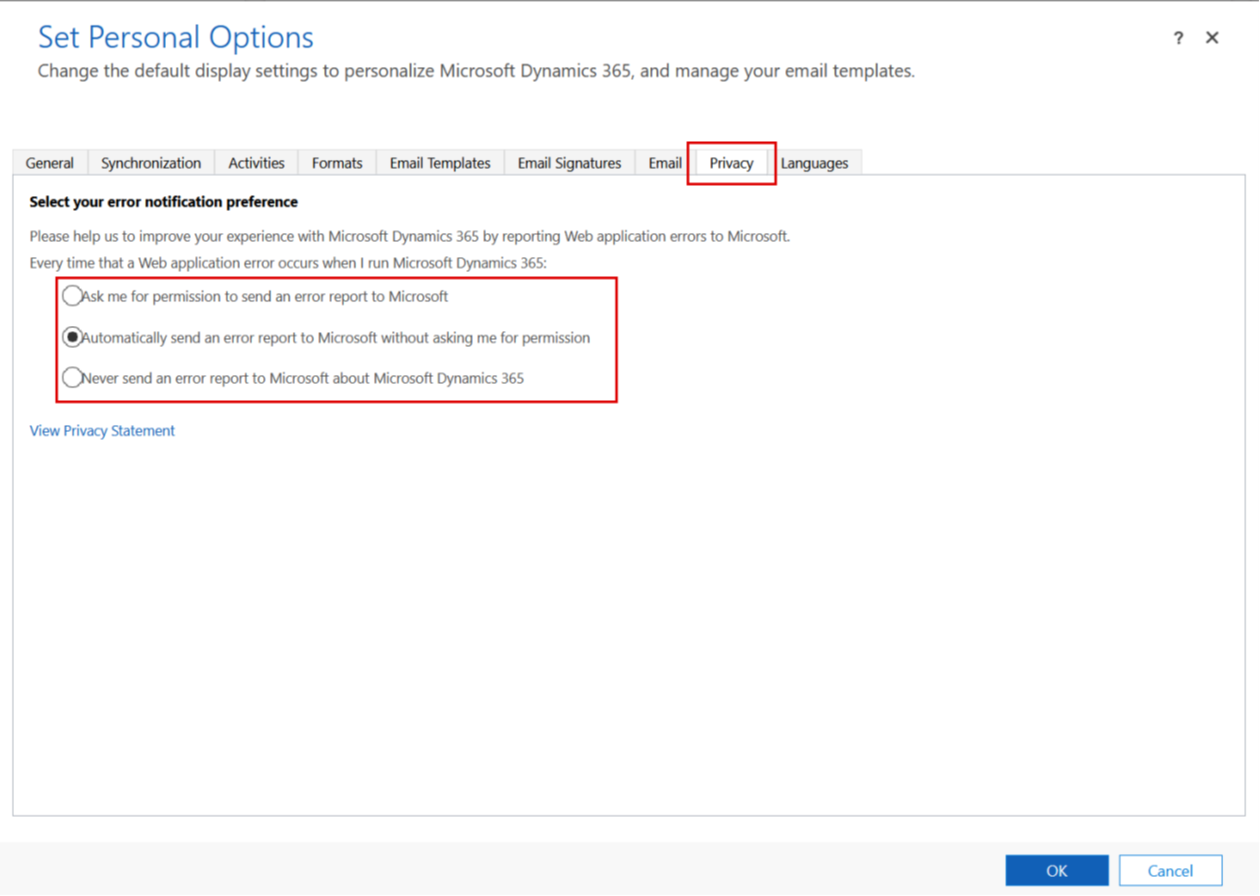
Until recently, when using Dynamics, you had an endless stream of pop-ups asking if you wanted to send an error report to Microsoft. These weren’t errors in your configuration or your set up, these were issues that had gone wrong deep inside Dynamics, which no-one had any control over, and you were asked if you wanted to send the information to Microsoft or not. You can default this if you wish.
So, if you go into the Privacy tab, the default option is to ask permission but, if you set the behaviour to one of the other options, the error message won’t pop up ever again – although it wasn’t bothering me too much lately:
Nifty little tips, eh? Wonder how many of you are going to check your Personalisation Settings now?
For further assistance, tips or advice on Microsoft Dynamics 365 Business Central, Microsoft Dynamics NAV or Microsoft Dynamics 365 CRM, please contact your Account Manager or register for our virtual (and free!) workshops here.