


In recent months, Microsoft has enabled a new and more intelligent search feature within Microsoft Dynamics 365, known as Relevance search. This is to replace the old Categorisation search we all know so well.
You might be asking "well what was wrong with the old Categorisation search, I liked it?!"
On the face of it, nothing really... but it does have limitations which will come apparent when you look into Relevance Search.
For me, the headline improvements for Relevance search are:
First, if you haven't already turned this feature on, then let's do that. You can do this in your Sandbox environment as Relevance Search is enabled at the Environment level.
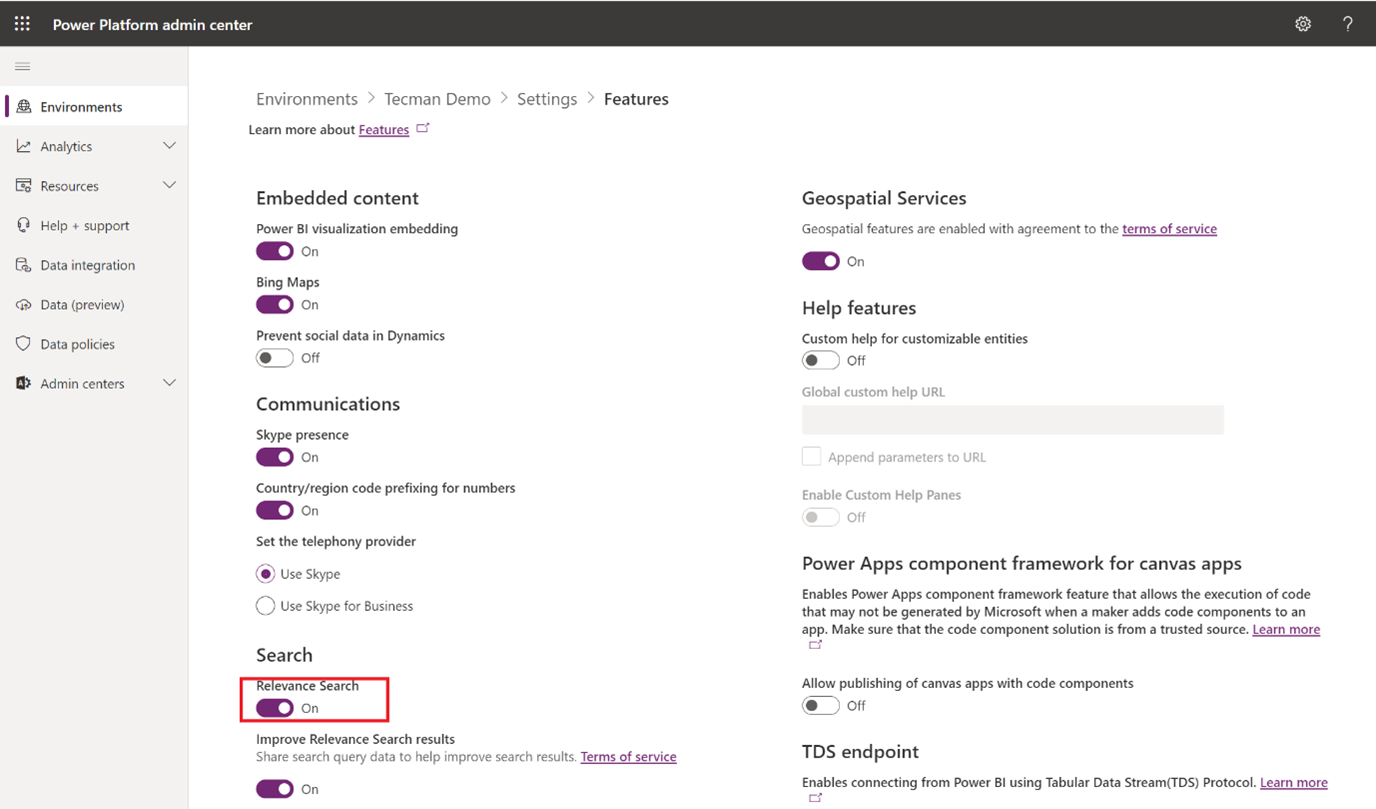
As a Dynamics user with a System Admin role, head to https://admin.powerplatform.microsoft.com/.
Sign in, click Environment on the left and then Settings and Features. Now, using the slider, switch it 'On'.
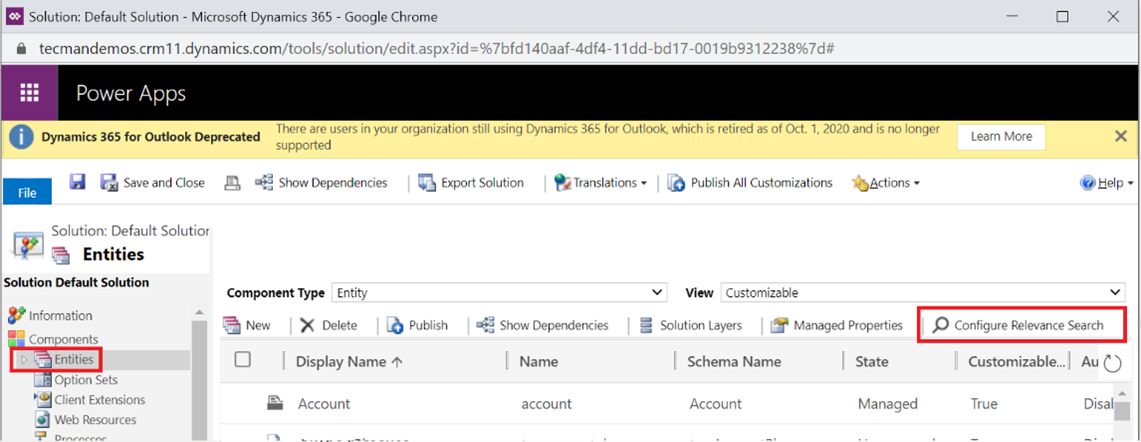
The next step is to configure the tables you want to include in your search (much like the Categorisation Search). This can be done by going into your Default Solution (or any solution), Entities and clicking 'Configure Relevance Search'.
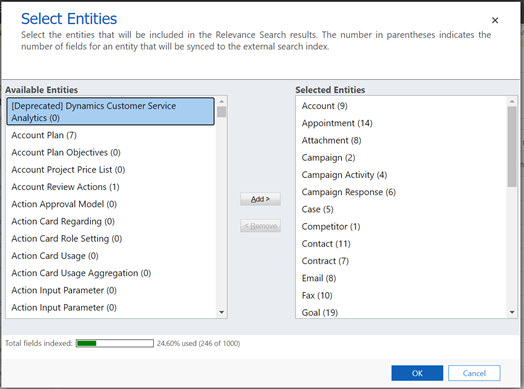
Now, using the add or remove buttons, you can configure which tables you want to search within your Dynamics 365 environment by moving them to the right-hand pane.
Up to this point, you're probably thinking this feels very similar to configuring Categorisation search, and that's because you are right!
With the steps above now completed - after saving and publishing - you should be looking at a search bar in your environment.

Jumping in with both feet... let's do a few searches...
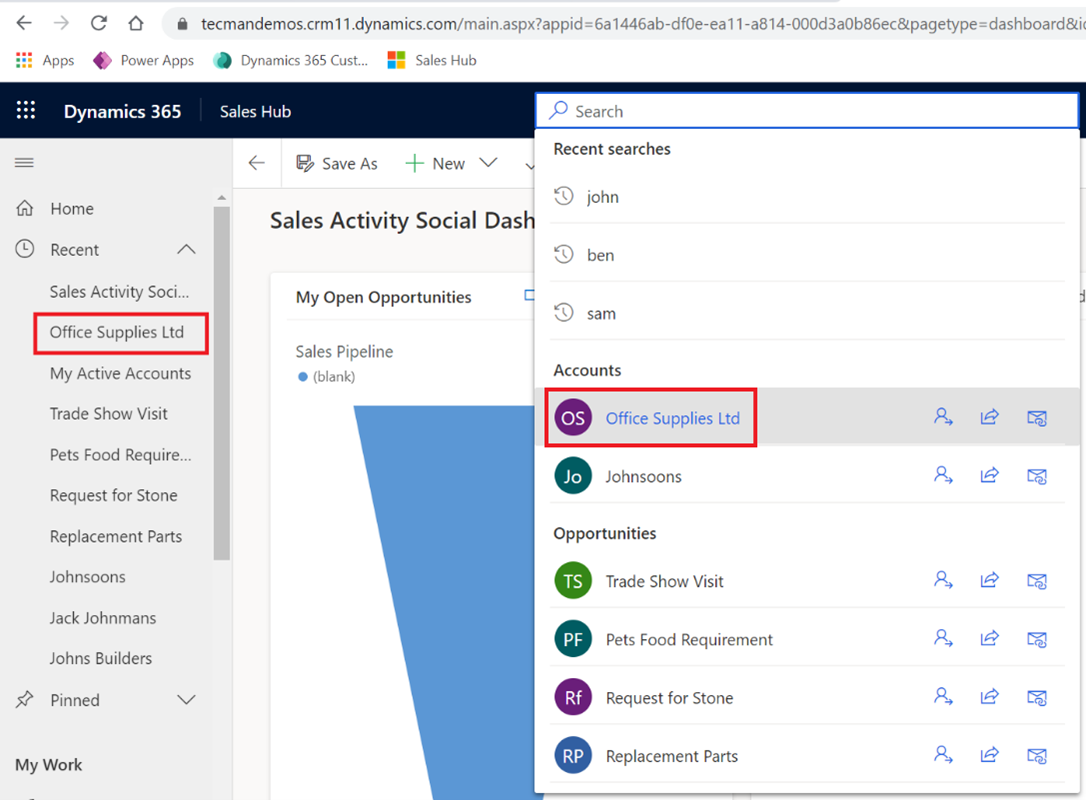
As soon as you type the first few letters of the search, it starts using autocomplete to bring back results. You don't even need to press the magnifying glass either. You might also notice that if you have accidentally misspelt the words in your search, Relevance Search does a great job of predicting what you were actually looking for and pulling that up for you.
Finally, it remembers your last three recent searches. Handy ay?
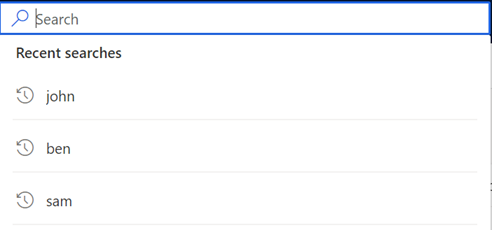
But what's even handier is that it mirrors your most recent records and separates them into the tables it belongs to, such as Accounts, Contacts, Opportunities etc. On top of that, from a quick search, you can use the 'Quick Actions' to assign, share or email a link directly to the record.
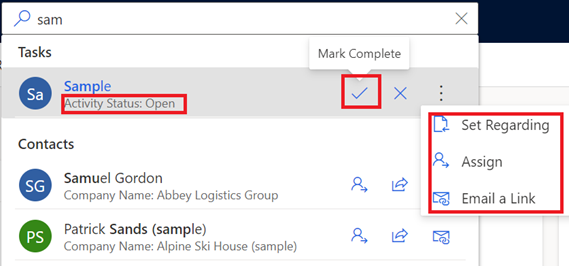
If, for example, you are working with an activity record, using the 'Quick Actions', you can mark it as complete or cancelled, or even set regarding, share or email a link right from within the search view. In anyone's world, less clicking can only be a good thing!
Okay, let's start with a new search. In the example below I have searched for John (Generic I know).
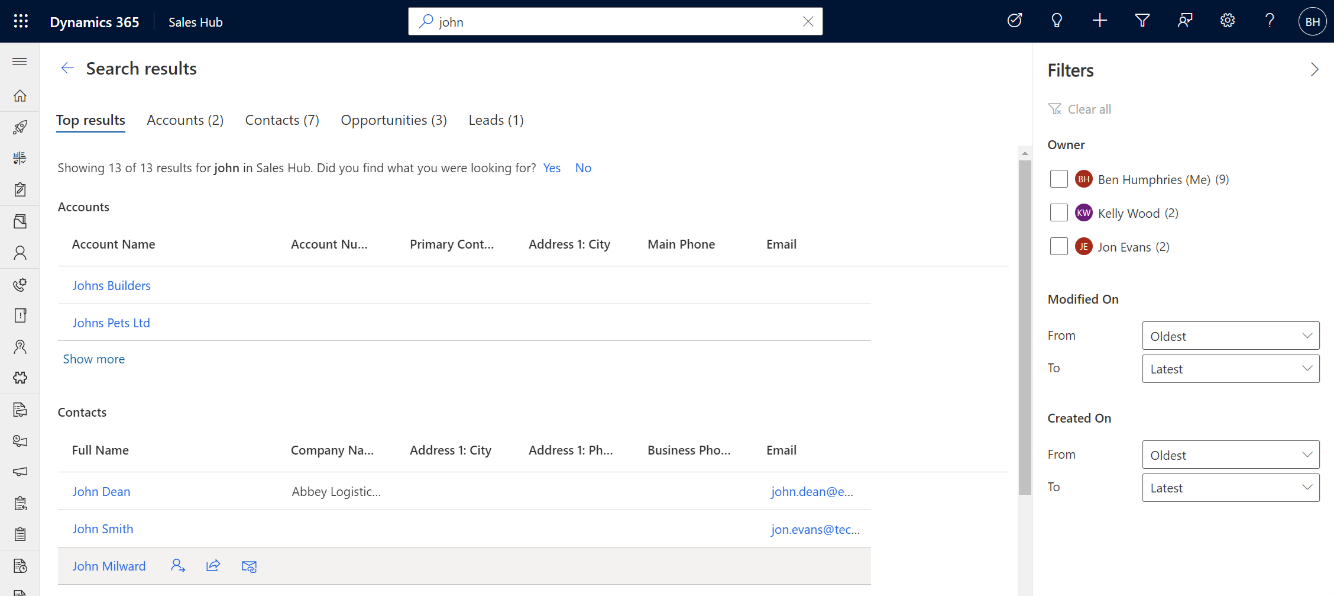
The result is then broken up into tables so you're able to see where 'John' is found in the database (across the tables I selected when I configured the Relevance Search), allowing me to filter further. On top of this, I can filter by the owner of the record and the system date fields, such as 'Modified' and 'Created On'.
For me getting this information previously, would have involved an Advanced Find and generally along with a lot of other questions. The new Relevance Search is much quicker and direct, meaning you're able to be even more productive in your day-to-day tasks.
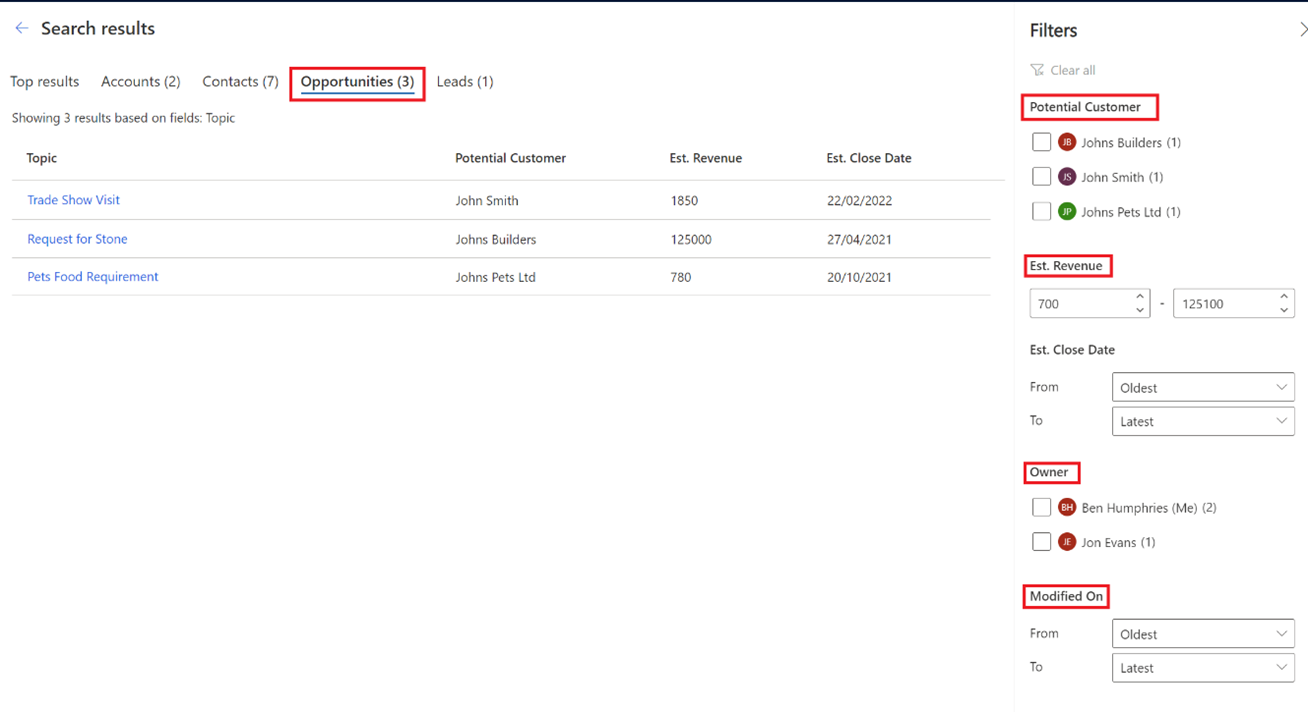
Another feature worth mentioning is depending on the table you select along the top, changes the filter criteria, so that's important to remember.
If I click on Opportunities, I am now presented with more filters such as 'Potential Customer', 'Est Revenue (Greater or Less than)', 'Record Owned By', and again the standard system date fields such as 'Modified' and 'Created On'. These options also change for 'Contact', 'Case', 'Lead' etc.
Depending on the first three columns of the view, this changes the filters available on the right-hand side. This is a change to the 'Quick View' from within the table itself.
Again, this could of potentially been another saved Advanced Find.
 And that's it! Easy, right?
Hopefully, you found this quick overview of Relevance Search helpful and if you wish to take a more in-depth look into the features please do not hesitate to get in touch with us by clicking here or emailing your Account Manager.